| Don't like the ads? Then create an account! Users with accounts have more options than anonymous users. |
The Legend of Zelda: The Wind Waker
| The Legend of Zelda: The Wind Waker | |
|---|---|

| |
| Developer(s) | Nintendo EAD |
| Publisher(s) | Nintendo |
| Release date | |
| Genre(s) | Action-adventure |
| Console(s) | Nintendo GameCube |
| Mode(s) | Single player |
| Input | Nintendo GameCube Controller |
The Legend of Zelda: The Wind Waker is the tenth installment of The Legend of Zelda series. It was first released on the Nintendo GameCube in 2002 in Japan and the following year in North America, Europe, and Australia. In 2013, the game was remastered and re-released for the Wii U with the title, The Legend of Zelda: The Wind Waker HD.
As suggested from the box art, much of the game involves Link traveling across the Great Sea to other islands, by riding a talking boat, the King of Red Lions. Similar to The Legend of Zelda: Ocarina of Time, which features the titular Ocarina of Time, The Legend of Zelda: The Wind Waker is also named after instrument, in this case, the Wind Waker.
The Legend of Zelda: The Wind Waker is noted for its distinctive cartoon-like cel shading visuals, a departure from that of The Legend of Zelda: Ocarina of Time and The Legend of Zelda: Majora's Mask. As a result, fans were divisive over the art style, and while The Legend of Zelda: The Wind Waker was one of the best-selling titles for the GameCube, it had significantly fewer sales than The Legend of Zelda: Ocarina of Time. In response to this, the realistic visuals were added into the next home console game, The Legend of Zelda: Twilight Princess.[1]
The Legend of Zelda: The Wind Waker received two direct sequels for the Nintendo DS, both of which have a similar art style, The Legend of Zelda: Phantom Hourglass and The Legend of Zelda: Spirit Tracks. In the Super Smash Bros. series, the Link from The Legend of Zelda: The Wind Waker and its sequels is named Toon Link, to discern from normal Link and Young Link.
Story
The game takes place one hundred years after the events of The Legend of Zelda: Ocarina of Time. It starts with a retelling of an ancient legend of an ancient, prosporous kingdom where a golden power lay hidden. One day a man of great evil uncovered the power and stole it, spreading darkness across the land. Out of nowhere, a young hero clad in green wielded the blade of evil's bane and sealed away the man of great evil. He was known as the Hero of Time, and he restored peace and light to the kingdom. One day, a fell wind blew across the kingdom, marking the return of the great evil previously thought to be sealed away permanently. The people believed the Hero of Time would return to rescue them, but he did not appear. The people had no other choice than to appeal to the great evil. Years later, the memory and the whereabouts of the kingdom became a mystery.
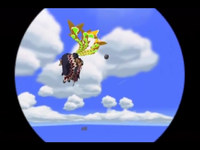
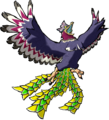
The game starts out on Outset Island, an island of the Great Sea; here boys are traditionally garbed green when they reach a certain age. This is because the elders hope on instilling the Hero of Time's courage in the youth. On the island, a young boy named Link is having a birthday. Link became of the predetermined age, and his Grandma provides green clothing, more specifically the Hero's Clothes, as a present to him. His younger sister, Aryll, allows Link to use her valued Telescope as a present. Link tries out the telescope from Aryll's Lookout, and he notices a giant bird kidnapping a young girl. A nearby pirate ship is shooting cannonballs at the bird, until one manages to hit the bird, who drops the young girl into a nearby forest. Link visits a local swordsman, Orca, for training on using a sword. After this, Link acquires the Hero's Sword and departs to the nearby Forest of Fairies to investigate.
At the Forest of Fairies, Link manages to rescue the young girl, named Tetra, but when he returns to Outset Island, the large bird returns and kidnaps Aryll. Link re-encounters Tetra and meets her pirate crew. He asks Tetra if can he join them on their ship to search for Aryll. Tetra originally refuses, and then the local mailman Quill shows up, explaining that the giant bird has been kidnapping young girls across the Great Sea and carrying them over to the Forsaken Fortress. He convinces Tetra to allow Link to join them on their ship, and she reluctantly agrees. Tetra notifies Link on how dangerous the fortress is and that he must also equip himself with a shield at minimum. Link returns into his house to say goodbye to Grandma, and from there he equips himself with the Hero's Shield. Link then returns to Tetra's Ship, where he, Tetra, and her pirate crew depart Outset Island and leave for the Forsaken Fortress.
At the Forsaken Fortress, Tetra's pirates put Link in a barrel and catapult him into the heavily-guarded location. At the peak of the fortress, Link finds Aryll and a few other young girls inside. However, Link is caught by the giant bird, who takes him to a shadowy, dark man ordering him to throw Link into the sea.
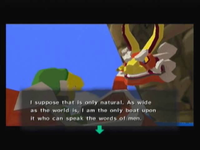
A talking red boat named the King of Red Lions discovers Link floating on the water, just at the coast of Windfall Island. He tells him that the Forsaken Fortress's master is Ganondorf, the evil character mentioned by legend. The seal had somehow failed and Ganondorf continued threatening the world with his dark magic. He could only be defeated by a great power. In order to travel around the Great Sea, the King of Red Lions instructs Link to find a sail.
After obtaining a sail, Link and the King of Red Lions go to the nearby Dragon Roost Island. Here, the King of Red Lions tells Link to meet the red dragon Valoo and ask for Din's Pearl, the first of the three pearls. The King of Red Lions then gives the Wind Waker to Link, a baton allowing him to control the winds. On the island, Link meets the Rito race, and the tribe's leader, Rito Chieftain, reveals that Prince Komali is in possession of Din's Pearl which he is unwilling to relinquish. Prince Komali has reached the age where tradition allows him to go up the mountain and receive a scale from Valoo. However, Komali is unable to because Valoo has been recently acting violent and unpredictable. Komali tells Link that he may keep Din's Pearl if he calms Valoo.
Link meets a young Rito girl named Medli, who helps him go up the mountain and enter into the dungeon, Dragon Roost Cavern. At the end of it, Link discovers that a massive parasite, Gohma, is responsible for angering Valoo. Link manages to defeat Gohma and he later obtains Din's Pearl from Komali.
Link and the King of Red Lions then go to Forest Haven, where Link must obtain Farore's Pearl from the Great Deku Tree. Inside the forest, Link encounters the Great Deku Tree and the Korok inhabitants. The Great Deku Tree is willing to give the pearl to Link after their annual traditional ceremony. They cannot begin the ceremony because Makar fell into the Forbidden Woods, so the Great Deku Tree asks Link to rescue Makar. At the end of the Forbidden Woods, Link encounters a massive flower-like creature named Kalle Demos. Makar has been captured by Kalle Demos, and Link manages to defeat it and rescue Makar. They return to the Great Deku Tree, who rewards Link with Farore's Pearl.
Link and the King of Red Lions set sail for Greatfish Isle to obtain Nayru's Pearl from the great water spirit, Jabun. When the two arrive, they notice the island is severely damaged and that Jabun is not in sight. Quill visits Link again and explains that Jabun changed his abode to Outset Island, behind an impenetrable stone slab, because Jabun is hiding from Ganondorf. Quill instructs Link to go back to Windfall Island, where he can find Tetra and her pirate crew. There, Link discovers that the Bomb Shop is closed, so he enters from behind, through the crawlspaces. From there he witnesses how the pirates have tied up Bomb-Master Cannon and stole his supply of bombs. Link overhears Gonzo remind Mako of the password that they use to enter inside of Tetra's Ship, and Link uses that password to gain entry.
Link steals some bombs from the pirates, and he and the King of Red Lions return to Link's hometown, Outset Island. They go behind the island and get caught in a whirlpool. Link continuously fires bombs from the King of Red Lions and onto the massive stone slab. After enough hits, the rock breaks entirely and the two enter inside. They are greeted by Jabun, and he gives Nayru's Pearl to Link.
With all three pearls, Link goes to the Triangle Islands and places them on each statue. This causes the Tower of the Gods to rise up from below the sea. Link and the King of Red Lions enter inside the tower where Link must complete a series of trials and fight the guardian Gohdan. After defeating Gohdan, Link appears on the roof and rings a bell, causing a ring of light to appear on the water surface in front of the tower. Link and the King of Red Lions go to the ring, and they go below the water surface.
The two end up at a monochromatic castle preserved underwater and frozen in time. Link goes inside the castle by himself and explores around the area. In the foyer, he moves a few statues which opens the entrance to a room below. In the room, Link finds the Master Sword and pulls it out from its pedestal. This restores the flow of time in the area, including the enemies. After defeating the enemies, Link and the King of Red Lions return to the surface and they go to the Forsaken Fortress.
During Link's second visit to the Forsaken Fortress, he finds Tetra and her pirate crew. Link travels back to the top and finds Aryll and the other captives. Tetra's crew frees the captives and return them to their homes. Link continues onward and engages in battle with the giant bird, named the Helmaroc King.
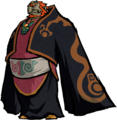
After defeating the bird, Link goes to Ganondorf in the Forsaken Fortress's main tower; he tries to attack Ganondorf with the Master Sword but to no effect. Ganondorf tells Link that by lifting the Master Sword, he allowed Ganondorf to regain his full power, as lifting the sword undid the seal entirely. Ganondorf attacks Link, thus injuring him, and Tetra comes in but she is also unsuccessful at stopping Ganondorf. Ganondorf notices her necklace and his Triforce of Power reacts: he discovers it as a piece of the Triforce of Wisdom and that Tetra is Princess Zelda. Quill and Prince Komali (having grown his wings) swoop in and rescue Link and Tetra. Valoo then appears and breathes fire on the entire Forsaken Fortress. Ganondorf manages to survive the fire.
The King of Red Lions takes Link and Tetra back to the castle below the sea. A mysterious voice communicates to Link from the Pirate's Charm, instructing that he and Tetra and enter the castle and find him. Link and Tetra go into the room below where Link found the Master Sword, and they meet Daphnes Nohansen Hyrule. He reveals that they are in the kingdom of Hyrule, and that he is the king of Hyrule. He then reveals himself to be the King of Red Lions. He reveals further details about the ancient legend of Hyrule.
According to the king, long ago, Ganondorf turned Hyrule into a world of shadows and sought to obtain the power of the gods. Daphnes alone could not stop Ganondorf, and his only choice was to leave the kingdom's fate to the gods. Upon hearing the pleas of the people, the gods sealed away Ganondorf along with Hyrule. They created a torrential downpour of rain to fall from the skies, burying Hyrule at the bottom of the ocean where it was forgotten. Before the gods sealed the kingdom of Hyrule, they commanded its inhabitants to build a new country and take refuge on the mountaintops.
Daphnes reveals to Tetra that she has a half of the Triforce of Wisdom, and with the other half, Daphnes connects the two halves together, transforming Tetra into Princess Zelda. The king instructs Link to return to the surface and reawaken the Master Sword's power but instructs Zelda to stay below in the kingdom, to protect her from Ganondorf.
Link goes outside the castle, and the King of Red Lions tells him that the Master Sword's power comes from two sages, of the Wind Temple and Earth Temple respectively. They return to the surface and the portal to Hyrule disappears. The King of Red Lions mentions another legend of the Hero of Time, the safekeeper of the Triforce of Courage. When the Hero of Time left Hyrule to go on another journey, he split the Triforce into eight shards and scattered them. Link and the King of Red Lions start a journey to reawkaken the sages and then later to reassemble the Triforce of Courage with eight Triforce Shards.
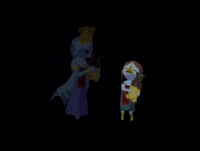
On his quest to the Earth and Wind Temples, Link discovers that both sages, Fado (sage of the Earth Temple) and Laruto (sage of the Wind Temple), were killed by Ganondorf, who also placed barriers around the temples. In both temples, when Link manages to bypass each of its barriers and enter inside, the sage appears to Link in the form of a spirit. They ask Link to find their descendant (who would become their heir), as the Master Sword's true power can only be awakened if the descendant plays a specific song at the end of each temple.
The new sage of the Earth Temple is Medli. Link goes back to Dragon Roost Island and plays the Earth God's Lyric for her, and Medli realizes she is the sage of the Earth Temple. Together, Link and Medli return to the Earth Temple where they cooperatively solve a series of puzzles and challenges. At the end, Link enters the Boss Door alone to fight Jalhalla. After defeating the boss, Medli prays to the gods, who restore one half of the Master Sword's power.
The new sage of the Wind Temple is Makar. Link returns to Forest Haven and plays the Wind God's Aria for Makar, who then realizes he is the new sage of the Wind Temple. Together, Link and Makar return to the Wind Temple where they cooperatively solve a series of puzzles and challenges. At the end, Link enters the Boss Door alone to fight Molgera. Makar then prays to the gods to restore the Master Sword's power. This restores the other half of the Master Sword's power, thus restoring its whole power.
Link and the King of Red Lions then go on a search for the eight Triforce Shards, which are located some place below the Great Sea. Link must reassemble Triforce of Courage in order to re-enter Hyrule below. To obtain each shard, Link must find the corresponding Triforce Chart and go to Tingle Island. Here Link must pay high amounts of Rupees to Tingle for him to decipher each chart individually. After Link recovers every Triforce Shard, he must return to Tower of the Gods and present the completed Triforce of Courage to the gods. After showing it to them, the Triforce's power infuses with Link, and the portal to Hyrule opens. The King of Red Lions proudly declares Link with a new title, the Hero of Winds.
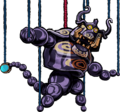
When Link returns to Zelda, she is kidnapped by Ganondorf and taken to Ganon's Tower. With the Master Sword, Link breaks the barrier beyond Hyrule Castle and continues to the tower. After a series of long trials, Link eventually encounters Ganondorf in a large chamber. Ganondorf is sitting on a bed where Zelda is sleeping, and from there he transforms into Puppet Ganon. Link manages to defeat the large marionette; back in his original form, Ganondorf takes Zelda and escapes to the rooftop. Link follows him to the rooftop, though when Link he reaches the location, Ganondorf charges at Link and beats him. His Master Sword flies off and lands right next to Zelda. Ganondorf proceeds by summoning the three pieces of the Triforce, from himself, Zelda, and Link respectively. When the Triforce reunites, Ganondorf shouts at the gods, wishing that the rays of the sun would shine upon Hyrule, which would become his own kingdom.
Before Ganondorf could make his wish, Daphnes Nohansen Hyrule appears and touches the Triforce. He reminds Ganondorf that whoever actually touches the Triforce would get their wish granted. The king wishes for a hope and a future for Link, Zelda, and the world above. He also wishes for Hyrule to be washed away, along with Ganondorf. After the king makes a wish, the Triforce separates again—his wish comes true as more water begins to flood Hyrule. Ganondorf laughs, believing that Link and Zelda do not have any future. Ganondorf draws out two swords, and Link and Zelda get in a final battle against Ganondorf, while the kingdom of Hyrule is flooding.
Sometime during the battle, Link uses his Mirror Shield to deflect a Light Arrow shot by Zelda, and directs it back at Ganondorf. When this happens, Link performs a Parry Attack and strikes the Master Sword into Ganondorf's forehead, which turns him into stone and ultimately defeats him. Link and Zelda say farewall to Daphnes Nohansen Hyrule, and bubbles carry them to the surface. The king ultimately decides to stay behind in Hyrule, and he and the location are buried underwater. Link and Tetra (who has changed back from Zelda) are reunited with Aryll and the pirates, and the game ends with them sailing away in search of a new land.
Gameplay
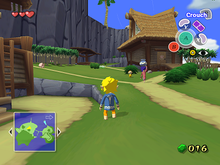
The Legend of Zelda: The Wind Waker has a control similar control scheme to the Nintendo 64 titles, Ocarina of Time and Majora's Mask. Link moves around three-dimensional environments, and he uses a sword and shield for his main weapon. He can use L-targeting to directly lock on an enemy or target. Link's health and magic supply is shown at the top-left corner: if he takes damage, Link loses a portion or a whole heart. Throughout his adventure, Link can obtain Heart Containers to extend his health supply.
During combat, Link can use a new ability, the parry attack, especially when fighting armored enemies. To perform the ability, Link must target an enemy and not actively attack it. When the enemy attempts to attack, the on-screen ![]() icon flashes, and the player must immediately press the button, causing Link to dodge the attack by rolling behind the foe and striking from behind or jumping over the enemy and slashing at their head.
icon flashes, and the player must immediately press the button, causing Link to dodge the attack by rolling behind the foe and striking from behind or jumping over the enemy and slashing at their head.
If Link defeats certain enemies, such as Bokoblins and Darknuts, it leaves its weapon behind (in this case, the each drops a Boko Stick and a Darknut Sword respectively). Link can pick up the weapon and use it in place of his sword, though another enemy can easily disarm the weapon from him. Link can disarm himself by either throwing the weapon or entering another room or location.
By using the C-Stick, the player has three-dimensional control over the camera system, including the ability to center it around Link entirely. This gives the player more control than the C-buttons from the Nintendo 64 titles.
As with every The Legend of Zelda title, there are dungeons, though the ones in The Legend of Zelda: The Wind Waker are featured in a wider variety of environments (many of which are subterranean). Most dungeons have an essential item or another piece of equipment, one example being the Skull Hammer. The game introduces new items such the Deku Leaf, which allows Link to safely glide across to a distant location (provided he has enough magic), or the Grappling Hook, which Link uses as a rope for crossing gaps.
The game has optional Side Quests, with the longest one being the Nintendo Gallery. It involves Link using the Deluxe Picto Box to take photographs of characters and enemies, which he can present to Carlov, who creates sculptures from the characters.
Seafaring
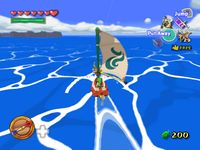
A core part of the gameplay involves seafaring across the Great Sea. Link travels the waters on a boat, the King of Red Lions, usually to go between islands. The boat uses a sail, which is driven by the wind blowing across the sea in one of eight directions. A compass at the bottom-left displays the current wind direction. A tailwind behind the sail enables the boat to move at top speed, while conversely, sailing in the opposite direction of the wind slows the boat entirely.
Link makes use of a baton, the Wind Waker, most often during seafaring. The Wind's Requiem is the first song that Link learns, and it allows him to change the direction of the wind. This is necessary for traveling to another island or using the Deku Leaf to glide across to a nearby height. There are five other songs that Link learns: one of them is the Ballad of Gales, which allows Link to summon a cyclone to transport him and the King of Red Lions to another island.
Throughout his adventure, Link obtains Treasure Charts, and these reveal the location of hidden Treasure Chests around the Great Sea. The treasure's location is represented by bright, shining ring on the water surface. From the King of Red Lions, Link can use the Grappling Hook as a crane to pull out the sunken Treasure Chest, which usually contains a 20 or 50-count Rupee.
Tingle Tuner
- Main article: Tingle Tuner
When Link frees Tingle from his cell on Windfall Island, Tingle gives him the Tingle Tuner. It is an optional feature where the player can connect a link cable to a Game Boy Advance unit, where the second player assumes control of Tingle. For a fee, Tingle can either find hidden treasures, provide hints, or sell items for Link.
Second Quest
- Main article: Second Quest
When the player first completes the game, a Second Quest is unlocked. The mode is largely similar to the original aside from a few changes. In it, Link wears his blue outfit throughout, Aryll wears her pirate outfit throughout, and all instances of Hylian in text are translated to English.
Characters
Main protagonists
Supporting characters
The following are supporting characters who are a spirit or another form of deity.
Other characters
The list does not include the three goddesses, whose story was retold during a flashback.
| Image | Name | Location |
|---|---|---|
| Abe | Outset Island | |
| Aldo | Forest Haven | |
| Ankle | Tingle Island | |
| Anton | Windfall Island | |
| Baito | Dragon Roost Island | |
| Basht and Bisht | Dragon Roost Island | |
| Beedle | Great Sea | |
| Candy | Windfall Island | |
| Cannon | Windfall Island | |
| Carlov | Forest Haven | |
| Dampa | Windfall Island | |
| David Jr. | Tingle Island | |
| Doc Bandam | Windfall Island | |
| Drona | Forest Haven | |
| Elma | Forest Haven | |
| Fishmen | Great Sea | |
| Garrickson | Windfall Island | |
| Gillian | Windfall Island | |
| Gossack | Windfall Island | |
| Gummy | Windfall Island | |
| Hollo | Forest Haven | |
| Hoskit | Dragon Roost Island | |
| Ilari | Dragon Roost Island | |
| Irch | Forest Haven | |
| Ivan | Windfall Island | |
| Jan | Windfall Island | |
| Jin | Windfall Island | |
| Joel | Outset Island | |
| Jun-Roberto | Windfall Island | |
| Kamo | Windfall Island | |
| Kane | Windfall Island | |
| Knuckle | Tingle Island | |
| Koboli | Dragon Roost Island | |
| Kogoli | Dragon Roost Island | |
| Kreeb | Windfall Island | |
| Lenzo | Windfall Island | |
| Linda | Windfall Island | |
| Linder | Forest Haven | |
| Link (pig) | Outset Island | |
| Loot | Great Sea | |
| Maggie | Windfall Island | |
| Maggie's father | Windfall Island | |
| Manny | Forest Haven | |
| Mesa | Outset Island | |
| Mila | Windfall Island | |
| Mila's father | Windfall Island | |
| Minenco | Windfall Island | |
| Missy | Windfall Island | |
| Mrs. Marie | Windfall Island | |
| Namali | Dragon Roost Island | |
| Oakin | Forest Haven | |
| Obli | Dragon Roost Island | |
| Old Man Ho Ho | Great Sea | |
| Olivio | Forest Haven | |
| Pashli | Dragon Roost Island | |
| Pompie and Vera | Windfall Island | |
| Potova & Joanna | Windfall Island | |
| Rito Chieftain | Dragon Roost Island | |
| Rose | Outset Island | |
| Rown | Forest Haven | |
| Salvage Corp. | Great Sea | |
| Salvatore | Windfall Island | |
| Sam | Windfall Island | |
| Servants of the tower | Tower of the Gods | |
| Skett and Akoot | Dragon Roost Island | |
| Sturgeon | Outset Island | |
| Sue-Belle | Outset Island | |
| Tott | Windfall Island | |
| Traveling merchant | Great Sea | |
| Willi | Dragon Roost Island | |
| Zill | Outset Island | |
| Zunari | Windfall Island |
Locations
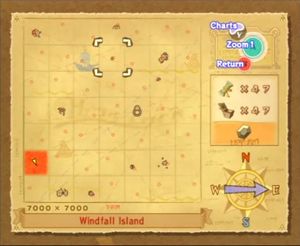
The Great Sea is the main, overseeing location for every island. The Great Sea has and the island coordinates are shown from map called the Sea Chart, which is arranged on a 7x7 coordinate grid, with 49 square sectors; each sector hosts one of the 49 islands. Some islands are larger than others, and some are entirely optional for Link to visit.
Islands
Late into his adventure, just outside the Tower of the Gods, Link and the King of Red Lions can travel down to visit a sunken Hyrule Castle. The final area that Link visits is Ganon's Tower, which also appears underwater, near Hyrule Castle.
There are lookout platforms, secret caverns, and submarines appearing in various parts of the Great Sea. Link can access the two temples, Earth Temple and the Wind Temple, from Headstone Isle and Gale Isle respectively.
Shops
Island areas
| Area | Island |
|---|---|
| Auction House | Windfall Island |
| Cafe Bar | Windfall Island |
| Dragon Roost Cavern | Dragon Roost Island |
| Dragon Roost Pond | Dragon Roost Island |
| Fairy Woods | Outset Island |
| Forbidden Woods | Forest Haven |
| Link's House | Outset Island |
| Mail Center | Dragon Roost Island |
| Nintendo Gallery | Forest Haven |
| Savage Labyrinth | Outset Island |
| School of Joy | Windfall Island |
| Wind Shrine | Dragon Roost Island |
Enemies
- Armos
- Armos Knight
- Beamos (red and green)
- Big Octo
- Boko Baba
- Bokoblin (slate, green, and pink)
- Bubble (red and blue)
- ChuChu (red, green, yellow, blue, and dark)
- Darknut
- Dexivine
- Fire Keese
- Floormaster
- Gyorg
- Kargaroc
- Keese
- Magtail
- Mighty Darknut
- Miniblin
- Moblin (brown and teal)
- Molgera's larva (boss helper)
- Morth
- Mothula (wingless and winged)
- Octorok (purple and pink)
- Peahat
- Phantom Ganon (miniboss)
- Poe
- Rat (brown and gray (Bombchu))
- ReDead
- Seahat
- Stalfos
- Warship
- Wizzrobe (red, yellow, and orange (miniboss))
Traps and obstacles
Bosses
Items and weapons
It has been requested that this section be rewritten and expanded to fill in missing descriptions.
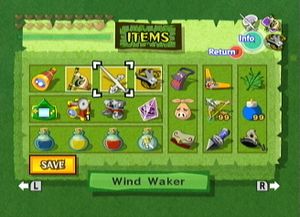
As with previous games, there are both one-of-a-kind items and replenishable items. Most of these items can be assigned to the ![]() ,
, ![]() , or
, or ![]() button.
button.
There are a few items that Link can only use in a dungeon.
There are some items that Link can only use in a bottle.
| Sprite | Name | Description |
|---|---|---|
| Blue Potion | ||
| Bottled Water | ||
| Elixir Soup | ||
| Fairy | ||
| Forest Firefly | ||
| Forest Water | ||
| Green Potion | ||
| Red Potion |
There are three unique bags which Link can obtain, each storing certain items inside. From the Pause menu, the player can select a bag and press ![]() to open it, allowing them to view the items contained inside.
to open it, allowing them to view the items contained inside.
| Sprite | Name | Description |
|---|---|---|
| Bait Bag | ||
| Delivery Bag | ||
| Spoils Bag |
There are five unique charts which help Link in finding the location of something hidden.
| Sprite | Name | Description |
|---|---|---|
| Ghost Ship Chart | ||
| Special Chart | ||
| Tingle's Chart | ||
| Treasure Chart | ||
| Triforce Chart |
Equipment
These are items directly equipped to Link without assigning to a certain button.
| Sprite | Name | Description |
|---|---|---|
| Bomb Bag | ||
| Hero's Charm | ||
| Hero's Clothes | ||
| Hero's Shield | ||
| Hero's Sword | ||
| Master Sword | ||
| Mirror Shield | ||
| Pirate's Charm | ||
| Power Bracelets | ||
| Quiver | ||
| Wallet |
By defeating certain enemies, Link can pick up their weapon and use it around the current location. This includes:
Spoils
| Sprite | Name | Description |
|---|---|---|
| Boko Baba Seed | ||
| Chu Jelly (blue, green, red) | ||
| Golden Feather | ||
| Joy Pendant | ||
| Knight's Crest | ||
| Skull Necklace |
Decorations
Decorations are items that Link can decorate around the different islands.
| Sprite | Name | Description |
|---|---|---|
| Big Catch Flag | ||
| Big Sale Flag | ||
| Exotic Flower | ||
| Fountain Idol | ||
| Hero's Flag | ||
| Pinwheel | ||
| Postman Statue | ||
| Sea Flower | ||
| Shop Guru Statue | ||
| Sickle Moon Flag | ||
| Skull Tower Idol | ||
| Town Flower |
Letters
| Sprite | Name | Description |
|---|---|---|
| Father's Letter | ||
| Maggie's Letter | ||
| Moblin's Letter | ||
| Note to Mom |
Gallery
- For this subject's image gallery, see Gallery:The Legend of Zelda: The Wind Waker.
Names in other languages
| Language | Name | Meaning |
|---|---|---|
| Japanese | ゼルダの伝説 風のタクト Zeruda no Densetsu Kaze no Takuto |
THE LEGEND OF ZELDA -Takt of Wind- |
External links
- Official North American website (Wayback Machine)
- Official Japanese website

