| Don't like the ads? Then create an account! Users with accounts have more options than anonymous users. |
Difference between revisions of "Gallery:The Legend of Zelda: Link's Awakening"
From Triforce Wiki, a The Legend of Zelda wiki
Jump to navigationJump to search
m |
(added jp logo) |
||
| (One intermediate revision by the same user not shown) | |||
| Line 1: | Line 1: | ||
{{italic title}} | |||
{{Stub}} | {{Stub}} | ||
A gallery of images pertaining to the original ''[[The Legend of Zelda: Link's Awakening]]''. For images | A gallery of images pertaining to the original ''[[The Legend of Zelda: Link's Awakening]]''. For images pertaining to the [[Game Boy Color]] port, see [[Gallery:The Legend of Zelda: Link's Awakening DX]]. For images pertaining to the [[Nintendo Switch]] [[reissue|remake]], see [[Gallery:The Legend of Zelda: Link's Awakening (Nintendo Switch)]]. | ||
== Logos == | |||
<gallery> | |||
TLOZ LA logo.png|Japanese logo | |||
</gallery> | |||
==Box art== | ==Box art== | ||
Latest revision as of 14:27, November 6, 2021
 This article is a stub. You can help Triforce Wiki by expanding it.
A gallery of images pertaining to the original The Legend of Zelda: Link's Awakening. For images pertaining to the Game Boy Color port, see Gallery:The Legend of Zelda: Link's Awakening DX. For images pertaining to the Nintendo Switch remake, see Gallery:The Legend of Zelda: Link's Awakening (Nintendo Switch).
Logos[edit]

Japanese logo
Box art[edit]
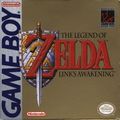
North American box art

Artwork[edit]

Link flipping a Spiked Beetle with his shield (Futabasha)

Link and BowWow at Goponga Swamp (Futabasha)
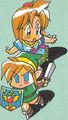
Marin accompanying Link (Futabasha)


