| Don't like the ads? Then create an account! Users with accounts have more options than anonymous users. |
Difference between revisions of "Gallery:The Legend of Zelda"
From Triforce Wiki, a The Legend of Zelda wiki
Jump to navigationJump to search
m (→Underworld enemies: Missed another) |
(→Artwork: The rest) |
||
| Line 23: | Line 23: | ||
</gallery> | </gallery> | ||
===Overworld enemies=== | ===Overworld enemies and obstacles=== | ||
<gallery> | <gallery> | ||
TLoZ Armos art.jpg|[[Armos]] | TLoZ Armos art.jpg|[[Armos]] | ||
Ghini TLoZ artwork.jpg|[[Ghini]] | Ghini TLoZ artwork.jpg|[[Ghini]] | ||
TLoZ Leever art.jpg|[[Leever]] | TLoZ Leever art.jpg|[[Leever]] | ||
TLoZ Lynel art.jpg|[[Lynel]] | |||
TLoZ Molblin art.jpg|[[Moblin|Molblin]] | TLoZ Molblin art.jpg|[[Moblin|Molblin]] | ||
TLoZ Octorok art.jpg|[[Octorok]] | TLoZ Octorok art.jpg|[[Octorok]] | ||
TLoZ Peahat art.jpg|[[Peahat]] | |||
TLoZ Rock art.jpg|[[Boulder|Rock]] | |||
Tektite Z1 artwork.jpg|[[Tektite]] | Tektite Z1 artwork.jpg|[[Tektite]] | ||
Zola TLoZ artwork.jpg|[[Zora|Zola]] | Zola TLoZ artwork.jpg|[[Zora|Zola]] | ||
</gallery> | </gallery> | ||
===Underworld enemies=== | ===Underworld enemies and obstacles=== | ||
<gallery> | <gallery> | ||
TLoZ Aquamentus art.jpg|[[Aquamentus]] | |||
Bubble TLoZ artwork.jpg|[[Bubble]] | Bubble TLoZ artwork.jpg|[[Bubble]] | ||
TLoZ Darknut art.jpg|[[Darknut]] | TLoZ Darknut art.jpg|[[Darknut]] | ||
TLoZ Digdogger art.jpg|[[Digdogger]] | |||
TLoZ Dodongo art.jpg|[[Dodongo]] | TLoZ Dodongo art.jpg|[[Dodongo]] | ||
TLoZ Gel art.jpg|[[Gel]] | |||
TLoZ Gibdo art.jpg|[[Gibdo]] | TLoZ Gibdo art.jpg|[[Gibdo]] | ||
TLoZ Gleeok art.jpg|[[Gleeok]] | |||
TLoZ Gleeok Head art.jpg|Gleeok Head | |||
TLoZ Gohma art.jpg|[[Gohma]] | TLoZ Gohma art.jpg|[[Gohma]] | ||
TLoZ Goriya art.jpg|[[Goriya]] | TLoZ Goriya art.jpg|[[Goriya]] | ||
| Line 45: | Line 53: | ||
TLoZ Lanmola art.jpg|[[Lanmola]] | TLoZ Lanmola art.jpg|[[Lanmola]] | ||
Like Like TLOZ artwork.jpg|[[Like Like]] | Like Like TLOZ artwork.jpg|[[Like Like]] | ||
TLoZ Manhandla art.jpg|[[Manhandla]] | |||
TLoZ Moldorm art.jpg|[[Moldorm (The Legend of Zelda)|Moldorm]] | TLoZ Moldorm art.jpg|[[Moldorm (The Legend of Zelda)|Moldorm]] | ||
TLoZ Patra art.jpg|[[Patra]] | |||
Pols Voice TLoZ.jpg|[[Pols Voice]] | Pols Voice TLoZ.jpg|[[Pols Voice]] | ||
TLoZ Rope art.jpg|[[Rope]] | |||
TLoZ Stalfos art.jpg|[[Stalfos]] | TLoZ Stalfos art.jpg|[[Stalfos]] | ||
TLoZ Stone Statue art.jpg|[[Stone Statue]] | |||
TLoZ Trap art.jpg|[[Trap]] | |||
TLoZ Vire art.jpg|[[Vire]] | |||
TLoZ Wall Master art.jpg|[[Wallmaster (The Legend of Zelda)|Wall Master]] | TLoZ Wall Master art.jpg|[[Wallmaster (The Legend of Zelda)|Wall Master]] | ||
Wizzrobe Zelda 1 artwork.jpg|[[Wizzrobe]] | Wizzrobe Zelda 1 artwork.jpg|[[Wizzrobe]] | ||
Revision as of 07:34, December 27, 2019
 This article is a stub. You can help Triforce Wiki by expanding it.
This is a gallery of images relating to The Legend of Zelda.
Boxart
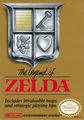
North American cover

North American Classic Series cover
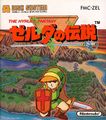
Famicom Disk System cover

1994 Japanese reissue cover

France, Belgium and Netherlands cover

Germany cover

Classic NES Series cover

European NES Classics cover

Famicom Mini cover


Artwork
Characters
- Link TLoZ artwork 2.png
Link

Ganon teaser


Overworld enemies and obstacles
- TLoZ Leever art.jpg
- TLoZ Octorok art.jpg
- TLoZ Peahat art.jpg
- Zola TLoZ artwork.jpg


Underworld enemies and obstacles
- TLoZ Darknut art.jpg
- TLoZ Gibdo art.jpg

Gleeok Head
- TLoZ Goriya art.jpg
- TLoZ Darknut art.jpg
- TLoZ Wall Master art.jpg


Screenshots

The introduction story in the original version

The updated introduction in subsequent ports

Link exploring the Manji dungeon


Title screens

Famicom Disk System original

First revision

Second revision, with an added trademark

Famicom cartridge re-release

Collector's Edition (GameCube)

Collector's Edition (Japan)

Classic NES Series (Game Boy Advance)


Cartridges

Standard gold cartridge

Nintendo World Class Service cartridge

