| Don't like the ads? Then create an account! Users with accounts have more options than anonymous users. |
Difference between revisions of "Gallery:The Legend of Zelda: A Link to the Past"
From Triforce Wiki, a The Legend of Zelda wiki
Jump to navigationJump to search
(Started on this; I'd like to keep the sources separate.) |
m (→Barcode Battler II: Derp) |
||
| Line 57: | Line 57: | ||
====Enemies==== | ====Enemies==== | ||
<gallery> | <gallery> | ||
ALttP BBII Moblin.jpg|[[Moblin]] | |||
</gallery> | </gallery> | ||
====Bosses==== | ====Bosses==== | ||
<gallery> | <gallery> | ||
ALttP BBII | ALttP BBII Arrghus.jpg|[[Arrghus]] | ||
ALttP BBII Big Moldorm.png|[[Moldorm (boss)|Moldorm]] | ALttP BBII Big Moldorm.png|[[Moldorm (boss)|Moldorm]] | ||
ALttP BBII Ganon.jpg|Ganon | ALttP BBII Ganon.jpg|Ganon | ||
</gallery> | </gallery> | ||
[[Category:Galleries]] | [[Category:Galleries]] | ||
[[Category:The Legend of Zelda: A Link to the Past]] | [[Category:The Legend of Zelda: A Link to the Past]] | ||
Revision as of 06:11, December 25, 2019
 This article is a stub. You can help Triforce Wiki by expanding it.
This is a gallery pertaining to The Legend of Zelda: A Link to the Past.
Artwork
Nintendo of Japan
Link
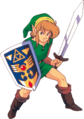
Character art

Characters


Objects
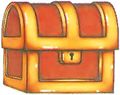
Treasure Chest (small)
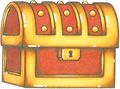
Treasure Chest (big)


Enemies


Nintendo Player's Guide
Items

Objects
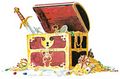
Treasure Chest

Enemies

Locations

Barcode Battler II
Enemies

Bosses
- ALttP BBII Big Moldorm.png

Ganon

