| Don't like the ads? Then create an account! Users with accounts have more options than anonymous users. |
Difference between revisions of "Gallery:The Legend of Zelda: Four Swords Adventures"
From Triforce Wiki, a The Legend of Zelda wiki
Jump to navigationJump to search
(→Enemies and bosses: Splitting bosses) |
|||
| Line 40: | Line 40: | ||
</gallery> | </gallery> | ||
===Enemies | ===Enemies=== | ||
<gallery> | <gallery> | ||
FSA Airokku.png|[[Airokku]] | FSA Airokku.png|[[Airokku]] | ||
| Line 54: | Line 54: | ||
FSA Dark Stalfos.png|[[Big Dark Stalfos]] | FSA Dark Stalfos.png|[[Big Dark Stalfos]] | ||
FSA Big Dodongo.png|[[Big Dodongo]] | FSA Big Dodongo.png|[[Big Dodongo]] | ||
FSA Bomb Soldier blue.png|[[Bomb Soldier]] | FSA Bomb Soldier blue.png|[[Bomb Soldier]] | ||
FSA Bomb Soldier green.png|Bomb Soldier | FSA Bomb Soldier green.png|Bomb Soldier | ||
| Line 76: | Line 75: | ||
FSA Floormaster.png|[[Floormaster]] | FSA Floormaster.png|[[Floormaster]] | ||
FSA Force Like.png|[[Force Like]] | FSA Force Like.png|[[Force Like]] | ||
FSA Gargantuan Ball.png|[[Gargantuan Ball]] | FSA Gargantuan Ball.png|[[Gargantuan Ball]] | ||
FSA Geldman.png|[[Geldman]] | FSA Geldman.png|[[Geldman]] | ||
| Line 85: | Line 83: | ||
FSA Gohma.png|[[Gohma]] | FSA Gohma.png|[[Gohma]] | ||
FSA Hardhat Beetle.png|[[Hardhat Beetle]] | FSA Hardhat Beetle.png|[[Hardhat Beetle]] | ||
FSA Hinox.png|[[Hinox]] | FSA Hinox.png|[[Hinox]] | ||
FSA Keese blue.png|[[Keese]] | FSA Keese blue.png|[[Keese]] | ||
| Line 98: | Line 93: | ||
FSA Octorok purple.png|Octorok | FSA Octorok purple.png|Octorok | ||
FSA Pengator.png|[[Pengator]] | FSA Pengator.png|[[Pengator]] | ||
FSA Rope green.png|[[Rope]] | FSA Rope green.png|[[Rope]] | ||
FSA Rope red.png|Rope | FSA Rope red.png|Rope | ||
| Line 114: | Line 107: | ||
FSA Stalfos.png|[[Stalfos]] | FSA Stalfos.png|[[Stalfos]] | ||
FSA Stalfos skull.png|Stalfos | FSA Stalfos skull.png|Stalfos | ||
FSA Stone Elevator.png|[[Stone Elevator]] | FSA Stone Elevator.png|[[Stone Elevator]] | ||
FSA Dog statue.png|[[Stone Statue]] | FSA Dog statue.png|[[Stone Statue]] | ||
| Line 131: | Line 123: | ||
FSA Thwomp.png|[[Thwomp (big)|Thwomp]] | FSA Thwomp.png|[[Thwomp (big)|Thwomp]] | ||
FSA Trap.png|[[Trap]] | FSA Trap.png|[[Trap]] | ||
FSA Vulture.png|[[Vulture]] | FSA Vulture.png|[[Vulture]] | ||
FSA Wallmaster.png|[[Wallmaster (The Legend of Zelda: A Link to the Past)|Wallmaster]] | FSA Wallmaster.png|[[Wallmaster (The Legend of Zelda: A Link to the Past)|Wallmaster]] | ||
| Line 139: | Line 130: | ||
FSA Zol green.png|Zol | FSA Zol green.png|Zol | ||
FSA Zora.png|[[Zora]] | FSA Zora.png|[[Zora]] | ||
</gallery> | |||
==Bosses== | |||
<gallery> | |||
FSA Phantom Ganon.png|[[Phantom Ganon]] | |||
FSA Stone Arrghus.png|[[Stone Arrghus]] | |||
FSA Helmaroc masked.png|[[Helmaroc King]] | |||
FSA Helmaroc unmasked.png|Helmaroc King | |||
FSA Helmaroc GBA.png|Helmaroc King | |||
FSA Poe GBA.png|[[Poe]] | |||
FSA Big Moldorm.png|[[Moldorm (boss)|Big Moldorm]] | |||
FSA Vaati.png|[[Vaati]] | |||
FSA Ganon.png|[[Ganon]] | |||
</gallery> | </gallery> | ||
[[Category:Galleries]] | [[Category:Galleries]] | ||
[[Category:The Legend of Zelda: Four Swords Adventures]] | [[Category:The Legend of Zelda: Four Swords Adventures]] | ||
Revision as of 07:17, December 17, 2020
 This article is a stub. You can help Triforce Wiki by expanding it.
A gallery of images pertaining to The Legend of Zelda: Four Swords Adventures.
Box art

North American box art

Logos
English logo
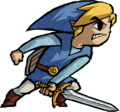
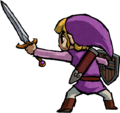
Artwork
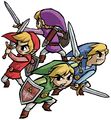
A group of Links

Link
Link
Link
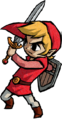
Link

A group of Links

Link

Link

Link
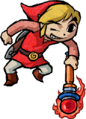
Link

Link
Link

Link

Navi Trackers


Sprites
Items
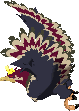
Enemies

Ball and Chain Soldier

Ball and Chain Soldier

Ball and Chain Soldier

Bomb Soldier

Boulder

Bow Soldier

Chief Soldier

Chief Soldier

Deadrock

Gibdo

Keese

Leever

Octorok

Octorok

Rope

Soldier

Soldier

Soldier

Stalfos

Sword Soldier

Sword Soldier

Sword Soldier

Tektite

Terrorpin

Terrorpin

Terrorpin

Terrorpin

Zol


Bosses
Helmaroc King

Helmaroc King


