| Don't like the ads? Then create an account! Users with accounts have more options than anonymous users. |
Difference between revisions of "Gallery:The Legend of Zelda: Ocarina of Time"
AlexBot2004 (talk | contribs) (→Items) |
AlexBot2004 (talk | contribs) (→Items) |
||
| Line 91: | Line 91: | ||
<gallery> | <gallery> | ||
Biggoron's Sword OoT art.jpg|[[Biggoron's Sword]] | Biggoron's Sword OoT art.jpg|[[Biggoron's Sword]] | ||
Blue Potion OoT artwork.jpg|[[Blue Potion]] | |||
Bomb OoT artwork.jpg|[[Bomb]] | |||
Bomb Bag OoT artwork.jpg|[[Bomb Bag]] | Bomb Bag OoT artwork.jpg|[[Bomb Bag]] | ||
Bombchu OoT artwork.jpg|[[Bombchu]] | |||
Boomerang OoT artwork.jpg|[[Boomerang]] | Boomerang OoT artwork.jpg|[[Boomerang]] | ||
Boss Key OoT artwork.png|[[Boss Key]] | Boss Key OoT artwork.png|[[Boss Key]] | ||
| Line 98: | Line 101: | ||
Cojiro OoT artwork.jpg|[[Cojiro]] | Cojiro OoT artwork.jpg|[[Cojiro]] | ||
Compass OoT artwork.png|[[Compass]] | Compass OoT artwork.png|[[Compass]] | ||
Deku Nut OoT artwork.jpg|[[Deku Nut]] | |||
Deku Seed OoT artwork.jpg|[[Deku Seed]]s | Deku Seed OoT artwork.jpg|[[Deku Seed]]s | ||
Deku Shield OoT artwork.jpg|[[Deku Shield]] | Deku Shield OoT artwork.jpg|[[Deku Shield]] | ||
| Line 109: | Line 113: | ||
Fairy Slingshot OoT artwork.png|[[Fairy Slingshot]] | Fairy Slingshot OoT artwork.png|[[Fairy Slingshot]] | ||
Farore's Wind OoT artwork.jpg|[[Farore's Wind]] | Farore's Wind OoT artwork.jpg|[[Farore's Wind]] | ||
Fire Arrow OoT artwork.jpg|[[Fire Arrow]] | |||
Gerudo Mask OoT artwork.jpg|[[Gerudo Mask]] | Gerudo Mask OoT artwork.jpg|[[Gerudo Mask]] | ||
Giant's Knife broken OoT artwork.jpg|[[Giant's Knife]] (broken) | Giant's Knife broken OoT artwork.jpg|[[Giant's Knife]] (broken) | ||
| Line 115: | Line 120: | ||
Goron's Bracelet OoT artwork.jpg|[[Goron's Bracelet]] | Goron's Bracelet OoT artwork.jpg|[[Goron's Bracelet]] | ||
Goron's Ruby OoT artwork.jpg|[[Goron's Ruby]] | Goron's Ruby OoT artwork.jpg|[[Goron's Ruby]] | ||
Goron Mask OoT artwork.jpg|[[Goron Mask]] | |||
Goron Tunic OoT artwork.png|[[Goron Tunic]] | Goron Tunic OoT artwork.png|[[Goron Tunic]] | ||
Heart Container OoT artwork.png|[[Heart Container]] | Heart Container OoT artwork.png|[[Heart Container]] | ||
| Line 120: | Line 126: | ||
Hover Boots OoT artwork.jpg|[[Hover Boots]] | Hover Boots OoT artwork.jpg|[[Hover Boots]] | ||
Hylian Shield OOT art.png|[[Hylian Shield]] | Hylian Shield OOT art.png|[[Hylian Shield]] | ||
Ice Arrow OoT artwork.jpg|[[Ice Arrow]] | |||
Iron Boots OoT artwork.png|[[Iron Boots]] | Iron Boots OoT artwork.png|[[Iron Boots]] | ||
Keaton Mask OoT artwork.jpg|[[Keaton Mask]] | Keaton Mask OoT artwork.jpg|[[Keaton Mask]] | ||
Kokiri's Emerald OoT artwork.jpg|[[Kokiri's Emerald]] | Kokiri's Emerald OoT artwork.jpg|[[Kokiri's Emerald]] | ||
Kokiri Sword OoT artwork.jpg|[[Kokiri Sword]] | Kokiri Sword OoT artwork.jpg|[[Kokiri Sword]] | ||
Lens of Truth OoT artwork.jpg|[[Lens of Truth]] | |||
Light Arrow OoT artwork.jpg|[[Light Arrow]] | |||
Longshot OoT artwork.jpg|[[Longshot]] | Longshot OoT artwork.jpg|[[Longshot]] | ||
Silver Scale OoT artwork.jpg|[[Magic Bean]] | Silver Scale OoT artwork.jpg|[[Magic Bean]] | ||
| Line 139: | Line 148: | ||
Pocket Egg OoT artwork.jpg|[[Pocket Egg]] | Pocket Egg OoT artwork.jpg|[[Pocket Egg]] | ||
Prescription OoT artwork.jpg|[[Prescription]] | Prescription OoT artwork.jpg|[[Prescription]] | ||
Red Potion OoT artwork.jpg|[[Red Potion]] | |||
Silver Gauntlet OoT artwork.jpg|[[Silver Gauntlet]] | Silver Gauntlet OoT artwork.jpg|[[Silver Gauntlet]] | ||
Silver Scale OoT artwork.jpg|[[Silver Scale]] | Silver Scale OoT artwork.jpg|[[Silver Scale]] | ||
| Line 147: | Line 157: | ||
World's Finest Eyedrops OoT artwork.jpg|[[World's Finest Eyedrops]] | World's Finest Eyedrops OoT artwork.jpg|[[World's Finest Eyedrops]] | ||
Zora's Sapphire OoT artwork.jpg|[[Zora's Sapphire]] | Zora's Sapphire OoT artwork.jpg|[[Zora's Sapphire]] | ||
Zora Mask OoT artwork.jpg|[[Zora Mask]] | |||
Zora Tunic OoT artwork.png|[[Zora Tunic]] | Zora Tunic OoT artwork.png|[[Zora Tunic]] | ||
</gallery> | </gallery> | ||
Revision as of 00:49, December 8, 2020
A collection of images pertaining to The Legend of Zelda: Ocarina of Time.
Artwork
Characters
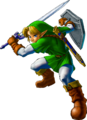
Link

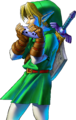
Link as a child
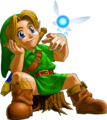
Child Link with Navi
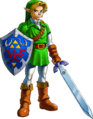
Link as an adult
Link about to perform a Spin Attack
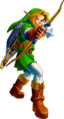
Link aiming his Fairy Bow

Link performing a Jump Attack
Link playing the Ocarina of Time
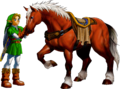
Link standing next to Epona
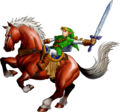
Link riding on Epona


Major characters

Princess Zelda as a child

Princess Zelda as an adult


Supporting characters


Bosses
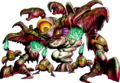
Parasitic Armored Arachnid:
Gohma (and Gohma Larvae)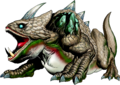
The Infernal Dinosaur:
King Dodongo
Bio-electric Anemone:
Barinade


Evil Spirit from Beyond:
Phantom Ganon
Subterranean Lava Dragon:
Volvagia
Giant Aquatic Amoeba:
Morpha
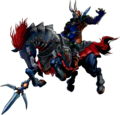
Phantom Shadow Beast:
Bongo Bongo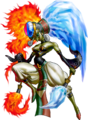
Sorceress Sisters:
Twinrova (combined)


King of Evil:
Ganondorf


Enemies and mini-bosses
- Gold Skulltula OoT artwork.jpg
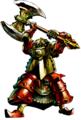
Iron Knuckle (Nabooru)


Items
- Biggoron's Sword OoT art.jpg
- Blue Potion OoT artwork.jpg
- Bomb OoT artwork.jpg
- Bomb Bag OoT artwork.jpg
- Bombchu OoT artwork.jpg
- Boomerang OoT artwork.jpg
- Deku Nut OoT artwork.jpg
- Deku Shield OoT artwork.jpg
- Din's Fire OoT artwork.jpg
- Dungeon Map OoT artwork.jpg
- Empty Bottle OoT artwork.jpg
- Fairy Bow OoT artwork.jpg
- Fairy Ocarina OoT artwork.jpg
- Farore's Wind OoT artwork.jpg
- Fire Arrow OoT artwork.jpg
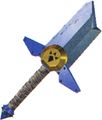
Giant's Knife (broken)
- Golden Gauntlet OoT artwork.jpg
- Goron's Bracelet OoT artwork.jpg
- Hookshot OOT artwork.jpg
- Hover Boots OoT artwork.jpg
- Ice Arrow OoT artwork.jpg
- Keaton Mask OoT artwork.jpg
- Kokiri Sword OoT artwork.jpg
- Lens of Truth OoT artwork.jpg
- Light Arrow OoT artwork.jpg
- Longshot OoT artwork.jpg
- Silver Scale OoT artwork.jpg
- Megaton Hammer OoT artwork.jpg
- Mirror Shield OoT artwork.jpg
- Nayru's Love OoT artwork.jpg
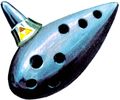
Ocarina of Time
- Red Potion OoT artwork.jpg
- Silver Gauntlet OoT artwork.jpg
- Silver Scale OoT artwork.jpg
- Stone of Agony OoT artwork.jpg
- World's Finest Eyedrops OoT artwork.jpg


Group artwork

The main cast

Link and Sheik fight various enemies


Box art
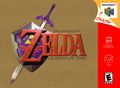
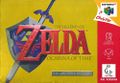
North America (front cover)
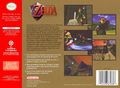
North America (back cover)
North America (Collector's Edition; front cover)

North America (Player's Choice; front cover)
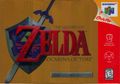
Japan (front cover)

Europe (front cover)
Australia (front cover)
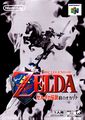
China (iQue Player release; front cover)


Logos
Logo
Screenshots
Title screens
Title screen
Japanese title screen
Title screen for the GameCube port

Japanese title screen for the 2002 GameCube port

Japanese title screen for the GameCube port on Zelda Collection

Chinese title screen (iQue Player)
Title screen of the unreleased traditional Chinese iQue version


Wallpapers
Link

Group artwork of the game characters
Game logo

iQue Player release


Miscellaneous

French magazine ad

iQue Player poster

