| Don't like the ads? Then create an account! Users with accounts have more options than anonymous users. |
Difference between revisions of "Gallery:Hyrule Warriors Legends"
(italic title) |
|||
| (2 intermediate revisions by one other user not shown) | |||
| Line 1: | Line 1: | ||
{{italic title}} | |||
{{more images}} | {{more images}} | ||
This is a gallery of images pertaining to ''[[Hyrule Warriors Legends]]'' and its specific DLC. For images created for or derived from its other versions, see [[Gallery:Hyrule Warriors|Gallery:''Hyrule Warriors'']] and [[Gallery:Hyrule Warriors: Definitive Edition|Gallery:''Hyrule Warriors: Definitive Edition'']]. | This is a gallery of images pertaining to ''[[Hyrule Warriors Legends]]'' and its specific DLC. For images created for or derived from its other versions, see [[Gallery:Hyrule Warriors|Gallery:''Hyrule Warriors'']] and [[Gallery:Hyrule Warriors: Definitive Edition|Gallery:''Hyrule Warriors: Definitive Edition'']]. | ||
| Line 76: | Line 77: | ||
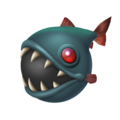
HWL Helmaroc King art.png|[[Helmaroc King]] | HWL Helmaroc King art.png|[[Helmaroc King]] | ||
HWL Phantom Ganon art.png|[[Phantom Ganon]] | HWL Phantom Ganon art.png|[[Phantom Ganon]] | ||
</gallery> | |||
===Weapons=== | |||
<gallery> | |||
HWL Darkmagic Sword art.jpg|[[Darkmagic Sword]] | |||
HWL Thief's Trident art.png|[[Thief's Trident]] | |||
HWL King of Evil Trident art.png|[[King of Evil Trident]] | |||
HWL Trident of Demise art.png|[[Trident of Demise]] | |||
HWL Simple Crossbows art.png|[[Simple Crossbows]] | |||
HWL Hylian Crossbows art.png|[[Hylian Crossbows]] | |||
HWL Legend's Crossbows art.png|[[Legend's Crossbows]] | |||
HWL Fairy Ocarina art.png|[[Fairy Ocarina]] | |||
HWL Lunar Ocarina art.png|[[Lunar Ocarina]] | |||
HWL Majora's Ocarina art.png|[[Majora's Ocarina]] | |||
HWL Pirate Cutlass art.png|[[Pirate Cutlass]] | |||
HWL Jeweled Cutlass art.png|[[Jeweled Cutlass]] | |||
HWL Regal Cutlass art.png|[[Regal Cutlass]] | |||
HWL Windfall Sail art.png|[[Windfall Sail]] | |||
HWL Swift Sail art.png|[[Swift Sail]] | |||
HWL Sail of Red Lions art.png|[[Sail of Red Lions]] | |||
HWL Phantom Sword art.png|[[Phantom Sword]] | |||
HWL Lokomo Sword art.png|[[Lokomo Sword]] | |||
</gallery> | |||
===My Fairy mode=== | |||
<gallery> | |||
HWL Fairy Light art.png|Light [[fairy]] | |||
HWL Fairy Darkness art.png|Darkness Fairy | |||
HWL Fairy Fire art.png|Fire Fairy | |||
HWL Fairy Water art.png|Water fairy | |||
HWL Fairy Lightning art.png|Lightning fairy | |||
HWL Fairy Clothing icon art.png|Clothing icon | |||
HWL Fairy food Bombfish art.png|[[Bombfish]] food | |||
HWL Fairy food Lon Lon Milk art.png|[[Lon Lon Milk]] food | |||
HWL Fairy food Magic Bean art.png|[[Magic Bean]] food | |||
HWL Fairy food Rock Sirloin art.png|[[Rock Sirloin]] food | |||
</gallery> | </gallery> | ||
| Line 81: | Line 118: | ||
<gallery> | <gallery> | ||
HWL group artwork.png|Group art | HWL group artwork.png|Group art | ||
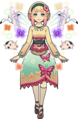
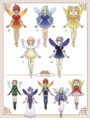
HWL Fairy group art.png|My Fairy group art | |||
</gallery> | </gallery> | ||
Latest revision as of 13:17, March 13, 2022
It has been requested that additional images be uploaded for this article. Remove this only when the image(s) have been uploaded for this article.
This is a gallery of images pertaining to Hyrule Warriors Legends and its specific DLC. For images created for or derived from its other versions, see Gallery:Hyrule Warriors and Gallery:Hyrule Warriors: Definitive Edition.
Artwork[edit]
Warriors[edit]

Link in the Great Sea Map costume

Link in the Master Wind Waker Map costume

Link in the Koholint Island Map costume
Link in the Grand Travels Map costume

Lana in the Great Sea Map costume
Lana in the Master Wind Waker Map costume
Darunia in the Great Sea Map costume
Darunia in the Master Wind Waker Map costume

Ruto in the Lorule Map costume
Agitha in the Koholint Island Map costume

Agitha in the Lorule Map costume
Fi in the Great Sea Map costume

Fi in the Lorule Map costume

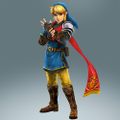
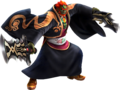
Ganondorf with a Trident

Ganondorf in the Great Sea Map costume
Ganondorf in the Wind Waker Robes

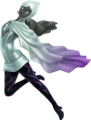
Zant in the Great Sea Map costume

Ghirahim in the Great Sea Map costume
Ghirahim in the Koholint Island Map costume

Wizzro in the Grand Travels Map costume
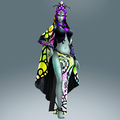
Twili Midna in the Lorule Map costume
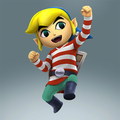
Young Link in the Grand Travels Map costume
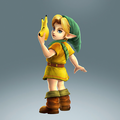
Young Link in the Lorule Map costume
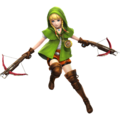
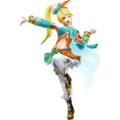
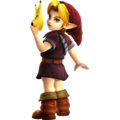
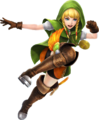
Linkle with Crossbows
Linkle with Boots
Linkle in the Koholint Island Map costume
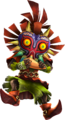
Skull Kid with an Ocarina
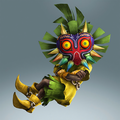
Skull Kid in the Koholint Island Map costume

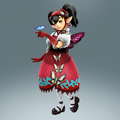
Tetra
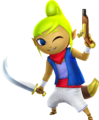
Tetra with a Cutlass

King Daphnes with a Sail
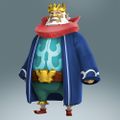
King Daphnes in the Grand Travels Map costume
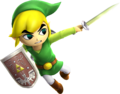
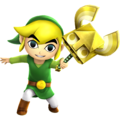
Toon Link with a Light Sword
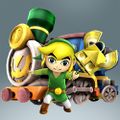
Toon Link with a Sand Wand and the Spirit Train
Toon Link with a Sand Wand

Toon Link's Spirit Train summon
Toon Link in the Master Wind Waker Map costume

Toon Link in the Grand Travels Map costume

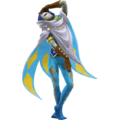
Medli with a Rito Harp

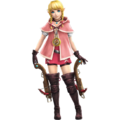
Marin with a Bell
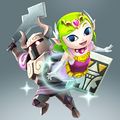
Toon Zelda with Phantom Arms
Toon Zelda as Phantom Zelda
Ravio with a Rental Hammer

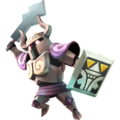
Yuga with a Picture Frame


Troops/enemies and giant bosses[edit]

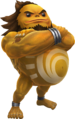
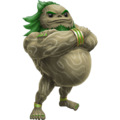
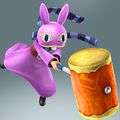
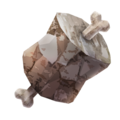
Big Blin and Stone Blin


Weapons[edit]


My Fairy mode[edit]
Light fairy

Darkness Fairy

Fire Fairy

Water fairy
Lightning fairy
Clothing icon
Bombfish food
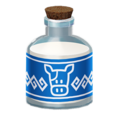
Lon Lon Milk food

Magic Bean food
Rock Sirloin food


Miscellaneous[edit]
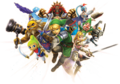
Group art
My Fairy group art

