| Don't like the ads? Then create an account! Users with accounts have more options than anonymous users. |
Difference between revisions of "Gallery:The Legend of Zelda: Four Swords Adventures"
(→Bosses) |
m (→Enemies) |
||
| (13 intermediate revisions by 2 users not shown) | |||
| Line 1: | Line 1: | ||
{{ | {{italic title}} | ||
{{more images}} | |||
This is a gallery of images pertaining to ''[[The Legend of Zelda: Four Swords Adventures]]''. | |||
== | ==Logos== | ||
<gallery> | <gallery> | ||
FSA logo EN.jpg|Logo | |||
</gallery> | </gallery> | ||
== | ==Box art== | ||
<gallery> | <gallery> | ||
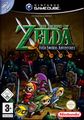
FSA | TLOZ Four Swords Adventures box.jpg|North American box art (front) | ||
TLOZ Four Swords Adventures Germany box art.jpg|Germany box art (front) | |||
FSA Japan box art.jpg|Japanese box art (front) | |||
</gallery> | </gallery> | ||
| Line 28: | Line 31: | ||
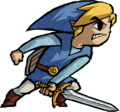
FSA Link lunge art.jpg|Link | FSA Link lunge art.jpg|Link | ||
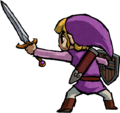
FSA Link force art.jpg|Link | FSA Link force art.jpg|Link | ||
FSA Tingle art.jpg|[[Tingle]] | |||
FSA Tetra art.jpg|[[Tetra]] | FSA Tetra art.jpg|[[Tetra]] | ||
FSA Trackers Rupee art.jpg|[[Navi Trackers]] | FSA Trackers Rupee art.jpg|[[Navi Trackers]] | ||
FSA Trackers stamp art.jpg|Navi Trackers | FSA Trackers stamp art.jpg|Navi Trackers | ||
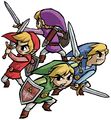
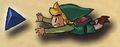
FSA main artwork.jpg|Group artwork used for the game cover | |||
Hyrule FSA artwork.jpg|[[Hyrule]] | |||
</gallery> | </gallery> | ||
| Line 43: | Line 49: | ||
<gallery> | <gallery> | ||
FSA Airokku.png|[[Airokku]] | FSA Airokku.png|[[Airokku]] | ||
FSA Arrgi.png|[[Arrgi]] | |||
FSA Arrgi open.png|Arrgi | |||
FSA Armos.png|[[Armos]] | FSA Armos.png|[[Armos]] | ||
FSA Armos Knight.png|[[Armos Knight]] | FSA Armos Knight.png|[[Armos Knight]] | ||
| Line 53: | Line 61: | ||
FSA Bee.png|[[Bee]] | FSA Bee.png|[[Bee]] | ||
FSA Dark Stalfos.png|[[Big Dark Stalfos]] | FSA Dark Stalfos.png|[[Big Dark Stalfos]] | ||
FSA Bomb Soldier blue.png|[[Bomb Soldier]] | FSA Bomb Soldier blue.png|[[Bomb Soldier]] | ||
FSA Bomb Soldier green.png|Bomb Soldier | FSA Bomb Soldier green.png|Bomb Soldier | ||
| Line 89: | Line 96: | ||
FSA Leever red.png|Leever | FSA Leever red.png|Leever | ||
Manhandla FSA sprite.png|[[Manhandla (The Legend of Zelda: Four Swords)|Manhandla]] | Manhandla FSA sprite.png|[[Manhandla (The Legend of Zelda: Four Swords)|Manhandla]] | ||
FSA Moldorm.png|[[Moldorm (The Legend of Zelda: A Link to the Past)|Moldorm]] | |||
FSA Octorok red.png|[[Octorok]] | FSA Octorok red.png|[[Octorok]] | ||
FSA Octorok blue.png|Octorok | FSA Octorok blue.png|Octorok | ||
FSA Octorok purple.png|Octorok | FSA Octorok purple.png|Octorok | ||
FSA Pengator.png|[[Pengator]] | FSA Pengator.png|[[Pengator]] | ||
FSA | FSA Rat.png|[[Rat]] | ||
FSA Rope red.png|Rope | FSA Rope red.png|[[Rope]] | ||
FSA Sand Crab.png|[[Sand Crab]] | FSA Sand Crab.png|[[Sand Crab]] | ||
FSA Devalant.png|[[Devalant|Sand Worm]] | FSA Devalant.png|[[Devalant|Sand Worm]] | ||
FSA Sea Urchin.png|[[Sea Urchin]] | FSA Sea Urchin.png|[[Sea Urchin]] | ||
FSA Shadow Link.png|[[Shadow Link]] | FSA Shadow Link.png|[[Shadow Link]] | ||
FSA Zol blue.png|[[Slime]] | |||
FSA Zol green.png|Slime | |||
FSA Popo.png|[[Popo|Snake Bushel]] | FSA Popo.png|[[Popo|Snake Bushel]] | ||
FSA Snowball.png|[[Snowball]] | FSA Snowball.png|[[Snowball]] | ||
FSA Frog Snowball.png|Snowball | |||
FSA Soldier blue.png|[[Guard (enemy)|Soldier]] | FSA Soldier blue.png|[[Guard (enemy)|Soldier]] | ||
FSA Soldier yellow.png|Soldier | FSA Soldier yellow.png|Soldier | ||
| Line 108: | Line 119: | ||
FSA Stalfos skull.png|Stalfos | FSA Stalfos skull.png|Stalfos | ||
FSA Stone Elevator.png|[[Stone Elevator]] | FSA Stone Elevator.png|[[Stone Elevator]] | ||
FSA Dog statue.png|[[Stone | FSA Dog statue.png|[[Stone statue]] | ||
FSA Dark Stalfos.png|[[Sutarunakku]] | FSA Dark Stalfos.png|[[Sutarunakku]] | ||
FSA Sword Soldier green.png|[[Sword Guard|Sword Soldier]] | FSA Sword Soldier green.png|[[Sword Guard|Sword Soldier]] | ||
| Line 125: | Line 136: | ||
FSA Wizzrobe.png|[[Wizzrobe]] | FSA Wizzrobe.png|[[Wizzrobe]] | ||
FSA Ropa.png|[[Ropa|Worm Basket]] | FSA Ropa.png|[[Ropa|Worm Basket]] | ||
FSA Zora.png|[[Zora]] | FSA Zora.png|[[Zora]] | ||
</gallery> | </gallery> | ||
| Line 133: | Line 142: | ||
<gallery> | <gallery> | ||
FSA Phantom Ganon.png|[[Phantom Ganon]] | FSA Phantom Ganon.png|[[Phantom Ganon]] | ||
FSA Stone Arrghus.png|[[Stone Arrghus]] | FSA Stone Arrghus covered.png|[[Stone Arrghus]] | ||
FSA Stone Arrghus.png|Stone Arrghus | |||
FSA Stone Arrghus mad.png|Stone Arrghus | |||
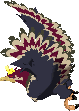
FSA Helmaroc masked.png|[[Helmaroc King]] | FSA Helmaroc masked.png|[[Helmaroc King]] | ||
FSA Helmaroc GBA.png|Helmaroc King | FSA Helmaroc GBA.png|Helmaroc King | ||
FSA Helmaroc unmasked.png|Helmaroc King | FSA Helmaroc unmasked.png|Helmaroc King | ||
FSA Dodongo.png|[[Dodongo]] | |||
FSA Mask Poe.png|[[Big Poe (The Swamp)|Big Poe]] | FSA Mask Poe.png|[[Big Poe (The Swamp)|Big Poe]] | ||
FSA Big Poe.png|[[Big Poe]] | FSA Big Poe.png|[[Big Poe]] | ||
FSA Poe GBA.png|[[Poe]] | FSA Poe GBA.png|[[Poe]] | ||
FSA Gohma.png|[[Gohma]] | |||
FSA Big Moldorm.png|[[Moldorm (boss)|Big Moldorm]] | FSA Big Moldorm.png|[[Moldorm (boss)|Big Moldorm]] | ||
FSA Frostare hang.png|[[Frostare]] | FSA Frostare hang.png|[[Frostare]] | ||
FSA Frostare GBA.png|Frostare | FSA Frostare GBA.png|Frostare | ||
FSA Frostare fly.png|Frostare | FSA Frostare fly.png|Frostare | ||
FSA Big Dodongo.png|[[Big Dodongo]] | |||
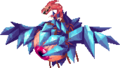
FSA Vaati.png|[[Vaati]] | FSA Vaati.png|[[Vaati]] | ||
FSA Vaati GBA.png|Vaati | FSA Vaati GBA.png|Vaati | ||
| Line 150: | Line 164: | ||
[[Category:Galleries]] | [[Category:Galleries]] | ||
[[Category:The Legend of Zelda: Four Swords Adventures]] | [[Category:The Legend of Zelda: Four Swords Adventures|*]] | ||
Latest revision as of 08:28, January 2, 2022
It has been requested that additional images be uploaded for this article. Remove this only when the image(s) have been uploaded for this article.
This is a gallery of images pertaining to The Legend of Zelda: Four Swords Adventures.
Logos[edit]
Logo
Box art[edit]

North American box art (front)
Germany box art (front)
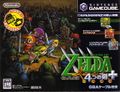
Japanese box art (front)


Artwork[edit]
A group of Links

Link
Link
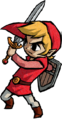
Link
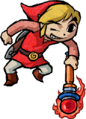
Link

A group of Links

Link

Link

Link
Link

Link
Link

Link

Navi Trackers

Group artwork used for the game cover


Sprites[edit]
Items[edit]
Enemies[edit]

Arrgi

Ball and Chain Soldier

Ball and Chain Soldier

Ball and Chain Soldier

Bomb Soldier

Boulder

Chief Soldier

Chief Soldier

Deadrock

Gibdo

Keese

Leever

Octorok

Octorok

Slime

Snowball

Soldier

Soldier

Soldier

Stalfos

Sword Soldier

Tektite

Terrorpin

Terrorpin

Terrorpin

Terrorpin


Bosses[edit]

Stone Arrghus

Stone Arrghus

Helmaroc King
Helmaroc King

Frostare
Frostare

Vaati


