| Don't like the ads? Then create an account! Users with accounts have more options than anonymous users. |
Difference between revisions of "Gallery:The Legend of Zelda: Link's Awakening DX"
(→Minibosses: Forgot to upload this one) |
m (→Minibosses) |
||
| Line 140: | Line 140: | ||
LADX Dodongo Snake.png|[[Dodongo|Dodongo Snake]] | LADX Dodongo Snake.png|[[Dodongo|Dodongo Snake]] | ||
LADX Desert Lanmola.png|[[Lanmola|Desert Lanmola]] | LADX Desert Lanmola.png|[[Lanmola|Desert Lanmola]] | ||
LADX Cue Ball.png|[[ | LADX Cue Ball.png|[[Hydrosoar|Cue Ball]] | ||
LADX Master Stalfos.png|[[Master Stalfos]] | LADX Master Stalfos.png|[[Master Stalfos]] | ||
LADX Gohma.png|[[Gohma]] | LADX Gohma.png|[[Gohma]] | ||
Revision as of 02:38, January 3, 2021
A collection of images pertaining to The Legend of Zelda: Link's Awakening DX. For images specifically pertaining to the original release, see Gallery:The Legend of Zelda: Link's Awakening.
Box art
North American cover

Japanese cover


Sprites
Game Boy Color
Characters

Hippo Model (Japan)

Hippo Model (international)
Enemies

Armos Statue

Bombite

Bone Putter

Camo Goblin

Camo Goblin

Gel (big)

Iron Mask

Karakoro

Karakoro

Keese

Mega Thwomp

Moblin

Pig Warrior

Shrouded Stalfos

Soldier

Spiny Beetle

Spiny Beetle

Spiny Beetle

Stalfos

Three-of-a-Kind

Three-of-a-Kind

Three-of-a-Kind

Thwomp


Minibosses

Armos Knight

Hinox

Hinox


Bosses
Items
Game Boy mode
Screenshots

Title screen
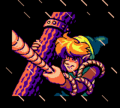
Link enduring a strong sea storm in the intro
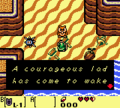
Link's first encounter with the owl
Link in a room with Goombas in the Tail Cave

Link battling Moldorm

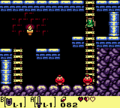
Link in the Bottle Grotto, in a room with two Boos

Link in a room in the Bottle Grotto with a Mask-Mimic
Link in the Key Cavern in a room with a Piranha Plant
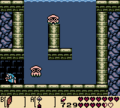
Link in a room with Bloobers in the Catfish's Maw

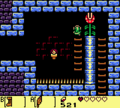
Link in the first floor of the Eagle Tower, next to an Anti-Kirby
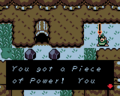
Link obtaining a Piece of Power


Miscellaneous
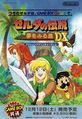
Japanese print ad
