| Don't like the ads? Then create an account! Users with accounts have more options than anonymous users. |
Difference between revisions of "Gallery:Zelda II: The Adventure of Link"
m |
(Or maybe like this? It feels more consistent with how the Geru, Daira, and Moblin ones are, and those colors are definite....) |
||
| (6 intermediate revisions by 2 users not shown) | |||
| Line 1: | Line 1: | ||
{{ | {{italic title}} | ||
{{more images}} | |||
This is a gallery of images pertaining to ''[[Zelda II: The Adventure of Link]]''. | This is a gallery of images pertaining to ''[[Zelda II: The Adventure of Link]]''. | ||
| Line 46: | Line 47: | ||
TAOL Link loading JP manual art.jpg|Link (Japanese manual) | TAOL Link loading JP manual art.jpg|Link (Japanese manual) | ||
TAoL fairy art.jpg|[[Fairy]] | TAoL fairy art.jpg|[[Fairy]] | ||
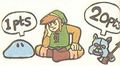
TAoL monster points art.jpg|Monsters (English manual) | |||
</gallery> | </gallery> | ||
| Line 57: | Line 59: | ||
Bit ZII artwork.jpg|[[Bit]] | Bit ZII artwork.jpg|[[Bit]] | ||
TAoL Boon art.jpg|[[Boon]] | TAoL Boon art.jpg|[[Boon]] | ||
TAoL Boss Bot art.jpg|[[Boss Bot]] | |||
Bot ZII artwork.jpg|[[Bot]] | Bot ZII artwork.jpg|[[Bot]] | ||
TAoL Bubble art.jpg|[[Bubble]] | |||
TAoL Daira JP art.jpg|[[Daira]] (Japanese manual) | TAoL Daira JP art.jpg|[[Daira]] (Japanese manual) | ||
TAoL Daira art.jpg|Daira (orange) | TAoL Daira art.jpg|Daira (orange) | ||
TAoL Daira red art.jpg|Daira (red) | |||
Deeler red ZII artwork.jpg|[[Deeler]] (red) | Deeler red ZII artwork.jpg|[[Deeler]] (red) | ||
Deeler blue ZII artwork.jpg|Deeler (blue) | Deeler blue ZII artwork.jpg|Deeler (blue) | ||
TAoL Doomknocker art.jpg|[[Doomknocker]] | TAoL Doomknocker art.jpg|[[Doomknocker]] | ||
TAoL Eagle Knight art.jpg|[[Eagle Knight]] | TAoL Eagle Knight art.jpg|[[Eagle Knight]] (red) | ||
TAoL Eagle Knight blue art.jpg|Eagle Knight (blue) | |||
TAoL Fiery Moa art.jpg|[[Fiery Moa]] | |||
TAoL Fire Bago-Bago art.jpg|[[Fire Bago-Bago]] | |||
TAoL Geldarm art.jpg|[[Geldarm]] | TAoL Geldarm art.jpg|[[Geldarm]] | ||
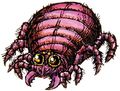
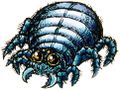
TAoL Geru orange art.jpg|[[Gēru]] (orange) | TAoL Geru orange art.jpg|[[Gēru]] (orange) | ||
TAoL Geru red art.jpg|Gēru (red) | TAoL Geru red art.jpg|Gēru (red) | ||
TAoL Geru blue art.jpg|Gēru (blue) | TAoL Geru blue art.jpg|Gēru (blue) | ||
TAoL Giant Bubble art.jpg|[[Giant Bubble]] | |||
TAoL Girubokku art.jpg|[[Girubokku]] | TAoL Girubokku art.jpg|[[Girubokku]] | ||
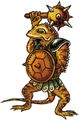
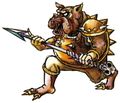
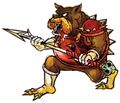
TAoL Goriya | TAoL Goriya red art.jpg|[[Goriya]] (orange) | ||
TAoL Goriya | TAoL Goriya orange art.jpg|Goriya (red) | ||
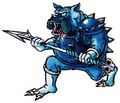
TAoL Goriya blue art.jpg|Goriya (blue) | TAoL Goriya blue art.jpg|Goriya (blue) | ||
TAoL Guma Gooma art.jpg|[[Gūma]] | TAoL Guma Gooma art.jpg|[[Gūma]] | ||
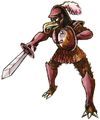
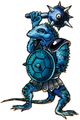
TAoL Ironknuckle orange art.jpg|[[Ironknuckle]] (orange) | TAoL Ironknuckle orange art.jpg|[[Ironknuckle]] (orange) | ||
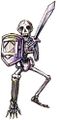
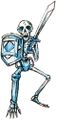
TAoL Ironknuckle red art.jpg|Ironknuckle ( | TAoL Ironknuckle art.jpg|Ironknuckle (red) | ||
TAoL Ironknuckle red art.jpg|Ironknuckle (blue) | |||
TAoL Leever art.jpg|[[Leever]] | TAoL Leever art.jpg|[[Leever]] | ||
TAoL Lowder art.jpg|[[Lowder]] | TAoL Lowder art.jpg|[[Lowder]] | ||
| Line 81: | Line 91: | ||
TAoL Mau mounted art.jpg|Mau (mounted) | TAoL Mau mounted art.jpg|Mau (mounted) | ||
TAoL Megmat art.jpg|[[Megmat]] | TAoL Megmat art.jpg|[[Megmat]] | ||
TAoL Moa art.jpg|[[Moa]] | TAoL Moa art.jpg|[[Moa]] ("red") | ||
TAoL Moa blue art.jpg|Moa (blue) | |||
TAoL Moby art.jpg|[[Moby]] | TAoL Moby art.jpg|[[Moby]] | ||
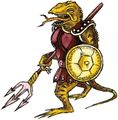
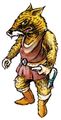
TAoL Molblin orange art.jpg|[[Moblin|Molblin]] (orange) | TAoL Molblin orange art.jpg|[[Moblin|Molblin]] (orange) | ||
| Line 87: | Line 98: | ||
TAoL Molblin blue art.jpg|Molblin (blue) | TAoL Molblin blue art.jpg|Molblin (blue) | ||
TAoL Myu art.jpg|[[Myu]] | TAoL Myu art.jpg|[[Myu]] | ||
TAoL Octorok art.jpg|[[Octorok]] | TAoL Octorok art.jpg|[[Octorok]] (red) | ||
TAoL Octorok blue art.jpg|Octorok (blue) | |||
TAoL Parutamu art.jpg|[[Parutamu]] | TAoL Parutamu art.jpg|[[Parutamu]] | ||
TAoL Ra mounted art.jpg|[[ | TAoL Ra blue art.jpg|[[Rā]] (flying, blue) | ||
TAoL Ra orange art.jpg|Rā (flying, orange) | |||
TAoL Ra mounted art.jpg|Rā (mounted) | |||
TAoL Rope art.jpg|[[Rope (Zelda II: The Adventure of Link)|Rope]] | |||
TAoL Soprano art.jpg|[[Soprano]] | |||
Stalfos red ZII artwork.jpg|[[Stalfos Knight|Stalfos]] (red) | Stalfos red ZII artwork.jpg|[[Stalfos Knight|Stalfos]] (red) | ||
Stalfos blue ZII artwork.jpg|Stalfos (blue) | Stalfos blue ZII artwork.jpg|Stalfos (blue) | ||
| Line 103: | Line 119: | ||
TAoL Helmethead art.jpg|[[Helmethead]] | TAoL Helmethead art.jpg|[[Helmethead]] | ||
TAoL Rebonack art.jpg|[[Rebonack]] | TAoL Rebonack art.jpg|[[Rebonack]] | ||
TAoL Carock art. | TAoL Carock red art.jpg|[[Carock]] | ||
TAoL Carock art.png|Carock | |||
TAoL Guma Gooma art.jpg|[[Gooma]] | TAoL Guma Gooma art.jpg|[[Gooma]] | ||
TAoL Barba art.jpg|[[Volvagia|Barba]] | TAoL Barba art.jpg|[[Volvagia|Barba]] | ||
| Line 133: | Line 150: | ||
Reflect spell TAoL artwork.png|Reflect | Reflect spell TAoL artwork.png|Reflect | ||
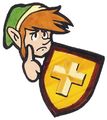
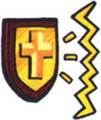
Shield spell TAoL artwork.png|Shield | Shield spell TAoL artwork.png|Shield | ||
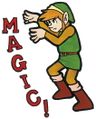
Spell | TAoL Spell art.jpg|Spell | ||
Thunder spell TAoL artwork.png|Thunder | Thunder spell TAoL artwork.png|Thunder | ||
</gallery> | |||
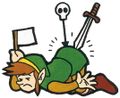
===Enemy projectiles=== | |||
<gallery> | |||
TAoL projectile chain hammer art.jpg|[[Ball and Chain|Chain hammer]] | |||
TAoL projectile axe art.jpg|[[Axe]] | |||
TAoL projectile club art.jpg|[[Club]] | |||
TAoL projectile fireball art.jpg|[[Fireball]]s | |||
</gallery> | </gallery> | ||
| Line 153: | Line 178: | ||
<gallery> | <gallery> | ||
TAoL Hyrule map artwork.png|Map of [[Kingdom of Hyrule|Hyrule]] | TAoL Hyrule map artwork.png|Map of [[Kingdom of Hyrule|Hyrule]] | ||
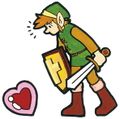
TAoL Magical Sword art.jpg|[[Magical Sword]] | |||
</gallery> | </gallery> | ||
==Screenshots== | ==Screenshots== | ||
<gallery> | <gallery> | ||
Zelda II title screen.png|Title screen | |||
TAoL Link gets the Triforce.png|[[Link]] receiving the [[Triforce]] | TAoL Link gets the Triforce.png|[[Link]] receiving the [[Triforce]] | ||
</gallery> | </gallery> | ||
Latest revision as of 23:14, March 23, 2024
It has been requested that additional images be uploaded for this article. Remove this only when the image(s) have been uploaded for this article.
This is a gallery of images pertaining to Zelda II: The Adventure of Link.
Logos[edit]

English logo
Box art[edit]
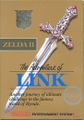
North American box art

North American box art (back)

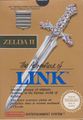
North American Classic Series box art

Japanese box art
France, Belgium and Netherlands cover
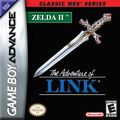
Classic NES Series cover

European NES Classics cover
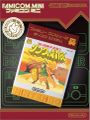
Famicom Mini cover


Artwork[edit]
Characters[edit]
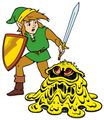
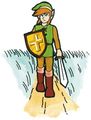
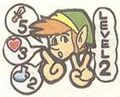
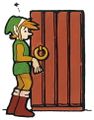
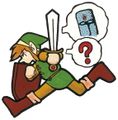
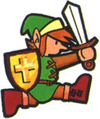
Link

Link

Link
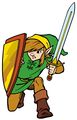
Link
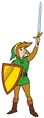
Link

Link (manual)
Link (manual)

Link (manual)
Link (Japanese manual)

Link (manual)
Link (Japanese manual)

Link (manual)
Link (manual)
Link (manual)
Link (manual)

Link (Japanese manual)

Link (Western manuals)
Link (manual)
Link (manual)
Link (manual)
Link (manual)
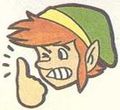
Link (Japanese manual)

Monsters (English manual)


Enemies[edit]

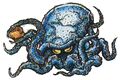
Acheman (bat)

Acheman (devil)
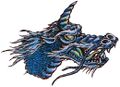
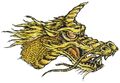
Daira (Japanese manual)

Daira (orange)
Daira (red)
Deeler (red)
Deeler (blue)
Eagle Knight (red)

Eagle Knight (blue)
Gēru (orange)
Gēru (red)
Gēru (blue)
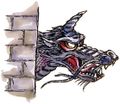
Goriya (orange)
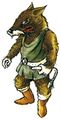
Goriya (red)

Goriya (blue)
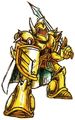
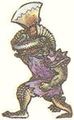
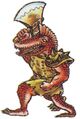
Ironknuckle (orange)
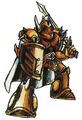
Ironknuckle (red)
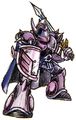
Ironknuckle (blue)

Mau (flying)

Mau (mounted)
Moa ("red")

Moa (blue)
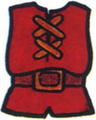
Molblin (orange)
Molblin (red)
Molblin (blue)
Octorok (red)
Octorok (blue)
Rā (flying, blue)
Rā (flying, orange)
Rā (mounted)
Stalfos (red)
Stalfos (blue)


Bosses[edit]

Carock


Items[edit]


Spells[edit]

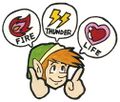
Fairy
Fire
Jump

Life
Reflect
Shield

Spell
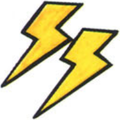
Thunder


Enemy projectiles[edit]


Scenes[edit]


Miscellaneous[edit]

Map of Hyrule


Screenshots[edit]
Title screen

