| Don't like the ads? Then create an account! Users with accounts have more options than anonymous users. |
Difference between revisions of "Gallery:Hyrule Warriors"
(→Weapons: Replaced an image) |
|||
| (5 intermediate revisions by 2 users not shown) | |||
| Line 1: | Line 1: | ||
{{italic title}} | |||
{{more images}} | {{more images}} | ||
This is a gallery of images pertaining to ''[[Hyrule Warriors]]'' and its specific DLC. For images created for or derived from its reissues, see [[Gallery:Hyrule Warriors Legends|Gallery:''Hyrule Warriors Legends'']] and [[Gallery:Hyrule Warriors: Definitive Edition|Gallery:''Hyrule Warriors: Definitive Edition'']]. | This is a gallery of images pertaining to ''[[Hyrule Warriors]]'' and its specific DLC. For images created for or derived from its reissues, see [[Gallery:Hyrule Warriors Legends|Gallery:''Hyrule Warriors Legends'']] and [[Gallery:Hyrule Warriors: Definitive Edition|Gallery:''Hyrule Warriors: Definitive Edition'']]. | ||
| Line 91: | Line 92: | ||
HW Dinolfos art.png|[[Dinolfos]] | HW Dinolfos art.png|[[Dinolfos]] | ||
HW Gibdo art.png|[[Gibdo]] and [[ReDead Knight]] | HW Gibdo art.png|[[Gibdo]] and [[ReDead Knight]] | ||
HW Gorons art.png|[[Goron Captain]] and [[Goron]]s | HW Gorons art.png|[[Goron Captain]] and [[Goron Soldier]]s | ||
HW Hylian Soldiers art.png|[[Hylian Captain]] and [[Hylian Soldier]]s | HW Hylian Soldiers art.png|[[Hylian Captain]] and [[Hylian Soldier]]s | ||
HW Lizalfos art.png|[[Lizalfos]] | HW Lizalfos art.png|[[Lizalfos]] | ||
| Line 127: | Line 128: | ||
HW Sheikah Naginata art.png|[[Sheikah Naginata]] | HW Sheikah Naginata art.png|[[Sheikah Naginata]] | ||
HW Giant's Knife art.png|[[Giant's Knife]] | HW Giant's Knife art.png|[[Giant's Knife]] | ||
HW Biggoron's Knife art.png|[Biggoron's Knife]] | HW Biggoron's Knife art.png|[[Biggoron's Knife]] | ||
HW Biggoron's Sword art.png|[[Biggoron's Sword]] | HW Biggoron's Sword art.png|[[Biggoron's Sword]] | ||
HW Goddess's Harp art.jpg|[[Goddess's Harp]] | HW Goddess's Harp art.jpg|[[Goddess's Harp]] | ||
| Line 194: | Line 195: | ||
HW Rupee art.png|[[Rupee]]s | HW Rupee art.png|[[Rupee]]s | ||
HW bomb art.png|[[Bomb]]s | HW bomb art.png|[[Bomb]]s | ||
</gallery> | |||
===Stages=== | |||
<gallery> | |||
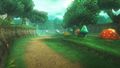
HW Hyrule Field 1 art.jpg|[[Hyrule Field]] | |||
HW Hyrule Field 2 art.jpg|Hyrule Field | |||
HW Hyrule Field 3 art.jpg|Hyrule Field | |||
HW Eldin Caves 1 art.jpg|[[Eldin Caves]] | |||
HW Eldin Caves 2 art.jpg|Eldin Caves | |||
HW Eldin Caves 3 art.jpg|Eldin Caves | |||
HW Faron Woods 1 art.jpg|[[Faron Woods]] | |||
HW Faron Woods 2 art.jpg|Faron Woods | |||
HW Faron Woods 3 art.jpg|Faron Woods | |||
HW Valley of Seers 1 art.jpg|[[Lanayru Gorge|Valley of Seers]] | |||
HW Valley of Seers 2 art.jpg|Valley of Seers | |||
HW Valley of Seers 3 art.jpg|Valley of Seers | |||
HW Death Mountain 1 art.jpg|[[Death Mountain]] | |||
HW Death Mountain 2 art.jpg|Death Mountain | |||
HW Death Mountain 3 art.jpg|Death Mountain | |||
HW Lake Hylia 1 art.jpg|[[Lake Hylia]] | |||
HW Lake Hylia 2 art.jpg|Lake Hylia | |||
HW Lake Hylia 3 art.jpg|Lake Hylia | |||
HW Twilight Field 1 art.jpg|[[Twilight Field]] | |||
HW Twilight Field 2 art.jpg|Twilight Field | |||
HW Twilight Field 3 art.jpg|Twilight Field | |||
HW Palace of Twilight 1 art.jpg|[[Palace of Twilight]] | |||
HW Palace of Twilight 2 art.jpg|Palace of Twilight | |||
HW Palace of Twilight 3 art.jpg|Palace of Twilight | |||
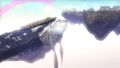
HW Skyloft 1 art.jpg|[[Skyloft]] | |||
HW Skyloft 2 art.jpg|Skyloft | |||
HW Skyloft 3 art.jpg|Skyloft | |||
HW Skyloft 4 art.jpg|Skyloft | |||
HW Sealed Grounds 1 art.jpg|[[Sealed Grounds]] | |||
HW Sealed Grounds 2 art.jpg|Sealed Grounds | |||
HW Sealed Grounds 3 art.jpg|Sealed Grounds | |||
HW Sealed Grounds 4 art.jpg|Sealed Grounds | |||
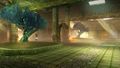
HW Temple of the Sacred Sword 1 art.jpg|[[Temple of the Sacred Sword]] | |||
HW Temple of the Sacred Sword 2 art.jpg|Temple of the Sacred Sword | |||
HW Temple of the Sacred Sword 3 art.jpg|Temple of the Sacred Sword | |||
HW Temple of Souls 1 art.jpg|[[Temple of Souls]] | |||
HW Temple of Souls 2 art.jpg|Temple of Souls | |||
HW Temple of Souls 3 art.jpg|Temple of Souls | |||
HW Gerudo Desert 1 art.jpg|[[Gerudo Desert]] | |||
HW Gerudo Desert 2 art.jpg|Gerudo Desert | |||
HW Gerudo Desert 3 art.jpg|Gerudo Desert | |||
</gallery> | |||
===Miscellaneous=== | |||
<gallery> | |||
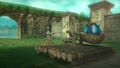
HW main 1 art.jpg|Key artwork | |||
HW main 2 art.jpg|Key artwork | |||
HW group 1 art.jpg|Group art | |||
HW group 2 art.jpg|Group art | |||
</gallery> | </gallery> | ||
Latest revision as of 21:42, August 16, 2022
It has been requested that additional images be uploaded for this article. Remove this only when the image(s) have been uploaded for this article.
This is a gallery of images pertaining to Hyrule Warriors and its specific DLC. For images created for or derived from its reissues, see Gallery:Hyrule Warriors Legends and Gallery:Hyrule Warriors: Definitive Edition.
Artwork[edit]
Warriors[edit]

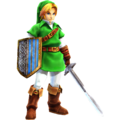
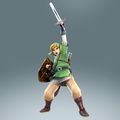
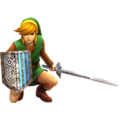
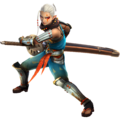
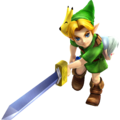
Link with a Hylian Sword
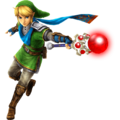
Link with a Magic Rod

Link with Gauntlets
Link with a Great Fairy
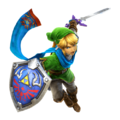
Link with the Master Sword

Link with a Horse
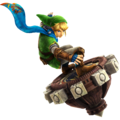
Link with a Spinner
Link dressed as Dark Link
Link in the Kokiri Tunic

Link in the Era of Twilight Tunic
Link in the Knight of Skyloft Tunic

Link in the Postman's Uniform
Link in the Classic Tunic
Impa with a Giant Blade

Impa with a Naginata
Impa in the Era of the Hero of Time Outfit
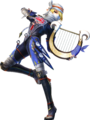
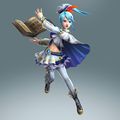
Sheik with a Harp
Sheik in the Era of the Hero of Time Outfit
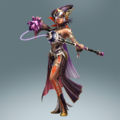
Lana with a Book of Sorcery
Lana with a Spear
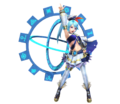
Lana with a Summoning Gate

Lana as the Guardian of Time

Lana in the Skull Kid's Clothes

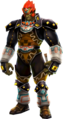
Darunia with a Hammer

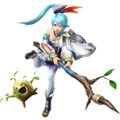
Ruto with a Zora Scale
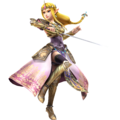
Zelda with a Rapier

Zelda with a Baton

Zelda with a Dominion Rod

Zelda in the Era of the Hero of Time Robes

Zelda in the Era of Twilight Robes
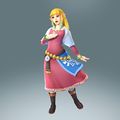
Zelda in the Skyloft Robes

Zelda in Ilia's Clothes
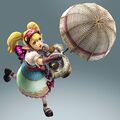
Agitha with a Parasol
Midna with a Shackle

Fi with a Goddess Blade
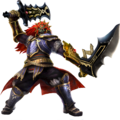
Ganondorf with Great Swords
Ganondorf in the Era of the Hero of Time Armor

Ganondorf in the Era of Twilight Armor
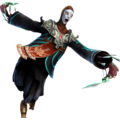
Zant with Scimitars

Ghirahim with a Demon Blade

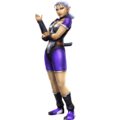
Cia
Cia with a Scepter

Cia as the Guardian of Time

Volga with a Dragon Spear
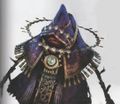
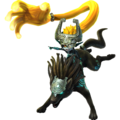
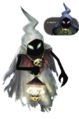
Wizzro

Wizzro with a Ring
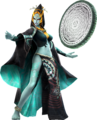
Twili Midna with a Mirror
Young Link with a Mask

Tingle with a Balloon


Soldiers/enemies[edit]
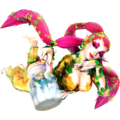
Big Poe and Icy Big Poe

Bokoblin (basic)
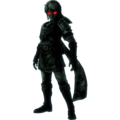
Gibdo and ReDead Knight


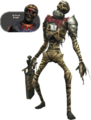
Giant bosses[edit]
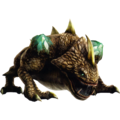
King Dodongo


Weapons[edit]


Items[edit]


Stages[edit]

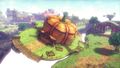
Hyrule Field
Hyrule Field

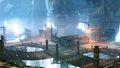
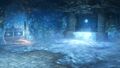
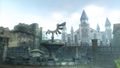
Eldin Caves

Eldin Caves
Faron Woods

Faron Woods

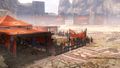
Valley of Seers

Valley of Seers
Death Mountain

Death Mountain
Lake Hylia
Lake Hylia

Twilight Field
Twilight Field

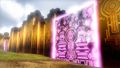
Palace of Twilight

Palace of Twilight

Skyloft
Skyloft
Skyloft
Sealed Grounds
Sealed Grounds
Sealed Grounds
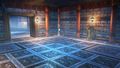
Temple of the Sacred Sword

Temple of the Sacred Sword

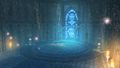
Temple of Souls

Temple of Souls
Gerudo Desert

Gerudo Desert


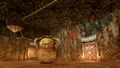
Miscellaneous[edit]

Key artwork
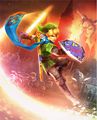
Key artwork

Group art
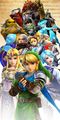
Group art


Graphics[edit]
Badges[edit]
Adventure Mode overworld sprites[edit]
Tutorial images[edit]

Box art[edit]

North American box art
