| Don't like the ads? Then create an account! Users with accounts have more options than anonymous users. |
Difference between revisions of "Gallery:The Legend of Zelda: Tri Force Heroes"
From Triforce Wiki, a The Legend of Zelda wiki
Jump to navigationJump to search
| Line 116: | Line 116: | ||
Boomerang TFH artwork.jpg[[Boomerang]] | Boomerang TFH artwork.jpg[[Boomerang]] | ||
Bow TFH artwork.jpg|[[Bow]] | Bow TFH artwork.jpg|[[Bow]] | ||
</gallery> | |||
===Credits artwork=== | |||
<gallery> | |||
TFH Credit Artwork 6.jpg | |||
TFH Credits Artwork 8.jpg | |||
TFH Credit Artwork 9.jpg | |||
</gallery> | |||
===Other=== | |||
<gallery> | |||
TFH Key Artwork.jpg|Key artwork | |||
</gallery> | </gallery> | ||
Latest revision as of 05:02, December 19, 2021
It has been requested that additional images be uploaded for this article. Remove this only when the image(s) have been uploaded for this article.
This is a gallery of images pertaining to The Legend of Zelda: Tri Force Heroes.
Artwork[edit]
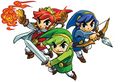
Links[edit]
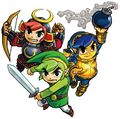
The Links prepared for action
The Links prepared for action

The Links holding their swords high

The Links in Totem position

The Links using the bow and Fire Gloves

A Link and two Doppels

The Links trying on outfits

The Links fighting a Moblin atop Totem Armos

The Links fighting Stalchampion


Supporting characters[edit]

Princess Styla

The Lady


Communication icons[edit]
Outfits[edit]


Sub-weapons[edit]

Credits artwork[edit]


Other[edit]

Key artwork
