| Don't like the ads? Then create an account! Users with accounts have more options than anonymous users. |
Difference between revisions of "The Legend of Zelda: Four Swords Adventures"
(I'm surprised that this doesn't have a page yet) |
(→Gallery: cat) |
||
| (11 intermediate revisions by 2 users not shown) | |||
| Line 12: | Line 12: | ||
|input = GameCube controller<br>Game Boy Advance | |input = GameCube controller<br>Game Boy Advance | ||
}} | }} | ||
'''''The Legend of Zelda: Four Swords Adventures''''' is a [[Nintendo GameCube]] title and the sequel to ''[[The Legend of Zelda: Four Swords]]''. The game was both developed and published by [[Nintendo]]. It was first released in Japan | '''''The Legend of Zelda: Four Swords Adventures''''' is a [[Nintendo GameCube]] title and the sequel to ''[[The Legend of Zelda: Four Swords]]''. The game was both developed and published by [[Nintendo]]. It was first released in Japan and North America in 2004 and in Europe and Australia in 2005. The game's main gimmick is how the [[Nintendo GameCube#Nintendo GameCube–Game Boy Advance Link Cable|Nintendo GameCube–Game Boy Advance Link Cable]] can be used as a controller instead of a traditional Nintendo GameCube Controller. Early in production, it was intended as a prequel to ''[[The Legend of Zelda: A Link to the Past]]'', and several graphical and setting similarities remain from that in the final game. | ||
==Plot== | |||
The game takes place an unspecified amount of time after ''Four Swords'', where the seal keeping [[Vaati]] in the [[Four Sword]] is beginning to weaken. [[Princess Zelda]] and the six [[Shrine Maidens]] gather at [[Hyrule Castle]] with [[Link]] to renew the seal, but when they open the portal to the [[Four Sword Sanctuary]], [[Shadow Link]] leaps out before trapping each of the girls in a [[Crystal Cocoon|crystal]] and sending them away. Link follows Shadow Link through the portal and is left with no choice but to draw the sword, releasing Vaati, who promptly sends him away with a [[tornado]]. | |||
The now-split Link wakes up near [[Lake Hylia]], where he is instructed to return to Hyrule Castle by [[Kaepora Gaebora]] and is repeatedly accosted by an increasing amount of Shadow Links. They arrive and defeat [[Phantom Ganon]], freeing one of the maidens. The continue on through [[Hyrule]], freeing two others from the [[Eastern Palace|Eastern Temple]] and [[Tower of Flames]], before Kaepora Gaebora tells them the castle has been invaded yet again. On the way back, they discover the four [[Knights of Hyrule]] carrying the [[Royal Jewels]] have been killed and turned into [[Big Dark Stalfos]]. They defeat and free the first of these before continuing back to Hyrule Castle, where they free the fourth maiden. | |||
Finding part of Hyrule has been [[The Dark World (level)|covered in darkness]], the Links travel to the [[Temple of Darkness]] in the [[Lost Woods]], where they hear from the local [[Deku Scrub]]s that another villain named [[Ganon]], who is much more powerful than Vaati, is on the move. On the way, they recover another Royal Jewel, and in the temple, they free the fifth maiden. She tells them that "Ganon" sounds similar to [[Ganondorf]] of the [[Gerudo]] society, so they head next to the [[Desert of Mystery|Desert of Doubt]]. | |||
At the Gerudo village, they learn Ganondorf broke the tribe's law by entering the [[pyramid]] and stealing the powerful [[trident]] hidden inside. They make their own way across the desert, recovering the third Royal Jewel and freeing the sixth and final maiden from the pyramid. Returning to the main area of Hyrule, they find it [[Frozen Hyrule|frozen]] by dark magic. They recover the final Royal Jewel and free Princess Zelda from the [[Temple of Ice]] before making their way up the [[Tower of Winds]]. | |||
At the top, the Links make their way across the [[Realm of the Heavens]], where they stem the creation of Shadow Links before entering the [[Palace of Winds]] to defeat Vaati. Once Vaati is destroyed, the Tower of Winds begins to crumble, and when they reach the bottom, Ganon appears and attacks them. Together, the Links, Zelda, and the maidens defeat Ganon and seal him in the Four Sword, returning it to its pedestal. | |||
==Characters== | |||
{|class=wikitable | |||
!Sprite | |||
!Name | |||
!Description | |||
|- | |||
|align=center| | |||
|[[Link]]s | |||
| | |||
|- | |||
|align=center| | |||
|[[Princess Zelda]] | |||
| | |||
|- | |||
|align=center| | |||
|[[Shrine Maidens]] | |||
| | |||
|- | |||
|align=center| | |||
|[[Kaepora Gaebora]] | |||
| | |||
|- | |||
|align=center| | |||
|[[Tingle]] | |||
| | |||
|- | |||
|align=center| | |||
|[[Fairy Queen|Great Fairy]] | |||
| | |||
|- | |||
|align=center| | |||
|[[Malon]] | |||
| | |||
|- | |||
|align=center| | |||
|[[Talon]] | |||
| | |||
|- | |||
|align=center| | |||
|[[Knights of Hyrule]] | |||
| | |||
|- | |||
|align=center| | |||
|[[Dampé]] | |||
| | |||
|} | |||
==Species== | |||
*[[Human]] | |||
*[[Great Fairy]] | |||
*[[Goron]] | |||
*[[Deku Scrub]] | |||
*[[Gerudo]] | |||
*[[Zuna]] | |||
==Enemies and minibosses== | |||
{|class=wikitable | |||
!Sprite | |||
!Name | |||
!Description | |||
|- | |||
|align=center|[[File:FSA Airokku.png]] | |||
|[[Airokku]] | |||
| | |||
|- | |||
|align=center|[[File:FSA Arrgi.png]] [[File:FSA Arrgi open.png]] | |||
|[[Arrgi]] | |||
| | |||
|- | |||
|align=center|[[File:FSA Armos.png]] | |||
|[[Armos]] | |||
| | |||
|- | |||
|align=center|[[File:FSA Armos Knight.png]] | |||
|[[Armos Knight]] | |||
| | |||
|- | |||
|align=center|[[File:FSA Ball and Chain Soldier gold.png]] [[File:FSA Ball and Chain Soldier red.png]] [[File:FSA Ball and Chain Soldier gray.png]] [[File:FSA Ball and Chain Soldier blue.png]] | |||
|[[Ball and Chain Trooper|Ball and Chain Soldier]] | |||
| | |||
|- | |||
|align=center|[[File:FSA Beamos.png]] | |||
|[[Beamos]] | |||
| | |||
|- | |||
|align=center|[[File:FSA Bee.png]] | |||
|[[Bee]] | |||
| | |||
|- | |||
|align=center|[[File:FSA Dark Stalfos.png|60px|class=sprite]] | |||
|[[Big Dark Stalfos]] | |||
| | |||
|- | |||
|align=center|[[File:FSA Bomb Soldier blue.png]] [[File:FSA Bomb Soldier green.png]] | |||
|[[Bomb Soldier]] | |||
| | |||
|- | |||
|align=center|[[File:FSA Bombchu.png]] | |||
|[[Bombchu]] | |||
| | |||
|- | |||
|align=center|[[File:FSA Bubble.png]] | |||
|[[Bubble]] | |||
| | |||
|- | |||
|align=center|[[File:FSA Buzz Blob.png]] | |||
|[[Buzz Blob]] | |||
| | |||
|- | |||
|align=center|[[File:FSA Chain Chomp.png]] | |||
|[[Chain Chomp]] | |||
| | |||
|- | |||
|align=center|[[File:FSA Cheep Cheep.png]] | |||
|[[Cheep Cheep]] | |||
| | |||
|- | |||
|align=center|[[File:FSA Darknut blue.png]] [[File:FSA Darknut green.png]] [[File:FSA Darknut red.png]] | |||
|[[Darknut|Chief Soldier]] | |||
| | |||
|- | |||
|align=center|[[File:FSA Deadrock.png]] [[File:FSA Deadrock petrified.png]] | |||
|[[Deadrock]] | |||
| | |||
|- | |||
|align=center|[[File:FSA Dodongo.png]] | |||
|[[Dodongo]] | |||
| | |||
|- | |||
|align=center|[[File:FSA Eyegore.png]] | |||
|[[Eyegore]] | |||
| | |||
|- | |||
|align=center|[[File:FSA Floormaster.png]] | |||
|[[Floormaster|Floor Master]] | |||
| | |||
|- | |||
|align=center|[[File:FSA Force Like.png]] | |||
|[[Force Like]] | |||
| | |||
|- | |||
|align=center| | |||
|[[Force Soldier]] | |||
| | |||
|- | |||
|align=center|[[File:FSA Frosteye.png]] | |||
|[[Frosteye]] | |||
| | |||
|- | |||
|align=center|[[File:FSA Geldman.png]] | |||
|[[Geldman]] | |||
| | |||
|- | |||
|align=center|[[File:FSA Ghini.png]] | |||
|[[Ghini]] | |||
| | |||
|- | |||
|align=center|[[File:FSA Giant Ghini.png]] | |||
|[[Giant Ghini]] | |||
| | |||
|- | |||
|align=center|[[File:FSA Gibdo tan.png]] [[File:FSA Gibdo white.png]] | |||
|[[Gibdo]] | |||
| | |||
|- | |||
|align=center|[[File:FSA Gohma.png]] | |||
|[[Gohma]] | |||
| | |||
|- | |||
|align=center|[[File:FSA Hardhat Beetle.png]] | |||
|[[Hardhat Beetle]] | |||
| | |||
|- | |||
|align=center|[[File:FSA Hinox.png]] | |||
|[[Hinox]] | |||
| | |||
|- | |||
|align=center|[[File:FSA Keese blue.png]] [[File:FSA Keese red.png]] | |||
|[[Keese]] | |||
| | |||
|- | |||
|align=center|[[File:FSA Bow Soldier green.png]] | |||
|[[Bow Guard|Knight Archer]] | |||
| | |||
|- | |||
|align=center|[[File:FSA Leever green.png]] [[File:FSA Leever red.png]] | |||
|[[Leever]] | |||
| | |||
|- | |||
|align=center|[[File:Manhandla FSA sprite.png]] | |||
|[[Manhandla (The Legend of Zelda: Four Swords)|Manhandla]] | |||
| | |||
|- | |||
|align=center|[[File:FSA Moldorm.png]] | |||
|[[Moldorm (The Legend of Zelda: A Link to the Past)|Moldorm]] | |||
| | |||
|- | |||
|align=center|[[File:FSA Octorok red.png]] [[File:FSA Octorok blue.png]] [[File:FSA Octorok purple.png]] | |||
|[[Octorok]] | |||
| | |||
|- | |||
|align=center|[[File:FSA Pengator.png]] | |||
|[[Pengator]] | |||
| | |||
|- | |||
|align=center|[[File:FSA Rat.png]] | |||
|[[Rat]] | |||
| | |||
|- | |||
|align=center|[[File:FSA Rope red.png]] | |||
|[[Rope]] | |||
| | |||
|- | |||
|align=center|[[File:FSA Sand Crab.png]] | |||
|[[Sand Crab]] | |||
| | |||
|- | |||
|align=center|[[File:FSA Devalant.png]] | |||
|[[Devalant|Sand Worm]] | |||
| | |||
|- | |||
|align=center|[[File:FSA Shadow Link.png]] | |||
|[[Shadow Link]] | |||
| | |||
|- | |||
|align=center|[[File:FSA Zol blue.png]] [[File:FSA Zol green.png]] | |||
|[[Slime]] | |||
| | |||
|- | |||
|align=center|[[File:FSA Popo.png]] | |||
|[[Popo|Snake Bushel]] | |||
| | |||
|- | |||
|align=center|[[File:FSA Soldier blue.png]] [[File:FSA Soldier yellow.png]] [[File:FSA Soldier green.png]] [[File:FSA Soldier red.png]] | |||
|[[Guard (enemy)|Soldier]] | |||
| | |||
|- | |||
|align=center|[[File:FSA Stalfos.png]] [[File:FSA Stalfos skull.png]] | |||
|[[Stalfos]] | |||
| | |||
|- | |||
|align=center|[[File:FSA Dark Stalfos.png]] | |||
|[[Sutarunakku]] | |||
| | |||
|- | |||
|align=center|[[File:FSA Sword Soldier green.png]] [[File:FSA Sword Soldier gray.png]] | |||
|[[Sword Guard|Sword Soldier]] | |||
| | |||
|- | |||
|align=center|[[File:FSA Tektite red.png]] [[File:FSA Tektite blue.png]] | |||
|[[Tektite]] | |||
| | |||
|- | |||
|align=center|[[File:FSA Terrorpin yellow.png]] [[File:FSA Terrorpin green.png]] [[File:FSA Terrorpin red.png]] [[File:FSA Terrorpin blue.png]] [[File:FSA Terrorpin purple.png]] | |||
|[[Terrorpin]] | |||
| | |||
|- | |||
|align=center|[[File:FSA Vulture.png]] | |||
|[[Vulture]] | |||
| | |||
|- | |||
|align=center|[[File:FSA Wallmaster.png]] | |||
|[[Wallmaster (The Legend of Zelda: A Link to the Past)|Wallmaster]] | |||
| | |||
|- | |||
|align=center|[[File:FSA Wizzrobe.png]] | |||
|[[Wizzrobe]] | |||
| | |||
|- | |||
|align=center|[[File:FSA Ropa.png]] | |||
|[[Ropa|Worm Basket]] | |||
| | |||
|- | |||
|align=center|[[File:FSA Zora.png]] | |||
|[[Zora]] | |||
| | |||
|} | |||
===Obstacles=== | |||
{|class=wikitable | |||
!Sprite | |||
!Name | |||
!Description | |||
|- | |||
|align=center|[[File:FSA Ball.png]] | |||
|[[Ball]] | |||
| | |||
|- | |||
|align=center| | |||
|[[Big Bomb]] | |||
| | |||
|- | |||
|align=center|[[File:FSA Boulder fall.png]] [[File:FSA Boulder roll.png]] | |||
|[[Boulder]] | |||
| | |||
|- | |||
|align=center|[[File:FSA Bumper.png]] | |||
|[[Bumper]] | |||
| | |||
|- | |||
|align=center| | |||
|[[Flying Pot]] | |||
| | |||
|- | |||
|align=center| | |||
|[[Flying Tile]] | |||
| | |||
|- | |||
|align=center|[[File:FSA Gargantuan Ball.png]] | |||
|[[Gargantuan Ball]] | |||
| | |||
|- | |||
|align=center|[[File:FSA Sea Urchin.png]] | |||
|[[Sea Urchin]] | |||
| | |||
|- | |||
|align=center|[[File:FSA Snowball.png]] [[File:FSA Frog Snowball.png]] | |||
|[[Snowball]] | |||
| | |||
|- | |||
|align=center|[[File:FSA Stone Elevator.png]] | |||
|[[Stone Elevator]] | |||
| | |||
|- | |||
|align=center|[[File:FSA Dog statue.png]] | |||
|[[Stone statue]] | |||
| | |||
|- | |||
|align=center|[[File:FSA Thwomp.png]] | |||
|[[Thwomp (big)|Thwomp]] | |||
| | |||
|- | |||
|align=center|[[File:FSA Trap.png]] | |||
|[[Trap]] | |||
| | |||
|} | |||
==Bosses== | |||
{|class="wikitable sortable" | |||
!class=unsortable|Sprite | |||
!Name | |||
!class=unsortable|Location | |||
!class=unsortable|Description | |||
|- | |||
|align=center|[[File:FSA Phantom Ganon.png]] | |||
|[[Phantom Ganon]] | |||
|[[Hyrule Castle]] | |||
| | |||
|- | |||
|align=center|[[File:FSA Stone Arrghus covered.png]] | |||
|[[Stone Arrghus]] | |||
|[[Eastern Palace|Eastern Temple]] | |||
| | |||
|- | |||
|align=center|[[File:FSA Helmaroc masked.png]] | |||
|[[Helmaroc King]] | |||
|[[The Mountain Path]] | |||
| | |||
|- | |||
|align=center|[[File:FSA Dodongo.png]] [[File:FSA Dodongo.png]] [[File:FSA Dodongo.png]] | |||
|[[Dodongo]]s | |||
|[[Tower of Flames]] | |||
| | |||
|- | |||
|align=center|[[File:FSA Mask Poe.png]] | |||
|[[Big Poe (The Swamp)|Big Poe]] | |||
|[[The Swamp]] | |||
| | |||
|- | |||
|align=center|[[File:FSA Big Poe.png]] [[File:FSA Poe GBA.png]] | |||
|[[Big Poe]] and [[Poe]] | |||
|[[Infiltration of Hyrule Castle]] | |||
| | |||
|- | |||
|align=center|[[File:FSA Gohma.png]] | |||
|[[Gohma]] | |||
|[[Lost Woods]] | |||
| | |||
|- | |||
|align=center|[[File:FSA Phantom Ganon.png]][[File:FSA Phantom Ganon.png]][[File:FSA Phantom Ganon.png]][[File:FSA Phantom Ganon.png]] | |||
|Phantom Ganon | |||
|[[Temple of Darkness]] | |||
| | |||
|- | |||
|align=center|[[File:FSA Big Moldorm.png]] | |||
|[[Moldorm (boss)|Big Moldorm]] | |||
|[[Pyramid]] | |||
| | |||
|- | |||
|align=center|[[File:FSA Frostare fly.png]] | |||
|[[Frostare]] | |||
|[[Tower of Winds]] | |||
| | |||
|- | |||
|align=center|[[File:FSA Big Dodongo.png]] | |||
|[[Big Dodongo]] | |||
|[[Realm of the Heavens]] | |||
| | |||
|- | |||
|align=center|[[File:FSA Vaati.png]] | |||
|[[Vaati]] | |||
|[[Palace of Winds]] | |||
| | |||
|- | |||
|align=center|[[File:FSA Ganon.png]] | |||
|[[Ganon]] | |||
|Tower of Winds (return) | |||
| | |||
|} | |||
==Gallery== | |||
{{main-gallery}} | |||
<gallery> | |||
FSA logo EN.jpg|Logo | |||
FSA main group art.jpg|Group artwork of the four Links | |||
FSA Japan box art.jpg|Japanese front box art | |||
FSA title screen.png|Title screen | |||
FSA Vaati GBA.png|[[Vaati]] Game Boy Advance sprite | |||
</gallery> | |||
{{Stub}} | {{Stub}} | ||
| Line 18: | Line 449: | ||
{{FSA}} | {{FSA}} | ||
[[Category:The Legend of Zelda: Four Swords Adventures|*]] | [[Category:The Legend of Zelda: Four Swords Adventures|*]] | ||
[[Category:The Legend of Zelda series]] | [[Category:The Legend of Zelda series]] | ||
[[Category:Home console games]] | |||
[[Category:2000s games]] | |||
Latest revision as of 18:18, March 5, 2022
| The Legend of Zelda: Four Swords Adventures | |||
|---|---|---|---|

| |||
| Developer(s) | Nintendo EAD | ||
| Publisher(s) | Nintendo | ||
| Release date | |||
| Genre(s) | Action-adventure | ||
| Rating(s) |
| ||
| Console(s) | Nintendo GameCube Game Boy Advance (with Link Cable) | ||
| Mode(s) | Single player, 2-4 players | ||
| Media | Disc | ||
| Input | GameCube controller Game Boy Advance | ||
The Legend of Zelda: Four Swords Adventures is a Nintendo GameCube title and the sequel to The Legend of Zelda: Four Swords. The game was both developed and published by Nintendo. It was first released in Japan and North America in 2004 and in Europe and Australia in 2005. The game's main gimmick is how the Nintendo GameCube–Game Boy Advance Link Cable can be used as a controller instead of a traditional Nintendo GameCube Controller. Early in production, it was intended as a prequel to The Legend of Zelda: A Link to the Past, and several graphical and setting similarities remain from that in the final game.
Plot[edit]
The game takes place an unspecified amount of time after Four Swords, where the seal keeping Vaati in the Four Sword is beginning to weaken. Princess Zelda and the six Shrine Maidens gather at Hyrule Castle with Link to renew the seal, but when they open the portal to the Four Sword Sanctuary, Shadow Link leaps out before trapping each of the girls in a crystal and sending them away. Link follows Shadow Link through the portal and is left with no choice but to draw the sword, releasing Vaati, who promptly sends him away with a tornado.
The now-split Link wakes up near Lake Hylia, where he is instructed to return to Hyrule Castle by Kaepora Gaebora and is repeatedly accosted by an increasing amount of Shadow Links. They arrive and defeat Phantom Ganon, freeing one of the maidens. The continue on through Hyrule, freeing two others from the Eastern Temple and Tower of Flames, before Kaepora Gaebora tells them the castle has been invaded yet again. On the way back, they discover the four Knights of Hyrule carrying the Royal Jewels have been killed and turned into Big Dark Stalfos. They defeat and free the first of these before continuing back to Hyrule Castle, where they free the fourth maiden.
Finding part of Hyrule has been covered in darkness, the Links travel to the Temple of Darkness in the Lost Woods, where they hear from the local Deku Scrubs that another villain named Ganon, who is much more powerful than Vaati, is on the move. On the way, they recover another Royal Jewel, and in the temple, they free the fifth maiden. She tells them that "Ganon" sounds similar to Ganondorf of the Gerudo society, so they head next to the Desert of Doubt.
At the Gerudo village, they learn Ganondorf broke the tribe's law by entering the pyramid and stealing the powerful trident hidden inside. They make their own way across the desert, recovering the third Royal Jewel and freeing the sixth and final maiden from the pyramid. Returning to the main area of Hyrule, they find it frozen by dark magic. They recover the final Royal Jewel and free Princess Zelda from the Temple of Ice before making their way up the Tower of Winds.
At the top, the Links make their way across the Realm of the Heavens, where they stem the creation of Shadow Links before entering the Palace of Winds to defeat Vaati. Once Vaati is destroyed, the Tower of Winds begins to crumble, and when they reach the bottom, Ganon appears and attacks them. Together, the Links, Zelda, and the maidens defeat Ganon and seal him in the Four Sword, returning it to its pedestal.
Characters[edit]
| Sprite | Name | Description |
|---|---|---|
| Links | ||
| Princess Zelda | ||
| Shrine Maidens | ||
| Kaepora Gaebora | ||
| Tingle | ||
| Great Fairy | ||
| Malon | ||
| Talon | ||
| Knights of Hyrule | ||
| Dampé |
Species[edit]
Enemies and minibosses[edit]

Obstacles[edit]
| Sprite | Name | Description |
|---|---|---|
| Ball | ||
| Big Bomb | ||
| Boulder | ||
| Bumper | ||
| Flying Pot | ||
| Flying Tile | ||
| Gargantuan Ball | ||
| Sea Urchin | ||

|
Snowball | |
| Stone Elevator | ||
| Stone statue | ||
| Thwomp | ||
| Trap |
Bosses[edit]
| Sprite | Name | Location | Description |
|---|---|---|---|

|
Phantom Ganon | Hyrule Castle | |

|
Stone Arrghus | Eastern Temple | |

|
Helmaroc King | The Mountain Path | |
| Dodongos | Tower of Flames | ||

|
Big Poe | The Swamp | |
 |
Big Poe and Poe | Infiltration of Hyrule Castle | |
| Gohma | Lost Woods | ||
|
|
Phantom Ganon | Temple of Darkness | |

|
Big Moldorm | Pyramid | |

|
Frostare | Tower of Winds | |

|
Big Dodongo | Realm of the Heavens | |

|
Vaati | Palace of Winds | |

|
Ganon | Tower of Winds (return) |
Gallery[edit]
- For this subject's image gallery, see Gallery:The Legend of Zelda: Four Swords Adventures.
Logo
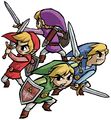
Group artwork of the four Links
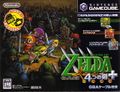
Japanese front box art
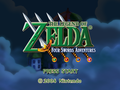
Title screen

Vaati Game Boy Advance sprite


 This article is a stub. You can help Triforce Wiki by expanding it.