| Don't like the ads? Then create an account! Users with accounts have more options than anonymous users. |
The Legend of Zelda: Majora's Mask
It has been requested that additional images be uploaded for this article. Remove this only when the image(s) have been uploaded for this article.
| The Legend of Zelda: Majora's Mask | |||||||||
|---|---|---|---|---|---|---|---|---|---|

| |||||||||
| Developer(s) | Nintendo EAD | ||||||||
| Publisher(s) | Nintendo | ||||||||
| Release date | Nintendo 64: Virtual Console (Wii): Virtual Console (Wii U): | ||||||||
| Genre(s) | Action-adventure | ||||||||
| Rating(s) |
| ||||||||
| Console(s) | Nintendo 64, Virtual Console (Wii, Wii U) | ||||||||
| Mode(s) | Single player | ||||||||
The Legend of Zelda: Majora's Mask is the sixth installment of The Legend of Zelda series. It was released for the Nintendo 64 in 2000, as a direct follow-up to The Legend of Zelda: Ocarina of Time. This game has a very strong emphasis on sidequests not seen to the same extent in the series again until The Legend of Zelda: Breath of the Wild, to the point of only having four major dungeons. The game has a markedly darker and more cynical tone than its predecessor. In 2015, a remake of the game was released for the Nintendo 3DS, titled The Legend of Zelda: Majora's Mask 3D.
The Legend of Zelda: Majora's Mask is one of three games that requires the use of the Expansion Pak, with the other two being Donkey Kong 64 and Perfect Dark. Of the three, The Legend of Zelda: Majora's Mask is the only one to be directly developed by Nintendo, while the other two were developed by Rare. In 2009, the game was ported to the Wii Virtual Console, and was priced at 1,000 Wii Points (1,200 in Japan). In 2016, it released for the Wii U Virtual Console.
The game was planned to be released for the iQue Player but ended up being canceled.
Story[edit]


The game starts with young Link atop Epona deep in the Lost Woods, as he searches for "a dear friend." Suddenly, two fairies named Tatl and Tael ambush him, causing him to be knocked off Epona and fall unconscious. Skull Kid then appears, wearing a sinister-looking mask, and finds the Ocarina of Time, which he plays with until Link wakes up, leading to a chase where Skull Kid poorly attempts to ride Epona and Link holds on to one of her legs, but eventually ends up kicked off near a large stump. Following further on foot, Link falls deep underground after going inside a large tree, before landing on a large flower. Skull Kid taunts him and tells him he got rid of Epona, but then his tone turns more sinister and he curses Link, turning him into a Deku Scrub (called "Deku Link"). He then laughs and leaves him like this, but accidentally leaves Tatl behind, forcing Link and Tatl into an uneasy alliance. After travelling underground and passing a withered tree closely resembling Deku Link, the two travel through a winding, warping tunnel and end up inside the bottom of a Clock Tower. As they leave the Clock Tower, they are met by the eccentric Happy Mask Salesman, who tells them that "a very important mask" was taken from him by the same imp that stole "a very important item" from Link, and that if Link recovers his "very important item," he will tell him how to restore his body, but he will be leaving town in three days.
Once they leave the Clock Tower, Link finds himself in a town called Clock Town in the land of Termina, where many of the inhabitants bear an uncanny resemblance to people he had met previously in Hyrule. Tatl suggests finding the nearby Great Fairy, but when they go to her, they find she has been split into Stray Fairies by Skull Kid. They also find that Skull Kid has caused trouble for many other people recently, compounded by the impending threat of an eerie-faced moon that seems to be growing closer each passing day. However, the things Link is able to do while as a Deku Scrub are highly limited, as many of the adults treat him as a small child, not even letting him leave town. After meeting a few people, such as the Bombers, Professor Shikashi, and a Business Scrub, Link is able to make it to the top of the Clock Tower where Skull Kid is, but only on midnight of the third day, when the Moon is dangerously close. Once he gets up to it, Skull Kid taunts them, while Tael tells them to find "the four" who are at the "swamp, mountain, ocean, canyon," for which Skull Kid insults and slaps him, to Tatl's shock. Skull Kid then screams, bringing the Moon down faster. Deku Link hits him with a bubble, causing him to drop the ocarina, and once Link picks it up, he remembers the Song of Time. While playing it as Deku Link, the ocarina changes into Deku Pipes, with the song itself reversing time for three days back to when they emerged from the Clock Tower, with only Link and Tatl remembering any of it. Realizing that the ocarina was the item the Mask Salesman spoke of, they return to him, and he teaches them the Song of Healing, turning the Deku curse into a removable mask, and thus restoring Link. However, once he realizes Link has not recovered the mask, he abruptly turns angry and frantic, telling them that the mask is of an evil power and will cause terrible things to happen, with an unwitting Skull Kid having stolen it while he was asleep.
Now restored, Link is able to leave town, and the game becomes vastly more open-ended regarding sidequest availability. He can find many masks by speaking to people around Termina, as it is an important tradition for their yearly carnival. Tatl urges him to go down to the Southern Swamp, like Tael said. Along the way, they find a drawing on a tree that Skull Kid, Tatl, and Tael made the day the two fairies met him, where he was crying over losing his best friends. Heading further south, they find the swamp's waters poisoned and filled with hostile Big Octos. Several monkeys direct Link to help an old hag, Koume, who takes Link via boat to the Deku Palace, where he learns the Deku King is holding a monkey prisoner on the false charge of killing his daughter, with only the Deku Butler believing him. In reality, the monkey was helping her to try and find the source of the poison. Link sneaks through the Palace Gardens and gets into the monkey's cage, where after realizing Link wants to help, he teaches him the Sonata of Awakening used to open Woodfall Temple. The Deku King overhears and is further enraged, as the song is only known to members of the royal family, and decides to start the monkey's punishment via repeatedly dipping him in a huge pot of boiling water. Link travels to Woodfall, first meeting a more cynical version of the owl Kaepora Gaebora, who teaches him the Song of Soaring to warp around. After getting to Woodfall Temple and playing the Sonata, Link travels through the dark temple full of poison and dangerous creatures, eventually finding the Fairy Bow and fighting the masked jungle warrior Odolwa. After defeating Odolwa and taking his mask, Link and Tatl are taken to a strange ethereal world where a large, mostly hidden being teaches them the Oath to Order song before transporting them back. In a nearby room, they find the Deku Princess, who they take back to the palace. Seeing what her father is doing, she angrily tackles him and demands the guards free the monkey, after which everything calms down and all is forgiven.
Link's next destination is the mountains of Snowhead, where the Goron tribe lives. When they get there, Link and Tatl discover it is in the midst of a lengthy winter, with many of the Gorons freezing due to the chilly air coming out of Snowhead Temple. Kaepora meets Link again and has him follow him across an abyss full of invisible platforms, with shed feathers acting as a guide. At a cave on the other side, Link discovers the Lens of Truth, allowing him to see both the platforms on the way back and the ghost of the Goron champion, Darmani III, who was blown off the mountain while trying to investigate the temple. He leads Link to his grave to be absolutely sure he can see him, and asks him to bring him back to life with his magic, and if that is too much to instead heal his sorrow. After using the Song of Healing, Darmani becomes the Goron Mask, which allows Link to take his form as Goron Link. When speaking with other Gorons, they will assume he is Darmani. After finding the Goron Elder and unfreezing him with Hot Springwater, he reveals he too is trying to go to the temple despite his feeble condition, but upon learning his son is crying because he misses him, he teaches him part of the Goron Lullaby to calm him down. When Goron Link plays it, the young Goron teaches him the rest, while every Goron in the room other than Link falls asleep. Making his way up to the temple and using the Lens of Truth, it is revealed that the wind is actually an apparently possessed Biggoron violently exhaling repeatedly. After playing the Goron's Lullaby, Biggoron falls asleep and falls off the mountain, allowing Link to access the temple, where he finds several ice and speed-related puzzles, the Fire Arrows, and a giant mechanical beast called Goht. After defeating Goht, Link is transported to another ethereal world and meets another Giant, who tells them they are "guardians," which Tatl interprets as meaning they are protective gods. Before they can get any further information, they are transported outside, where spring has returned. Before moving on to the next area, Link must first gain access to the Powder Keg item from Medigoron.
On another first day, Link must buy a Powder Keg and use it on the boulder blocking Milk Road, allowing access to Romani Ranch, where they find Epona under the care of Romani, who teaches them how to shoot arrows from horseback, re-teaches Link Epona's Song, and asks them to help deal with strange aliens that always show up before the carnival to steal their cows. Now having Epona, Link can travel to Great Bay, where the Zora tribe lives. Noticing a strange form in the water surrounded by seagulls, Link finds the wounded musician Mikau, lead guitarist of the popular Zora band, The Indigo-gos. He tells them through song that a Zora girl laid some eggs, which were then stolen by pirates, causing her to lose her voice, and he was wounded trying to get them back. He then asks someone to "heal his soul," prompting Link to play the Song of Healing and turn him into the Zora Mask. When he travels to Zora Hall, he sees that the Zora girl in the song referred to the lead singer of the band, Lulu, and that the water has recently fogged up from a storm at the Great Bay Temple, making it hard for the Zoras to navigate. Link must then go to the Pirates' Fortress and recover some of the eggs (as well as the Hookshot item), though he learns there are some more in Pinnacle Rock. After rescuing a seahorse from a fisherman, he is led to Pinnacle Rock where he can find the rest of the eggs being guarded by giant sea snakes. Taking all the eggs to the Lakeside Laboratory, where they hatch and form a musical staff, teaching him the New Wave Bossa Nova. Once he plays this to Lulu, her voice returns, and a nearby island is revealed to be a giant, ancient turtle. The turtle takes Link to the temple, where he must navigate many water-powered mechanisms and find the Ice Arrows, eventually leading him to fight a giant fish called Gyorg. Once it is beaten, Link is again trasported to another Giant's realm. The Giant urges them to "Help our friend," which Tatl takes to mean the remaining Giant.
The final region is the Ikana Canyon. Before they can reach the top, a hooded man tells them they cannot pass without a specific mask from two evil-hearted men near Milk Road, referring to the Gorman Brothers. After bating them in a horse race, they give him the Garo Mask. Once he obtains that, the man lets him pass, and warns him of the evil spirits lingering ahead. When he reaches the top of the canyon, he discovers many types of wandering spirits, and must deal with them in a variety of ways. Eventually, after collecting the Captain's Hat, re-learning the Song of Storms, collecting the Gibdo Mask, making it through the maze beneath the Well, and collecting the Mirror Shield, he makes it to the heart of Ikana Castle, where he does battle with the king, Igos du Ikana. After defeating him, Ikana realizes that fighting petty battles is what destroyed their civilization in the first place, and urges Link to travel to the top of Stone Tower Temple to stem the evil within. To assist him, he teaches Link the Elegy of Emptiness, which creates a statue of Link's current form in his place. Once he gets through the Stone Tower Temple, he is accosted by the Garo Master, and after defeating him, gains the Light Arrow. Link must them travel outside the temple and use the new arrow on a large red jewel, flipping the temple upside-down. Link must then navigate the flipped version of the temple, creating a vastly different experience, and eventually make it to the same room he obtained the arrows in, leading to a portal that leads to a fight against the gargantuan Twinmold, a task made easier if he obtained the Giant's Mask prior. Once that is done, they are taken to the final Giant, who tells them to call the Giants when they need them, and then sadly tells them to forgive their friend, confusing Tatl. Once that is done, a portal appears over Ikana Canyon and seemingly takes away the evil spirits, allowing them to rest peacefully.
Making their way to the top of the Clock Tower on the third night again, Link uses the Oath to Order to call the giants, and they successfully stop the Moon from falling while Skull Kid faints. Tatl scolds Skull Kid for everything he had done, but Tael tells her it was the mask's doing, to which another voice agrees, calling Skull Kid weak. The two realize now that the mask itself is speaking, as it drops Skull Kid and says he is no longer useful, before going into the Moon to possess it instead. The Moon starts being brought down even harder, straining the Giants, while Link resolves to go into the Moon himself to destroy the mask. When he gets there, he discovers a large clearing with a single tree. Around the tree are four children wearing the bosses' masks playing, while another, wearing Majora's Mask, sits lonely under the tree. If Link has collected every mask he can, he can trade them to the playing children and play a game of hide-and-seek with each, taking him to a challenge themed after one of the dungeons. Once all except the main three transformation masks are traded away, Link can obtain the Fierce Deity Mask. Regardless, talking with the child under the tree leads to a fight against Majora's Mask, who throughout the battle transforms into Majora's Incarnation and then Majora's Wrath. Once Majora's Wrath is destroyed, the Moon vanishes in a beam of rainbow light, while Link, Epona, Tatl, Tael, Skull Kid, and the four Giants appear in Termina Field. It is shown that the friends Skull Kid thought had abandoned him were the Giants, and they tell him they still always thought of him as a friend in spite of all he had done before walking off again while Skull Kid cries in shame. Skull Kid then asks Link if he wants to be his friend and indirectly reveals he is the same one who Link played Saria's Song to in the previous game. The Happy Mask Salesman then appears with Majora's Mask and reveals that the evil has now left it, before disappearing. Skull Kid and his friends travel to the carnival as the credits roll, and everyone who Link helped in his adventure is shown celebrating. At the end of it, it is shown that the gnarled, Deku-like tree from the opening is actually the Deku Butler's missing son, and Link is shown traveling further in his search for Navi, with the stump now having a drawing of Link, Skull Kid, Tatl, Tael, and the Giants on it.
Gameplay[edit]
 This section is a stub. You can help Triforce Wiki by expanding it.
The Legend of Zelda: Majora's Mask reuses many of the gameplay mechanics from The Legend of Zelda: Ocarina of Time, while introducing two major mechanics: masks and the three-day cycle. Masks allow Link to access different areas and quests, and some masks transform Link, allowing him to perform unique actions. The transformation masks include the Deku Mask, Goron Mask, Zora Mask, and Fierce Deity's Mask.
The Legend of Zelda: Majora's Mask operates on a three-day cycle, where Link has 72 in-game hours before the moon crashes into Termina, requiring him to play the Song of Time to reset the cycle. Several quests are time-sensitive, taking place at specific times on specific days. Each time the cycle is reset, Link loses all disposable items, such as Rupees and arrows, as well as any quest progress, as everyone except Link, Tatl, and the Happy Mask Salesman are reset to how they were at the beginning of the cycle, with no knowledge of anything Link did previously. Additionally, progress in dungeons is reset alongside the cycle.
Characters[edit]
Link[edit]
| Link | ||||
|---|---|---|---|---|
| Link | Deku Link | Goron Link | Zora Link | Fierce Deity Link |

|

|

|

|

|
| Link's default Hylian form is well-rounded compare to the more specialized others, and can use a majority of items (some of which are upgradable), wear masks, and ride Epona. He is more acrobatic and athletic than the previous game. He plays the Ocarina of Time. | Deku Link takes the form of the missing Deku Butler's son. He can spin to stun enemies and gain speed, use Deku Flowers to glide a short distance, and perform a few hops on the water. Using magic, he can also shoot weak bubble projectiles. Deku Link is light enough to stand on lily pads in the swamp but is not heavy enough to press switches. He cannot swim, and is extremely vulnerable to fire. This is his youngest form, so he is always treated as a young child. He plays the Deku Pipes. | Goron Link takes the form of Darmani III, the Goron hero. He can curl up and roll around on the ground, allowing him to move very fast. By using magic, he grows spikes when going fast enough, allowing him to go even faster and defeat enemies, though bumping into objects causes him to be knocked away. Goron Link walks slowly, but this is compensated by his strength. Goron Link can also walk on lava for a short period without taking damage, but his girth in this form does not allow him to swim, causing him to sink instantly. He plays the Goron Drums. | Zora Link takes the form of Mikau, guitarist of The Indigo-Go's. He is skilled at swimming, and can quickly swim through the water. He can toss his blade-like fins like a boomerang, and, using magic, can generate a force field while swimming. Zora Link is vulnerable to fire and ice attacks, and his on-land attacks are low-power. He plays the Zora Guitar. | Fierce Deity Link is a huge adult form of Link that is difficult to unlock. He wields the massive Fierce Deity Sword, which is four times as powerful than the Kokiri Sword, and by using magic power can shoot Sword Beams. However, this form is exclusive to boss battles and can only be gained directly before the final boss, who can be defeated easily with it. He is the only form to not get an instrument. |
Heroes[edit]


Supporting characters[edit]
The following characters directly assist Link during his adventure.


Minor characters[edit]
- ???
- Anju's grandmother
- Anju's mother
- Aveil
- Banker
- Bean Seller
- Beavers
- Biggoron
- Bomb Shop Owner
- Captain Viscen
- Carpenters
- Composer Brothers
- Cursed Rich Man
- Dampe
- Deku Butler
- Deku Butler's son
- Deku King
- Deku Princess
- Fisherman
- Frog Choir
- Gabora
- Giant Turtle
- Gorman Brothers
- Gorman Troupe
- Goron Elder
- Goron Elder's son
- Grog
- Honey & Darling
- Indigo-Go's
- Kamaro
- Keaton
- Kotake
- Koume
- Link (Goron)
- Madame Aroma
- Mamamu Yan
- Man from Curiosity Shop
- Mayor Dotour
- Medigoron
- Moon Children
- Monkey
- Mr. Barten
- Old Lady from Bomb Shop
- Pamela
- Pamela's father
- Part-Timer
- Pierre
- Poe Collector
- Postman
- Professor at the Marine Research Lab
- Professor Shikashi
- Receptionist
- Sakon
- Shiro
- Soldiers
- Swamp Shooting Gallery Guy
- Swamp Tourist Center Guide
- Swordsman
- Town Shooting Gallery Owner
- Treasure Chest Shop Owner
- Zubora
Locations[edit]
Main locations[edit]
- Lost Woods
- Clock Town
- Termina Field
- Southern Swamp
- Snowhead
- Milk Road
- Great Bay
- Ikana Canyon
- Moon
Dungeons[edit]
Every major dungeon in The Legend of Zelda: Majora's Mask takes place in a temple. Whenever Link completes one dungeon, the surrounding area is affected, and the availability of optional sidequests changes. Progress in dungeons and the changes to its surrounding area when completed are lost whenever the three-day cycle is reset. Once a dungeon's boss is defeated, a platform lights up in the dungeon's entrance that allows Link to quickly return to the boss room.
Major dungeons are in bold. Minor dungeons are in italics.
| Name | Description | Item | Reward | Miniboss | Boss |
|---|---|---|---|---|---|
| Portal | The link between Hyrule and Termina, this is an underground passage underneath the Lost Woods that eventually leads to the interior of the Clock Tower. It is used as a training stage for Deku Link and cannot be revisited. | None | |||
| Astral Observatory | The observatory of Professor Shikashi is accessed by a connected sewer passageway, containing Skulltulas as the first enemies encountered in the game. It is initially visited while stuck as Deku Link. | Moon's Tear |
None | ||
| Deku Palace | The Deku King's castle in the Southern Swamp, it must be navigated to speak with the monkey he has imprisoned. The route is more complicated in the Japanese version. | Magic Beans |
Sonata of Awakening |
None | |
| Woodfall Temple | Located in the Woodfall area of the Southern Swamp, the Woodfall Temple requires the use of Deku Link. Once the boss, Odolwa, is defeated, the poison clears from the swamp, and Link meets and rescues the Deku Princess. | Hero's Bow |
Odolwa's Remains Oath to Order |
Dinofols Gekko and Snapper |
Odolwa |
| Deku Shrine (optional) | The Deku Shrine is a series of passages under the Deku Palace that the Deku Butler challenges Link to a race through. | Mask of Scents |
None | ||
| Swamp Spider House (optional) | A shrine infested with Gold Skulltulas, defeating them all saves the man in the foyer who was cursed into a Skulltula-like monster from them. | Mast of Truth |
None | ||
| Snowhead Temple | Located in Snowhead, the Snowhead Temple requires the use of Goron Link. The dungeon consists of a tall main room that must be scaled by using smaller, side rooms. Once the boss, Goht, is defeated, spring comes to Mountain Village. | Fire Arrow |
Goht's Remains |
Wizrobe (ice) | Goht |
| Pirates' Fortress | The stronghold of the Gerudo pirates, Link passes through here while collecting the Zora Eggs. | Hookshot |
Pirate | None | |
| Great Bay Temple | Located in the Great Bay, the Great Bay Temple requires the use of Zora Link. The dungeon consists of room of flowing water, and the direction of the water flow must be changed to access certain rooms. Once the boss, Gyorg, is defeated, the murky water in the Great Bay clears up. | Ice Arrow |
Gyorg's Remains |
Arrghus Gekko and Mad Jelly |
Gyorg |
| Oceanside Spider House (optional) | A shelter full of Gold Skulltulas. Depending on what day it is cleared, Link gets either a wallet upgrade or Rupees. Stalchildren also investigate a secret held within. | Wallet upgrade |
None | ||
| Sakon's Hideout (optional) | The lair of Sakon the thief and the climax of the Anju and Kafei sidequest. The player alternates between Link and Kafei, with Link defeating enemies and Kafei performing block puzzles. | Couple's Mask |
None | ||
| Beneath the Graveyard | Three headstones of the Ikana Graveyard can be opened by the resident Stalchildren, one on each night. Each leads to a different challenge with a different reward, though only the first night's is required. | Song of Storms |
Iron Knuckle | None | |
Piece of Heart |
Iron Knuckle | ||||
Empty Bottle |
Big Poe | ||||
| Beneath the Well | A Gibdo-infested maze underneath Ikana Village. Each Gibdo can only be passed by giving them whatever items they want. | Mirror Shield |
None | ||
| Ancient Castle of Ikana | The fortified palace of Igos du Ikana, former ruler of the Ikana Kingdom before its fall. It is filled with the undead remnants of his former subjects. | Elegy of Emptiness |
Wizrobe (fire) Igos du Ikana's lackeys Igos du Ikana |
None | |
| Stone Tower Temple | Located at the top of the Stone Tower in Ikana Canyon, the Stone Tower Temple requires the use of all of Link's transformations as well as the Elegy of Emptiness. Additionally, the dungeon can be inverted, making what was previously the ceiling of a room the floor. Once the boss, Twinmold, is defeated, the curse over Ikana Canyon is lifted. | Light Arrow Giant's Mask |
Twinmold's Remains |
Garo Master Gomess |
Twinmold |
| Secret Shrine (optional) | A hidden cave behind a waterfall at Ikana Canyon, the initial minibosses from each temple return for another shot at defeating Link. Each requires a certain amount of hearts to face. | Piece of Heart |
Dinofols Wizrobe (ice) Wart Garo Master |
None | |
| Moon | The final area of the game is a subspace area inside of the Moon itself. From an idyllic meadow, four optional challenges can be accessed - along with the final battle - by speaking to the different Moon Children. | Fierce Deity's Mask |
Completion | Dinofols Iron Knuckle Garo Master |
Majora's Mask Majora's Incarnation Majora's Wrath |
Enemies[edit]
| Name | Description | Locations |
|---|---|---|
| Armos | Statues that come to life when touched. Defeating them causes them to spin crazily and explode. | Stone Tower Temple |
| Arrgi | Orbs that surround and protect Wart. Attacking them causes them to fall off, and attacking them on the ground defeats them. | Great Bay Temple Secret Shrine |
| Bad Bat | Large counterparts to Keese which fly around in different habitats and pursue Link. | Beneath the Graveyard Ikana Graveyard Road to Southern Swamp Termina Field |
| Beamos | Rotating security apparatuses that shoot lasers from their single eyes. Explosions stun or defeat them. | Stone Tower Stone Tower Temple |
| Big Octo | Large relatives of Octoroks that block paths and suck Link in to spit him out if approached. | Deku Palace Southern Swamp |
| Big Poe | A giant ghost that tries to spin into Link. Defeating it grants a Big Poe Soul. | Beneath the Graveyard |
| Bio Deku Baba (1) | A mutation of Deku Babas that hang upside-down from lily pads or the ceiling, cutting them causes them to adapt to an insectoid running shape. | Great Bay Temple Grotto |
| Bio Deku Baba (2) | Some Bio Deku Babas start out in their mobile form. | Stone Tower Temple |
| Black Boe | Small and weak balls of darkness that inhabit shadowy places and attack in groups. | Beneath the Well Mountain Village Oceanside Spider House Grotto (Japanese releases only) Stone Tower Temple Woodfall Temple |
| Blue Bubble | Flying, burning skulls that curse Link if they successfully touch him with their fire. | Ancient Castle of Ikana Ikana Canyon Road to Ikana Stone Tower Temple Termina Field |
| Blue Chuchu | A rare Chuchu that contains no items, but respawns regardless. It becomes a platform when frozen by an Ice Arrow. | Great Bay Temple |
| Blue Tektite | Hopping four-legged spiders that can adapt to live under snowdrifts or on the surface of water. | Goron Village Great Bay Temple Road to Goron Village Road to Mountain Village |
| Cucco | Seemingly average chickens that call an aggressive invincible flock if attacked enough. | Astral Observatory Barn Cucco Shack East Clock Town |
| Death Armos | Floating Armos that slam the ground when approached. They can be beaten by flipping them with a Light Arrow, causing them to slam their heads into the ground. | Stone Tower Temple |
| Deep Python | Enormous lunging sea snakes that guard some Zora Eggs and the seahorse's partner, they can be attacked with Zora Link's electicity. | Pinnacle Rock |
| Deku Baba (1) | Withered, respawning plants that chomp upwards endlessly and give a Deku Stick on defeat. | Beneath the Well Grotto Southern Swamp |
| Deku Baba (2) | Aggressive carnivorous plants that give either Deku Nuts or a Deku Stick depending on how they are defeated. | Beneath the Well Grotto (Japanese releases only) Road to Goron Village Road to Southern Swamp Sakon's Hideout Southern Swamp Termina Field Woodfall Temple |
| Deku Scrub | Guards that patrol the Deku Palace's inner gardens throwing Link out if they spot him. At night, their vision is marked by a chain of orbs. | Deku Palace |
| Desbreko | Giant Skullfish that are accompanied by a school of their smaller counterparts, they attempt to latch onto Link. | Great Bay Temple Pirates' Fortress |
| Dexihand | Gangly skeletal arms that attempt to grab Link and throw him. | Beneath the Well Great Bay Temple Stone Tower Temple |
| Dinofols | Machete-wielding, fire-breathing lizard people that are quite aggressive, but not very durable. | Snowhead Temple |
| Dodongo | Ceratopsian dinosaurs in two sizes and strengths, they can be defeated with enough hits to the tail or bombs fed. | Grotto Termina Field |
| Dog | Ordinary terrier dogs that are normally friendly and docile, but attack Deku Link on sight. | Doggy Racetrack Romani Ranch South Clock Town Swamp Spider House |
| Dragonfly | Huge, electric insects that try to zap Link with their tails. | Southern Swamp Stone Tower Temple Woodfall Woodfall Temple |
| Eeno | Living snow-piles that attack with snowballs they produce. Larger ones split into three smaller ones upon defeat unless melted. | Termina Field Snowhead Temple |
| Eyegore | Living cycloptic statues that are weak in the giant eye. Depending on the individual, they may slam the ground or fire lasers. | Stone Tower Temple |
| Fire Keese | Keese that deal fire damage, making them especially dangerous to Deku Link. They can reignite using torches. | Beneath the Well Stone Tower |
| Floormaster | Giant hands that try to bash into Link. Defeating them causes them to split into three tiny ones which attempt to grab Link to grow back to full size. | Ancient Castle of Ikana |
| Freezard | Ice sculpture enemies that periodically breath icy breath forward. | Beneath the Well Snowhead Temple |
| Garo Robe | Restless spirits belonging to the footsoldier ninjas of the Garo tribe, they can be summoned in Ikana Canyon with the Garo's Mask. They attack with blades and give hints on defeat. | Ancient Castle of Ikana Ikana Canyon |
| Gerudo guard | Patrolling guards that throw Link out of Pirates' Fortress if he is spotted. Ones on-foot can be briefly stunned with Arrows or the Hookshot, but boating ones are invincible. | Pirates' Fortress |
| "Ghost" | Flatwoods-type aliens that raid Romani Ranch for their cows on the first night, they move slowly, but continuously respawn. | Romani Ranch |
| Giant Bee | Oversized hymenopterans that angrily attack if their beehives are destroyed, but act more docile if flying around normally. | Mountain Village Pirates' Fortress Swamp Spider House |
| Gibdo | Mummies with a paralyzing gaze and shriek, they can be spoken with using the Gibdo's Mask. | Beneath the Well Ikana Canyon |
| Gold Skulltula | Cursed spiders that haunt a few areas, wiping them out of those areas earns Link a reward. | Oceanside Spider House Swamp Spider House |
| Green Chuchu | Wobbly balls of slime that give a Magic Jar on defeat and respawn infinitely. | Great Bay Temple Stone Tower Temple Road to Southern Swamp Termina Field |
| Guay | Pointy-beaked crows that pursue Link through the air. | Ancient Castle of Ikana Ikana Canyon Road to Goron Village Stone Tower Temple Swamp Shooting Gallery Termina Field Zora Cape |
| Gyorg's fish | Aggressive schools of biting fish summoned by Gyorg. | Great Bay Temple |
| Hiploop (1) | Aggressive giant beetles that charge Link on sight. | Woodfall |
| Hiploop (2) | Aggressive giant beetles that wear iron masks for protection. These can be removed with the Hookshot. | Stone Tower Temple |
| Ice Keese | Frosty Keese that can freeze Link on contact. | Beneath the Well Road to Snowhead Snowhead |
| Keese | Bats found underground, often invisible. | Beneath the Graveyard |
| Leever | Spinning green organisms that burrow infinitely from sand. | Great Bay Termina Field Zora Cape |
| Like Like | Slimy tube-like creatures appearing in multiple sizes around and under Great Bay, they attempt to eat Link and take his Hero's Shield. | Great Bay Zora Cape |
| Mad Scrub | Aggressive Deku Scrubs that hide in Deku Flowers and spit nuts at Link. | Deku Palace Deku Shrine Swamp Shooting Gallery Woodfall |
| Mini Baba | Deku Baba sprouts that respawn infinitely and drop Deku Nuts on defeat. | Beneath the Well Deku Palace Grotto Southern Swamp Woods of Mystery |
| Moth | Swarming insects that like fire and will attack Link if he holds a lit Deku Stick, though will also surround lit bombs. | Woodfall Temple |
| Nejiron | Goron-like creatures that burrow up from the ground and try to explode on Link. | Road to Ikana Stone Tower Temple |
| Octorok | Giant octopuses that spit deflectable rocks at Link from the water. Freezing them with Ice Arrows turns them into platforms. | Great Bay Temple Ikana Canyon Southern Swamp Town Shooting Gallery |
| Odolwa's giant bug | Huge counterparts to the small bugs that are summoned by Odolwa as his minions. | Woodfall Temple |
| Pea Hat | A giant pineapple-like plant that attacks with its rotor-like leaves. | Grotto |
| Pea Hat Larva | Tiny Pea Hats that are spawned if the Pea Hat is attacked while it sleeps. | Grotto |
| Poe | Ghosts that attack Link over a bottomless pit. Targeting them causes them to become invisible and intangible briefly, and defeating them spawns a Poe Soul. | Stone Tower Temple |
| Real Bombchu | Giant rats that attack by running at Link with a pack of explosives, even running on walls and ceilings. | Great Bay Temple Road to Ikana Snowhead Temple Stone Tower Temple Termina Field |
| Red Bubble | Burning skulls that leap from lava pits and bounce around. | Snowhead Temple |
| Red Chuchu | Simple slimes that grant a Recovery Heart on defeat, and respawn endlessly. | Termina Field |
| ReDead | Zombies with a paralyzing gaze and scream, the ones in this game were dancers in life and will perform if Link wears the Garo's Mask, Captain's Hat, or Gibdo's Mask. | Ancient Castle of Ikana Stone Tower |
| Sakon | A greedy opportunistic thief, Sakon can only be fought when he steals a bag of supplies from the Old Lady from the Bomb Shop. Using the sword makes him drop the bag, but a projectile or explosion will kill him by blowing up the bag too. | North Clock Town |
| Shell Blade | Giant scallops that attack with their spiked hinges and can only be beaten by severing their internal muscle. | Great Bay Temple Pirates' Fortress |
| Skullfish | Aggressive fish skeletons that are found throughout Great Bay. They simply chase and bite Link. | Great Bay Great Bay Temple Pirates' Fortress Road to Goron Village Stone Tower Temple Zora Cape |
| Skulltula | Large spiders that descend from threads and alternate between their tough backs and soft bellies. Arrows and the Hookshot ignore their defenses completely. | Ancient Castle of Ikana Astral Observatory Beneath the Graveyard Beneath the Well Lone Peak Shrine Great Bay Temple Grotto Woodfall Temple |
| Skullwalltula | Tiny Skulltulas that climb on walls. Only in Japanese releases are they on climbable walls where they can attack Link. | Grotto |
| Snapper | Large tortoises that spin in their shells at Link and can be beaten by attacking their undersides. | Road to Goron Village Woods of Mystery Woodfall Temple |
| Stalchild | Small skeletons that are the former soldiers of Captain Keeta. Using the Captain's Hat allows Link to talk to them. | Ikana Graveyard Oceanside Spider House |
| Takkuri | A durable thieving bird that steals not just Rupees, but swords and bottles. Managing to defeat it grants a Huge Rupee worth 200. | Termina Field |
| Wallmaster | Giant hands that fall from the ceiling to grab Link and take him back to the dungeon's start. | Beneath the Graveyard Beneath the Well |
| White Boe | Weak balls of whiteness that hide among snow and attack in groups. | Mountain Village Road to Mountain Village Snowhead Snowhead Temple |
| White Wolfos | Strong Wolfos found in icy areas, they have the same claw attacks and weak tails as their normal counterparts. | Road to Goron Village Snowhead Snowhead Temple |
| Wizrobe (fire) | A wizard that casts fire magic at Link and warps between different tiles on the floor. After enough hits, it summons transparent copies to confuse Link. | Stone Tower Temple |
| Wolfos | Humanoid wolves that attack and defend with their claws, but have very weak tails. | Road to Goron Village Road to Southern Swamp Sakon's Hideout Swamp Shooting Gallery |
| Yellow Chuchu | Weak slime balls that respawn infinitely and give Arrows on defeat. | Great Bay Temple Stone Tower Temple |
Obstacles[edit]
| Name | Description | Locations |
|---|---|---|
| Ball | Giant rolling iron spheres that travel along straight paths. | Deku Shrine |
| Bomb Flower | Explosive plants that explode if accidentally run over by Goron Link. | Goron Racetrack |
| Boulder | Giant rolling rocks that appear in infinite amounts. | Stone Tower |
| Falling rock | Lava rocks that fall drop from the ceiling. | Stone Tower Temple |
| Fire Barrier (1) | Walls of fire that sprout up if approached. | Deku Shrine Ikana Graveyard |
| Fire Barrier (2) | Rings of fire that surround certain objects until a criterion is met, and sometimes surround a battle. | Ancient Castle of Ikana Ikana Canyon Ikana Graveyard Stone Tower Stone Tower Temple Woodfall Temple |
| Fire Eye | Eye Switches that stay closed most of the time, opening to unleash a stream of fire when approached. Hitting the open eye with an arrow destroys them. | Beneath the Well |
| Flying Pot | Seemingly normal pots that launch at Link when he approaches. | Stone Tower Temple |
| Icicle | Hanging icy stalactites that fall when Link comes near. | Beneath the Well Snowhead Temple |
| Lava | Molten rock that is incredibly hot. Goron Link can briefly stand in it without problem. | Snowhead Temple Stone Tower Temple |
| Lily pad | Ordinary lily pads mutated into carnivorous creatures by poison. They attempt to eat Deku Link if he stands on one too long. Once the poison dissipates, they change back to normal. | Woodfall Temple |
| Mine | Spiked balls that hang from chains, knocking them into each other causes them to explode. | Pirates' Fortress Stone Tower Temple |
| Poison | Contaminated water that hurts to swim in. Once the turbine in Woodfall Temple begins spinning, it starts being purified, finishing when the temple is completed. | Deku Palace Southern Swamp Woodfall Temple Woodfall |
| Rolling Pin | A long cylindrical shaft covered in spikes, they move between two locations infinitely. | Beneath the Well Stone Tower Temple |
| Snowball | Rolling snow piles that act similar to boulders. One has a rolling Goron inside. | Goron Village Road to Snowhead Snowhead |
| Spiked club | A large, swinging, two, ended bat that Deku Link must avoid as he travels between nearby Deku Flowers. | Moon |
| Trap | Spinning spiked disks that move back-and-forth. | Beneath the Well |
| Wind | Biggoron's breath, which threatens to push Link into the abyss as it did Darmani III. | Snowhead |
Minibosses[edit]
Unlike the previous game, only a few minibosses are also encountered as enemies.
| Name | Description | Locations |
|---|---|---|
| Skull Kid | Skull Kid's battle is encountered fairly early in the game, where Deku Link must shoot a bubble at him in order to get back the Ocarina of Time. However, he cannot be defeated until the Four Giants are summoned, which defeats him automatically. | Clock Tower |
| Dinofols | Fire-breathing reptilian warriors that wield machetes. | Woodfall Temple Secret Shrine Moon |
| Gekko and Snapper | Gekkos are large, mutated frogs that can punch and climb on the ceiling, but are generally weak. Midway through the battle, it calls a large Snapper - a spinning turtle enemy - to help him, and it must be flipped over to knock the Gekko off and attack it some more. When they are defeated, Gekko shrinks into a normal frog, and Snapper shrinks into nothing. | Woodfall Temple |
| Wizrobe (ice) | Sorcerers that specialize in icy magic, they teleport between glowing floor tiles, and after enough damage, summon transparent duplicates to confuse Link. | Snowhead Temple Secret Shrine |
| Gorman Brothers | A pair of unscrupulous horse trainers that force Cremia to take her milk delivery onto their property before attacking her wagon. Link needs to use arrows to protect her cargo from them, though if he has the Circus Leader's Mask, they will not be able to successfully attack. Their battle is optional. | Gorman Track |
| Pirate | Three color-coded Gerudo warriors that wield a pair of scimitars. If Link is hit by their twirling attack, he is thrown out. | Pirates' Fortress |
| Wart | A giant one-eyed mass that protects itself with a layer of Arrgi. Attacking the eye when it is open disorients it and scatters its Arrgi, after which it begins sliding around the room chaotically. | Great Bay Temple Secret Shrine |
| Gekko and Mad Jelly | A second Gekko that attacks within a giant blob of slime that it uses to capture Link. By using an Ice Arrow while it is on the ceiling, Mad Jelly temporarily shatters into several smaller slimes and Gekko is forced out. | Great Bay Temple |
| Captain Keeta | A giant skeleton of the former military captain of the Ikana Kingdom, Captain Keeta at first runs up a hill protected by his Stalchild minions and Fire Barriers. He can be slowed down by hitting him with arrows (especially Ice Arrows), and once reached and attacked, he starts fighting directly and occasionally leaping away. | Ikana Graveyard |
| Iron Knuckle | Heavily armored warriors that wield massive axes, they are very powerful and tough, but also very slow. Hitting them with enough effective attacks makes them lose their outer armor, making them less tough, but also faster. | Beneath the Graveyard Moon |
| Big Poe | A giant ghost that Dampe accidentally digs up. It attacks by spinning at Link, and can be damaged by hitting it with an arrow when it stops. It drops a Big Poe Soul on defeat. This battle is optional. | Beneath the Graveyard |
| Amy | The first of the optional four ghost sisters, Amy spins at Link with her torch and briefly turns invisible and intangible after each hit. | Spirit House |
| Beth and Jo | The second and third of the optional ghost sisters, they act just like Amy, but fight as a team. | Spirit House |
| Meg | The final of the optional ghost sisters, she summons three duplicates and surrounds Link with them before attacking. To damage her, the correct Meg must be attacked with an arrow. | Spirit House |
| Sharp | The cursed elder of the Composer Brothers, Sharp conducts a song that slowly drains the life from Link. The only way to stop him is to play the Song of Storms. | Spring Water Cave |
| Pamela's father | A scientist who was turned partway into a Gibdo after an expedition Beneath the Well. Attempting to attack him directly prompts Pamela to stop Link and kick him out. Link needs to play the Song of Healing, restoring the scientist and turning his curse into the Gibdo's Mask. | Music Box House |
| Wizrobe (fire) | A sorcerer who specializes in fire magic, it warps between special floor tiles before casting at Link. Midway through the battle, it starts summoning copies to confuse Link. | Ancient Castle of Ikana |
| Igos du Ikana's lackeys | A pair of Stalfos that act as Igos du Ikana's bodyguards. Knocking them out only causes them to temporarily crumble; to defeat them, light from the window must be reflected onto their bone piles. | Ancient Castle of Ikana |
| Igos du Ikana | The former king of the Ikana Kingdom, he steps in once his lackeys are beaten. He acts similar, but has more abilities, including making his head fly to bite at Link. | Ancient Castle of Ikana |
| Garo Master | A leader of the Garo tribe, he acts similar to the Garo Robes, but has more moves, such as vanishing and dropping at Link to surprise him. | Stone Tower Temple Secret Shrine Moon |
| Gomess | A reaper-like figure made of a swarm of Bad Bats, Gomess can only be attacked by first using a Light Arrow to scatter the bats, then attacking its glowing core. | Stone Tower Temple |
Bosses[edit]
In fitting with the game's theme, each of the temple bosses wears a mask, which the player obtains upon defeating them.
| Temple bosses | |||||||||||
|---|---|---|---|---|---|---|---|---|---|---|---|
| Masked Jungle Warrior | Masked Mechanical Monster | Gargantuan Masked Fish | Giant Masked Insect | ||||||||

|

|

|

| ||||||||
| Odolwa | Goht | Gyorg | Twinmold | ||||||||
| Woodfall Temple | Snowhead Temple | Great Bay Temple | Stone Tower Temple | ||||||||
| A quick-moving tribal giant that attacks with a sword and shield and summons fire and insect minions to battle Link. It can be damaged simply through attacking it normally, which stuns it for more hits to be made. | A robotic bull-like creature that tramples forwards around a track-like room, using rocks, electricity, stalactites, and bombs to slow down Link. Goron Link can chase it down and damage it quickly and repeatedly, stunning it for further hits. | An enormous fish that leaps over and slams into the platform Link is on and attempts to eat him or summon small biting fish if he is in the water. Hitting it with a projectile stuns it, and then Zora Link can dive in to attack it for damage. | A pair of titanic Moldorms that leap out and into the sand. They can only be damaged on the heads or tail ends. The Giant's Mask allows Link to fight them at their own size. | ||||||||
| Final boss | |||||||||||

| |||||||||||
| Majora's Mask | Majora's Incarnation | Majora's Wrath | |||||||||
| Moon | |||||||||||
| The final boss's first form summons the masks of the previous four bosses from Link and attacks Link in a larger, tentacled version of its normal appearance. It attacks by twirling at Link and shooting lasers that can be reflected with the Mirror Shield. Its underside it its weak point, and attacking that will knock it to the ground. | After enough damage, the mask grows limbs and a small head and starts dancing. It attacks by moonwalking or running around the room, occasionally stopping to launch several small balls of light from its hands. Its whole body is now fairly weak, though, and attacking it will knock it over for more hits. | After more damage, the mask gains size and muscle mass and it grows a larger, more ghastly head. It now acts more serious, attacking with large energy balls, a pair of giant whips, and spiked tops. It tries to dodge whenever Link attacks it, but managing to hit it still stuns it. Defeating it destroys the evil in the mask for good. | |||||||||
Items[edit]
Pickups[edit]
These items fill Link's various meters and counters.
| Icon | Name | Description |
|---|---|---|
| Gold Skulltula Spirit | Link receives one of these after defeating a Gold Skulltula. There are 30 of them in the Swamp Spider House and the Great Bay Spider House each. Completing the former earns Link the Mask of Truth as a reward, but completing the latter earns him a wallet upgrade if it is completed on Day 1 - varying amounts of Rupees if completed on Day 2 or 3. | |
| Magic Jar | These small green phials restore Link's Magic Meter. | |
| Recovery Heart | These small red hearts restore Link's Health Meter. | |
| Rupee | Colorful gemstones used as money. Green ones are worth one, blue ones are worth five, red ones are worth 20, purple ones are worth 50, silver ones are worth 100, and huge ones are worth 200. |
Map[edit]
Most map items appear only in dungeons. Any Dungeon Maps or Compasses collected by Link remains with him, even if he repeats the three-day cycle.
| Icon | Name | Description |
|---|---|---|
| Boss Key | These are one-time use items that unlock the boss room of a dungeon. Link can always obtain a Boss Key by defeating the second mini-boss of a dungeon. | |
| Compass | These allow Link to see where treasure chests are located in a dungeon. They also show the direction Link is facing and where he entered the room. | |
| Dungeon Map | These show which rooms Link has visited and which room he is currently in. When paired with a Compass, a Dungeon Map shows which rooms have treasure chests, which rooms have not yet been visited, and the dungeon boss's room. | |
| Small Key | One-time use items that unlock certain regular doors within dungeons. They are usually found within treasure chests. | |
| Stray Fairy | Shattered pieces of Great Fairies, 15 are lost in each of the temples. The Great Fairy's Mask prompts them to fly at Link, but some must be released from bubbles, pots, or enemies first. |
Select Item[edit]
Many of the items from The Legend of Zelda: Ocarina of Time return in The Legend of Zelda: Majora's Mask, along with some new ones, such as the Powder Keg and Pictograph Box. The player can assign items to either ![]() ,
, ![]() , and
, and ![]() from the Select Item Subscreen.
from the Select Item Subscreen.
- Unique items
There are a few weapons and other items that Link only obtains once.
| Icon | Name | Description |
|---|---|---|
| Great Fairy's Sword | This sword is the game's analogue to Biggoron's Sword from The Legend of Zelda: Ocarina of Time. The Great Fairy's Sword is a large, purple sword with black roses etched in its blade. Because of how large the Great Fairy's Sword is, Link has to use both hands to carry it, therefore preventing him from simultaneously equipping a shield. Unlike the Kokiri Sword and its variants, the Great Fairy's Sword is a C-button item. The sword is obtained from the Fairy of Kindness in Ikana Village. | |
| Hero's Bow | A bow that Link can shoot arrows from to hit enemies or switches at a distance. It is the main treasure of the Woodfall Temple, and is the game's counterpart to The Legend of Zelda: Ocarina of Time's Fairy Bow, which can only be used by adult Link. | |
| Hookshot | A set of spring-loaded, trigger-pulled hooks attached to lengthy chains. It can attack enemies from a distance as well as latch onto certain surfaces (like wood) to pull Link across large distances. The Hookshot has a different design than in The Legend of Zelda: Ocarina of Time, and it has a longer chain, about the length of the Longshot from said game. It is found in the Pirates' Fortress. | |
| Ocarina of Time | A gift that Link received from Princess Zelda during the events of The Legend of Zelda: Ocarina of Time. During his adventure in The Legend of Zelda: Majora's Mask, Link must use the Ocarina of Time to manipulate time, travel across Termina, and uncover the four dungeons. Link's other forms use different instruments, but they all use the Ocarina's icon. It must first be recovered from Skull Kid. | |
| Pictograph Box | Link can use this to take pictures of scenery and people, although the Pictograph Box can only hold one photo at a time. Koume gives this as a present to Link for rescuing her from the Woods of Mystery. |
- Replenishable items
There are some weapons and other items that Link can carry more than one of. Whenever Link restarts the three-day cycle, he loses all of these items.
| Icon | Name | Description |
|---|---|---|
| Arrow | Fast, long-range ammunition for the Hero's Bow, they are a common random drop. | |
| Bomb | These are explosive items that are used to blow up fake walls, but they can also take out enemies, dealing two units of damage per hit to them. Link can only use them while he is in his normal form. Bombs can be obtained as random drops or from buying them from certain shops. | |
| Bombchu | Mouselike explosives that quickly move forward and can run up walls and ceilings. They are very rare, only found in a few shops and Treasure Chests and never as a random drop. | |
| Deku Nut | Deku Nuts are natural stun grenades, and Link can use them in his regular form. Deku Nuts can be obtained as random drops or from buying them from certain shops. As Deku Link, he can shoot Deku Nuts in midair after launching out of a Deku Flower. | |
| Deku Stick | These are long wooden branches that Link can swing by pressing the designated C button. Deku Sticks inflict twice as much damage as the Kokiri Sword, and twice moreover when aflame. They can mainly be acquired by destroying Deku Babas while they are in an upright position. Link can also use them as a torch to carry fire to objects that require kindling. The disadvantage of using a Deku Stick is that they break on impact. | |
| Magic Bean | These can be purchased from the Bean Seller in the Deku Palace or the Business Scrub in Southern Swamp for 10 Rupees. In his normal form, Link can plant Magic Beans in plots of soft soil. He can then pour water into the soil, causing the Magic Bean to grow rapidly. Link can then use the plant that formed to ride around the area he is in for a short time. | |
| Powder Keg | A powerful bomb that can only be used by Goron Link and purchased at the Bomb Shop in West Clock Town or from Medigoron in Goron Village. Because of their size, Goron Link can only carry one at a time. Powder Kegs are used to blow up very large rocks, such as the one blocking the entrance to Romani Ranch. |
- Magic items
These items all consume magic to use.
| Icon | Name | Description |
|---|---|---|
| Fire Arrow | These are flaming arrows that Link can shoot from the Hero's Bow, although at the cost of magic power. When launched at a target, a Fire Arrow bursts into flames, burning any enemies who come in contact. Fire Arrows can also be used to light torches and melt ice. Fire Arrows are the main treasure in Snowhead Temple. | |
| Ice Arrow | These are icy arrows that Link can shoot from the Hero's Bow, although at the cost of magic power. Ice Arrows are used to freeze enemies into ice blocks or freeze water. They play a larger role than in The Legend of Zelda: Ocarina of Time, and are the main dungeon item of the Great Bay Temple. | |
| Lens of Truth | A special eyepiece found in Goron Village's Lone Peak Shrine. Whenever the item is active, Link can see invisible enemies, hidden walls and fake walls. The Lens of Truth is required to see Darmani's ghost to obtain the Goron Mask. | |
| Light Arrow | These are arrows with the power of light that Link can shoot from the Hero's Bow, although at the cost of magic power (more than what the Fire and Ice Arrows require). Light Arrows are the main item in the Stone Tower Temple. Their main use is to turn the temple upside down, but are also used to defeat the mini-boss Gomess. |
- Bottles
Bottles are used to contain certain items, such as potions. There are six Empty Bottles for Link to collect. Resetting the three-day cycle allows Link to keep his Empty Bottles, including if any were stolen, but he does not retain their contents.
| Icon | Name | Description |
|---|---|---|
| Empty Bottle | Obtained from Kotake in the Southern Swamp or Woods of Mystery. It comes filled with Red Potion to deliver to Koume. | |
| Empty Bottle | Obtained from winning the Goron Race. It comes filled with Gold Dust. | |
| Empty Bottle | Given from Romani after protecting Romani Ranch from the invading "ghosts." It comes filled with Milk. | |
| Empty Bottle | Obtained from beating both of the Beaver Bros. down the Waterfall Rapids. | |
| Empty Bottle | Found by defeating the Big Poe found Beneath the Graveyard on the final day. | |
| Empty Bottle | Obtained from Madame Aroma as a reward for giving her the Special Delivery to Mama. It comes filled with Chateau Romani. |
- Bottled items
There are some items that Link cannot obtain unless he has a bottle to store it in.
| Icon | Name | Description |
|---|---|---|
| Big Poe Soul | Spirits obtained from a defeated Big Poe. A particular Gibdo wants one. | |
| Blue Potion | A special potion that fills health and magic and dispels curses. It can be bought at the Magic Hags' Potion Shop after providing a Magic Mushroom, or from the Business Scrub in Ikana Canyon. | |
| Bug | Small blue insects found in the wild in various places, especially under rocks. Setting them loose near soft soil usually prompts them to burrow into it, digging out an item or Gold Skulltula. | |
| Chateau Romani | Fine aged milk that renders the Magic Meter unlimited for the remainder of the three-day cycle. It is a Milk Bar exclusive. | |
| Deku Princess | The Deku Scrub princess, rescued from Woodfall Temple and needing returned to the Deku Palace. | |
| Fairy | Magical beings that restore health, even upon Link running out of health. They can be found in a few locations, with most Owl Statues having one hidden nearby. | |
| Fish | Small aquatic creatures, they are primarily used to feed the pair of goosefish-like fish in the Marine Research Lab. | |
| Gold Dust | A valuable substance vital in forging the Gilded Sword. It is the prize of the Goron Races. | |
| Green Potion | A medicine that boosts magic power, it ca be bought at the Magic Hags' Potion Shop and the Business Scrub in Zora Hall. | |
| Hot Spring Water | Hot water used to melt ice. Keeping it too long cools it into normal Spring Water. Most hot springs are in caves around Snowhead. | |
| Magic Mushroom | Aromatic fungi that can be detected with the Mask of Scents in various hiding places and sold to the Magic Hags' Potion Shop. | |
| Milk | A drink that restores a small amount of health, but can be used twice. It can be bought in a few places or, using Epona's Song, taken from cows directly. | |
| Poe Soul | Spirits dropped by defeated Poes, they can be "drank" for a random effect to Link's health meter. | |
| Red Potion | A medicine that boosts health, it ca be bought at the Magic Hags' Potion Shop. | |
| Seahorse | A fish known for its distinctive appearance and affectionate courtship habits, it guides Link to Pinnacle Rock after being saved from the Fisherman's Hut. | |
| Spring Water | Water is used to make Magic Beans grow. It can be found in many places. | |
| Zora Egg | Lulu's seven unhatched children, they must be rescued from the Pirates' Fortress and Pinnacle Rock and united in the Marine Research Lab. |
- Sidequest items
These items are shown, traded, and delivered to other characters as part of sidequests. They are lost when the three-day cycle is reset. All paper or parchment items can be alternatively given to ??? in the Stock Pot Inn.
| Icon | Name | Description |
|---|---|---|
| Slot 1 | ||
| Moon's Tear | A sparkling gem that falls from the Moon's eye after viewing it from the Astral Observatory. It is given to the Business Scrub in South Clock Town in exchange for his Deku Flower. | |
| Land Title Deed | The deed to the Deku Flower of South Clock Town, obtained from the Business Scrub there. It is in turn given to the Business Scrub in Southern Swamp for his Deku Flower. | |
| Swamp Title Deed | The deed to the Deku Flower of Southern Swamp, obtained from the Business Scrub there. It is in turn given to the Business Scrub in Goron Village for his Deku Flower. | |
| Mountain Title Deed | The deed to the Deku Flower of Goron Village, obtained from the Business Scrub there. It is in turn given to the Business Scrub in Zora Hall for his Deku Flower. | |
| Ocean Title Deed | The deed to the Deku Flower of Zora Hall, obtained from the Business Scrub there. It is in turn given to the Business Scrub in Ikana Canyon for his Deku Flower. | |
| Slot 2 | ||
| Room Key | A key to one of the rooms in the Stock Pot Inn, which Anju can mistakenly give to Link if spoken with at the right time on the First Day. | |
| Special Delivery to Mama | A priority letter Kafei left with the man from the Curiosity Shop after following Sakon. It can be given directly to Madame Aroma in exchange for a bottle full of Chateau Romani, or to the Postman in exchange for his hat. | |
| Slot 3 | ||
| Letter to Kafei | A letter written by Anju for her fiance Kafei, it is obtained by agreeing to help her on the First Day and meeting her in the Stock Pot Inn's kitchen at midnight. It must be put in a postbox before the Postman's morning rounds. | |
| Pendant of Memories | Kafei's necklace, given to Link to deliver to Anju once Link meets him face-to-face. | |
Masks[edit]
There are a total of 24 masks in The Legend of Zelda: Majora's Mask. The total number of masks Link has collected is shown on the File Select screen. Masks range from being used in a single optional sidequest to being required to complete the game. They are equipped with ![]() ,
, ![]() , and
, and ![]() from the Masks Subscreen.
from the Masks Subscreen.
| Postman's Hat | All-Night Mask | Blast Mask | Stone Mask | Great Fairy's Mask | Deku Mask |
| This is given to Link by the Postman when he gives him the Special Delivery to Mama. Link can use it to look into postboxes, and gets a Piece of Heart upon doing it the first time. Any subsequent instances of doing this rewards Link with a single Rupee instead. | This mask can be bought at the Curiosity Shop for 500 Rupees, but only on the night of the Final Day if Sakon's robbery of the old lady from the Bomb Shop was stopped that cycle. Link can use the All-Night Mask to stay awake when hearing either of Anju's grandmother's long stories in the Stock Pot Inn. In doing so, Link can earn a Piece of Heart for both. | To obtain this mask, Link must recover the Bomb Shop lady's bag from Sakon, who steals it at North Clock Town around midnight on the First Day. The Blast Mask is used as an alternative for bombs, although its use always results in Link taking damage. | This mask allows Link to appear invisible to most enemies. Link can obtain the mask by giving a Red Potion to Shiro the invisible injured soldier near the entrance to Ikana Canyon. The Stone Mask is especially useful when avoiding Gerudo guards in Pirates' Fortress. | This mask is given to Link by the Great Fairy of Magic in North Clock Town if he rescues her a second time. The Great Fairy's Mask attracts Stray Fairies in the four temples like a magnet. Whenever there is a Stray Fairy somewhere in the room, the mask's hair glitters. Because some fairies are too far to get on foot, the mask is required to gather all of the Stray Fairies. | A mask that turns Link into a Deku Scrub. It is created in an early part of his journey, when he learns the Song of Healing and plays it to turn back into his normal form. |
| Keaton Mask | Bremen Mask | Bunny Hood | Don Gero's Mask | Mask of Scents | Goron Mask |
| Link can obtain this mask from the man from the Curiosity Shop at around 1 PM on the Final Day. Link can use it to attract Keatons from moving circles of bushes. Link can answer the Keatons' various trivia questions in exchange for prizes. | This mask is given to Link by simply talking to Guru-Guru in the Laundry Pool on the night of the First Day or Second Day. The Bremen Mask is used to create a catchy tune with the Ocarina of Time to attract animals (and even Igos du Ikana's lackeys), and is needed in order to obtain the Bunny Hood. | The Bunny Hood causes Link to run very fast, and can also help him perform long jumps more easily. Link can obtain the Bunny Hood from Grog at the Cucco Shack if he uses the Bremen Mask to march around the shack, causing the chicks to turn into Cuccos. | Link can get this mask by giving the starving Goron in the Mountain Village a Rock Sirloin from Goron Village. Don Gero's Mask allows Link to speak to the frogs that occasionally appear around Termina. | This pig mask is given to Link by the Deku Butler for completing his race challenge in Deku Shrine. Link wears the Mask of Scents to find Magic Mushrooms for Kotake's Blue Potion, which restores both health and magic. | A mask that turns Link into a Goron. It is created when Link plays the Song of Healing to heal Darmani. |
| Romani's Mask | Circus Leader's Mask | Kafei's Mask | Couple's Mask | Mask of Truth | Zora Mask |
| This mask is given to Link by helping out Romani and Cremia each in one three-day cycle. Link must first prevent the "ghosts" from abducting Romani during the night of the First Day by shooting them down. He must then protect Cremia from the Gorman Brothers as she goes out to deliver milk on the Second Day. If Link manages to successfully protect Cremia, she gives him Romani's Mask, which allows him to enter the Milk Bar. | Link receives this mask upon completing a soundcheck for Toto in the Milk Bar. Link must use all four of his transformations to accomplish this. In doing so, he obtains the Circus Leader's Mask. The mask resembles Gorman, the crying circus leader who joined the entertainment business to hear the song by the Indigo-Go's. When his brothers try to rob Cremia during the night of the Second Day, Link can wear the mask to stop them from attacking. | A mask resembling the face of Kafei. Link can obtain it by talking to Kafei's mother, Madame Aroma, in the Mayor's Residence in his regular form. The mask allows Link to begin the Kafei sidequest. | This is given to Link when he completes the lengthy Kafei sidequest. It is the combination of the masks of the sun and the moon and part of a Terminian wedding ceremony. The Couple's Mask is used once to stop the fighting in the Mayor's Residence and get a Piece of Heart. | This Sheikah mask is given to Link by completing the Swamp Spider House. Link can use the Mask of Truth to talk to Gossip Stones and animals. | A mask that turns Link into a Zora. It is created when Link plays the Song of Healing to Mikau, a Zora guitarist. |
| Kamaro's Mask | Gibdo's Mask | Garo's Mask | Captain's Hat | Giant's Mask | Fierce Deity's Mask |
| A mask resembling the face of Kamaro, the ghost dancer. Link can obtain this mask if he plays the Song of Healing to Kamaro, who is sitting atop a mushroom-shaped rock in the south side of Termina Field at night. Link can use the mask to create a dancing technique, which he can teach the Rosa Sisters for a Piece of Heart. | This is made when Link plays the Song of Healing to free Pamela's father in the Music Box House of his curse. Link uses the Gibdo's Mask to talk to Gibdos and distract ReDeads. It is mandatory in completing Beneath the Well. | The Gorman Brothers give this mask to Link if he beats them in a horse race with Epona around Gorman Track. It summons the spirits of Garo Robes in certain parts of Ikana Canyon, and also distracts ReDeads. Link needs the Garo's Mask in order to enter Ikana Canyon. | A mask designed in the likeness of Captain Keeta. It is in a treasure chest that Link can open by defeating Skull Keeta in the Ikana Graveyard. It is used to speak with and give orders to Stalchildren and distract ReDeads. It is required to go Beneath the Graveyard, which is mandatory to complete the game. | Link finds this mask within the Stone Tower Temple after defeating an Eyegore. The Giant's Mask is only used during the battle against Twinmold, and while Link wears it, his magic supply is consumed at a steady rate. | It can only be acquired once all 23 masks have been obtained, then giving the twenty non-transformation masks to all the children within the Moon, and then talking to the kid wearing Majora's Mask. Putting on the Fierce Deity Mask causes Link to transform into a very powerful warrior named Fierce Deity Link, who even appears older in age. |
Quest Status[edit]
| Icon | Name | Description |
|---|---|---|
| Bombers' Notebook | A schedule book obtained by Jim of the Bombers when inducted as a human, it is used to keep track of when various characters have some associated event. | |
| Heart Container | Link finds one at the end of each dungeon as a reward for defeating the boss. Collecting a Heart Container adds another heart to Link's health. There are only four in the game | |
| Map | In this game, rather than having maps of outdoor locations automatically, Link must purchase them from Tingle. There are six maps - one for each region of Termina - and purchasing a map within its own region gives it a discounted price. | |
| Piece of Heart | These are found all around Termina, and there are 52 Pieces of Hearts in total. If Link collects four Pieces of Hearts, another Heart Container is added to his health gauge. Whenever Link collects a Piece of Heart, his health is refilled. |
- Upgradables
There is some equipment that Link can upgrade later on in his adventure.
| Icon | Name | Description |
|---|---|---|
| Swords | ||
| Kokiri Sword | The Kokiri Sword is the most basic sword, and it returns from The Legend of Zelda: Ocarina of Time, albeit redesigned. During his journey, Link can upgrade it to a more powerful weapon. | |
| Razor Sword | This sword is a temporary form of the Kokiri Sword that inflicts twice as much damage. After defeating Goht or melting the ice on the forge at the Mountain Smithy, Link can obtain it for 100 Rupees at the Mountain Smithy in the Mountain Village. It loses its edge after 100 hits or when a three-day cycle is restarted, returning to the shape of the Kokiri Sword. | |
| Gilded Sword | A permanent upgrade to the Kokiri Sword with three times the strength. To acquire it, Link must go to the Mountain Village with the Gold Dust and give it to the Mountain Smithy, who then mends the Kokiri Sword into the Gilded Sword. | |
| Fierce Deity Sword | A massive, double-helix shaped sword four times as powerful as the Kokiri Sword, but only usable as Fierce Deity Link. It can shoot electrified sword beams, though this consumes magic. | |
| Shields | ||
| Hero's Shield | A metal shield that Link starts his journey with. It resembles the Hylian Shield from The Legend of Zelda: Ocarina of Time. Unlike the Hylian Shield, the Hero's Shield is small enough for Link to hold it with one hand, instead of crouch. | |
| Mirror Shield | A shield made of highly polished metal inscribed with the symbol of a screaming face. It is an upgrade of the Hero's Shield, and its reflective plate allows Link to reflect light onto light-sensitive switches, enemies, and blocks. It is the main treasure found Beneath the Well. | |
| Quivers | ||
| Quiver | This item comes with the Hero's Bow and is where Link keeps the arrows that he collects. It can carry up to 30 arrows. | |
| Big Quiver | The first upgrade is obtained in the Clock Town Shooting Gallery if Link can score 40 or more points, or at the Swamp Shooting Gallery, if Link gains at least 2,120 points. It can carry up to 40 arrows. | |
| Biggest Quiver | The second upgrade is also obtained by clearing whichever Shooting Gallery remains after getting the Big Quiver. The Biggest Quiver can hold up to 50 arrows. | |
| Bomb Bags | ||
| Bomb Bag | This is where Link keeps his bombs. The Bomb Bag carries up to 20 bombs. Link can buy it from the Bomb Shop in West Clock Town for 50 Rupees. | |
| Big Bomb Bag | The first upgrade carries up to 30 Bombs. It becomes available for purchase if Link recovers the Old Lady's sack of Bomb Bags from Sakon on the night of the First Day. If Link does not do this, he can instead purchase the Big Bomb Bag from the Curiosity Shop for 100 Rupees on the Final Day. | |
| Biggest Bomb Bag | The second upgrade carries up to 40 Bombs. Link can acquire it from the Business Scrub near Goron Village if he trades the Big Bomb Bag and 200 Rupees. | |
Link starts out with a Wallet that holds up to 99 Rupees. During his adventure, he can purchase two Wallet upgrades, which increase the maximum number of rupees he can carry.
| Icon | Name | Description |
|---|---|---|
| Adult's Wallet | The first upgrade to the Wallet, the Adult's Wallet, carries up to 200 Rupees. I is given to Link if he deposits a collective total of 200 Rupees in the Clock Town Bank, or acquires the 30 Gold Skulltula Spirits in the Oceanside Spider House on the First Day. | |
| Giant's Wallet | The second upgrade to the Wallet, the Giant's Wallet, can hold up to 500 Rupees, and is given after both of the above conditions have been met. |
Four upgrades are provided by Great Fairies.
| Name | Description |
|---|---|
| Magic Meter | The ability to use magic granted by the Great Fairy of Magic in North Clock Town. |
| Magic Spin Attack | A powerful attack granted by the Great Fairy of Power in Woodfall. |
| Magic power upgrade | A doubling of the Magic Meter granted by the Great Fairy of Wisdom in Snowhead. |
| Defensive power upgrade | A reinforcement of the Health Meter granted by the Great Fairy of Courage in Zora Cape. |
- Songs
Many songs can be learned and played on the instruments.
| Icon | Name | Input | Description |
|---|---|---|---|
| Song of Time | Restarts the three-day cycle and saves the game. It is learned from a memory of Princess Zelda upon recovering the Ocarina of Time. | ||
| Song of Healing | Releases tortured souls from suffering and turns them into masks. It is learned from the Happy Mask Salesman after going back in time the first time. | ||
| Epona's Song | Summons Epona to Link if she can reach him. It is learned from Romani in Romani Ranch on the First Day. | ||
| Song of Soaring | Allows Link to warp to any activated Owl Statue. It is learned from a plinth mentioned by Kaepora Gaebora near the entrance to Woodfall. | ||
| Song of Storms | Causes rain, making Magic Bean sprouts grow and dispelling curses. It is learned from Flat Beneath the Graveyard on the First Day. | ||
| Scarecrow's Song | Player-decided (eight notes) | Summons Pierre the scarecrow, who can be used as a Hookshot target. He must be taught at the Trading Post or Astral Observatory each cycle for it to work. | |
| Song of Double Time | Sends Link to the next 12-hour interval. It is alluded to by Pierre, but must be discovered for oneself by playing it. | ||
| Inverted Song of Time | Slows the passage of time down to 1/3 of the normal speed. Time-based character movements are also affected. It is alluded to by Pierre, but must be discovered for oneself by playing it. |
Some special songs are used to access the temples.
| Icon | Name | Input | Description |
|---|---|---|---|
| Sonata of Awakening | Awakens heavy sleepers and allows access to Woodfall Temple. It is taught by the monkey imprisoned in the Deku Palace. | ||
| Goron Lullaby | Puts Gorons to sleep and allows access to Snowhead Temple. It is partially taught by the Goron Elder, with his son finishing it. | ||
| New Wave Bossa Nova | Gives Lulu her voice back and allows access to Great Bay Temple. It is taught by the baby Zoras when they are gathered. | ||
| Elegy of Emptiness | Causes Link to shed a hollow shell of his current body and allows access to Stone Tower Temple. It is taught by Igos du Ikana after his defeat. | ||
| Oath to Order | Summons the Four Giants to the Clock Tower and allows access to the Moon. It is taught by the first of the giants. |
- Remains
Remains are masks that Link acquires from defeating a boss in one of the four respective temples. Link cannot wear these masks, but he uses them in the final boss battle to free the four Giants. In a different three-day cycle, Remains allow Link to instantly fight the corresponding boss of a completed dungeon.
| Icon | Name | Description |
|---|---|---|
| Odolwa's Remains | They are received for beating the Woodfall Temple's boss, Odolwa. It frees the giant looking over the Swamp. | |
| Goht's Remains | They are received for beating the Snowhead Temple's boss, Goht. It frees the giant looking over the Mountains. | |
| Gyorg's Remains | They are received for beating the Great Bay Temple's boss, Gyorg. It frees the giant looking over the Ocean. | |
| Twinmold's Remains | They are received for beating the Stone Tower Temple's boss, Twinmold. It frees the giant looking over the Canyon. |
Gallery[edit]
- For this game's image gallery, see Gallery:The Legend of Zelda: Majora's Mask.
-
 English logo
 -
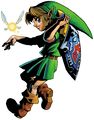 Link with Tatl
 -

-

-


Names in other languages[edit]
| Language | Name | Meaning |
|---|---|---|
| Japanese | ゼルダの伝説 ムジュラの仮面 Zeruda no Densetsu: Mujura no Kamen |
The Legend of Zelda: Mujura's Mask |
External links[edit]
- Official website (Wayback Machine)
- Official Japanese website
References[edit]
- ^ https://www.nintendo.co.jp/n01/n64/software/nus_p_nzsj/normal/index.html
- ^ Zelda - A History of Success - www.zelda.de (Wayback Machine)
- ^ Nintendo: Nintendo 64 Game List - nintendo.com (Wayback Machine)