| Don't like the ads? Then create an account! Users with accounts have more options than anonymous users. |
Difference between revisions of "The Legend of Zelda: Link's Awakening"
| Line 46: | Line 46: | ||
!Description | !Description | ||
|- | |- | ||
|align=center style="background-color: | |align=center style="background-color:lightsteelblue"|[[File:Link LA sprite.png]] | ||
|[[Link]] | |[[Link]] | ||
|Link is the main protagonist, and he goes on an adventure to awaken the Wind Fish. | |Link is the main protagonist, and he goes on an adventure to awaken the Wind Fish. | ||
| Line 57: | Line 57: | ||
!Description | !Description | ||
|- | |- | ||
|align=center style="background-color: | |align=center style="background-color:lightsteelblue"|[[File:BowWow LA sprite.png]] | ||
|[[Chain Chomp|BowWow]] | |[[Chain Chomp|BowWow]] | ||
|An iron dog owned by [[Madam MeowMeow]], it is kidnapped by [[Moblin]]s and accompanies Link after being rescued, eating nearby enemies occasionally. It can bite through [[Goponga Flower]]s and sense buried [[Secret Seashell]]s, but will also fight [[Kiki the Monkey|Kiki]]. | |An iron dog owned by [[Madam MeowMeow]], it is kidnapped by [[Moblin]]s and accompanies Link after being rescued, eating nearby enemies occasionally. It can bite through [[Goponga Flower]]s and sense buried [[Secret Seashell]]s, but will also fight [[Kiki the Monkey|Kiki]]. | ||
|- | |- | ||
|align=center style="background-color: | |align=center style="background-color:lightsteelblue"|[[File:Flying Rooster LA sprite.png]] | ||
|[[Flying Rooster]] | |[[Flying Rooster]] | ||
|A [[Cucco|chicken]] capable of prolonged flight, brought back from its grave under the [[weathercock]] with the [[Frog's Song of Soul]]. By picking it up, Link can reach many locations. | |A [[Cucco|chicken]] capable of prolonged flight, brought back from its grave under the [[weathercock]] with the [[Frog's Song of Soul]]. By picking it up, Link can reach many locations. | ||
|- | |- | ||
|align=center style="background-color: | |align=center style="background-color:lightsteelblue"|[[File:Marin LA sprite.png]] | ||
|[[Marin]] | |[[Marin]] | ||
|An innocent girl living on the island, she is the one who found Link on the shore and cared for him until he awoke. She enjoys singing and is accompanied in various events throughout the game. | |An innocent girl living on the island, she is the one who found Link on the shore and cared for him until he awoke. She enjoys singing and is accompanied in various events throughout the game. | ||
|- | |- | ||
|align=center style="background-color: | |align=center style="background-color:lightsteelblue"|[[File:Owl LA sprite.png]] | ||
|[[Owl]] | |[[Owl]] | ||
|A wise, mysterious bird who shows up at various intervals throughout the game to deliver lore to Link. | |A wise, mysterious bird who shows up at various intervals throughout the game to deliver lore to Link. | ||
|- | |- | ||
|align=center style="background-color: | |align=center style="background-color:lightsteelblue"|[[File:Tarin LA sprite.png]] | ||
|[[Tarin]] | |[[Tarin]] | ||
|Marin's comical, goodhearted father found in various odd circumstances. | |Marin's comical, goodhearted father found in various odd circumstances. | ||
|- | |- | ||
|align=center style="background-color: | |align=center style="background-color:lightsteelblue"|[[File:Wind Fish LA sprite.png]] | ||
|[[Wind Fish]] | |[[Wind Fish]] | ||
|The legendary dreamer held within the egg on [[Mt. Tamaranch]]. He is regarded as a deity by the islanders. | |The legendary dreamer held within the egg on [[Mt. Tamaranch]]. He is regarded as a deity by the islanders. | ||
| Line 88: | Line 88: | ||
!Description | !Description | ||
|- | |- | ||
|align=center style="background-color: | |align=center style="background-color:lightsteelblue"| | ||
|[[Bear Cub]] | |[[Bear Cub]] | ||
|One of the animals who listens to Marin singing in [[Animal Village]]. | |One of the animals who listens to Marin singing in [[Animal Village]]. | ||
|- | |- | ||
|align=center style="background-color: | |align=center style="background-color:lightsteelblue"|[[File:Christine LA sprite.png]] | ||
|[[Christine]] | |[[Christine]] | ||
|A goat from Animal Village and pen pal of [[Mr. Write]]. | |A goat from Animal Village and pen pal of [[Mr. Write]]. | ||
|- | |- | ||
|align=center style="background-color: | |align=center style="background-color:lightsteelblue"|[[File:Bear LA sprite.png]] | ||
|[[Chef Bear]] | |[[Chef Bear]] | ||
|An Animal Village resident and chef, who gives Link a [[pineapple]] for a [[honeycomb]]. | |An Animal Village resident and chef, who gives Link a [[pineapple]] for a [[honeycomb]]. | ||
|- | |- | ||
|align=center style="background-color: | |align=center style="background-color:lightsteelblue"|[[File:CiaoCiao LA sprite.png]] | ||
|[[CiaoCiao]] | |[[CiaoCiao]] | ||
|A Mini Bow-Wow with an obsession for jewelry. | |A Mini Bow-Wow with an obsession for jewelry. | ||
|- | |- | ||
|align=center style="background-color: | |align=center style="background-color:lightsteelblue"|[[File:Crazy Tracy LA sprite.png]] | ||
|[[Crazy Tracy]] | |[[Crazy Tracy]] | ||
|A reclusive woman who makes [[secret medicine]]. | |A reclusive woman who makes [[secret medicine]]. | ||
|- | |- | ||
|align=center style="background-color: | |align=center style="background-color:lightsteelblue"|[[File:Great Fairy LA sprite.png]] | ||
|[[Great Fairy|Faerie Queen]] | |[[Great Fairy|Faerie Queen]] | ||
|Life-restoring large faeries who live in springs. | |Life-restoring large faeries who live in springs. | ||
|- | |- | ||
|align=center style="background-color: | |align=center style="background-color:lightsteelblue"|[[File:Fisherman LA sprite.png]] | ||
|[[Fisherman]] | |[[Fisherman]] | ||
|Runs a [[fishing]] minigame in [[Mabe Village]], and either he or an identical character fishes up the [[Mermaid]]'s belonging after being given a [[fishing hook]]. | |Runs a [[fishing]] minigame in [[Mabe Village]], and either he or an identical character fishes up the [[Mermaid]]'s belonging after being given a [[fishing hook]]. | ||
|- | |- | ||
|align=center style="background-color: | |align=center style="background-color:lightsteelblue"|[[File:Ghost LA sprite.png]] | ||
|[[Ghost (The Legend of Zelda: Link's Awakening)|Ghost]] | |[[Ghost (The Legend of Zelda: Link's Awakening)|Ghost]] | ||
|A spirit who wishes to return to his old house one last time before moving on. | |A spirit who wishes to return to his old house one last time before moving on. | ||
|- | |- | ||
|align=center style="background-color: | |align=center style="background-color:lightsteelblue"|[[File:Grandma Yahoo LA sprite.png]] | ||
|[[Grandma Yahoo|Grandma Ulrira]] | |[[Grandma Yahoo|Grandma Ulrira]] | ||
|The sweeping-obsessed wife of [[Old Man Ulrira|old man Ulrira]]. | |The sweeping-obsessed wife of [[Old Man Ulrira|old man Ulrira]]. | ||
|- | |- | ||
|align=center style="background-color: | |align=center style="background-color:lightsteelblue"|[[File:Goriya LA sprite.png]] | ||
|[[Goriya]] | |[[Goriya]] | ||
|A reclusive friendly monster who lives on [[Toronbo Shores]] and lends Link his [[Boomerang]]. | |A reclusive friendly monster who lives on [[Toronbo Shores]] and lends Link his [[Boomerang]]. | ||
|- | |- | ||
|align=center style="background-color: | |align=center style="background-color:lightsteelblue"|[[File:Cucco keeper LA sprite.png]] | ||
|[[Henhouse Keeper]] | |[[Henhouse Keeper]] | ||
|A man who lives in [[Tal Tal Heights]] and wishes to see the Flying Rooster. | |A man who lives in [[Tal Tal Heights]] and wishes to see the Flying Rooster. | ||
|- | |- | ||
|align=center style="background-color: | |align=center style="background-color:lightsteelblue"|[[File:Hippo LA sprite.png]] | ||
|[[Hippo Model]] | |[[Hippo Model]] | ||
|A female hippo of Animal Village who is posing for Schule's painting. | |A female hippo of Animal Village who is posing for Schule's painting. | ||
|- | |- | ||
|align=center style="background-color: | |align=center style="background-color:lightsteelblue"|[[File:Kiki LA sprite.png]] | ||
|[[Kiki the Monkey|Kiki]] | |[[Kiki the Monkey|Kiki]] | ||
|A monkey who will help build a bridge for Link if given [[banana]]s. It responds aggressively to [[Chain Chomp|BowWow]]. | |A monkey who will help build a bridge for Link if given [[banana]]s. It responds aggressively to [[Chain Chomp|BowWow]]. | ||
|- | |- | ||
|align=center style="background-color: | |align=center style="background-color:lightsteelblue"|[[File:Madam MeowMeow LA sprite.png]] | ||
|[[Madam MeowMeow]] | |[[Madam MeowMeow]] | ||
|A BowWow-owning woman in Mabe Village. | |A BowWow-owning woman in Mabe Village. | ||
|- | |- | ||
|align=center style="background-color: | |align=center style="background-color:lightsteelblue"|[[File:Mamu LA sprite.png]] | ||
|[[Mamu]] | |[[Mamu]] | ||
|The leader of a popular frog band who teach Link the [[Frog's Song of Soul]]. | |The leader of a popular frog band who teach Link the [[Frog's Song of Soul]]. | ||
|- | |- | ||
|align=center style="background-color: | |align=center style="background-color:lightsteelblue"|[[File:Manbo LA sprite.png]] | ||
|[[Manbo]] | |[[Manbo]] | ||
|A large {{wp|ocean sunfish|Sun Fish}} who teaches Link [[Manbo's Mambo]]. | |A large {{wp|ocean sunfish|Sun Fish}} who teaches Link [[Manbo's Mambo]]. | ||
|- | |- | ||
|align=center style="background-color: | |align=center style="background-color:lightsteelblue"|[[File:Martha LA sprite.png]] | ||
|[[Mermaid]] | |[[Mermaid]] | ||
|A mermaid who has lost her [[necklace]] (or swimsuit top in the Japanese, French and German versions) and gives Link one of her [[Mermaid's Scale|scale]]s if he returns it. | |A mermaid who has lost her [[necklace]] (or swimsuit top in the Japanese, French and German versions) and gives Link one of her [[Mermaid's Scale|scale]]s if he returns it. | ||
|- | |- | ||
|align=center style="background-color: | |align=center style="background-color:lightsteelblue"|[[File:Mr Write LA sprite.png]] | ||
|[[Mr. Write]] | |[[Mr. Write]] | ||
|A letter-writing enthusiast who becomes pen pals with Christine. | |A letter-writing enthusiast who becomes pen pals with Christine. | ||
|- | |- | ||
|align=center style="background-color: | |align=center style="background-color:lightsteelblue"|[[File:Old Man Ulrira LA sprite.png]] | ||
|[[Old Man Ulrira]] | |[[Old Man Ulrira]] | ||
|An old man who gives Link hints via [[telephone]]. | |An old man who gives Link hints via [[telephone]]. | ||
|- | |- | ||
|align=center style="background-color: | |align=center style="background-color:lightsteelblue"|[[File:Papahl LA sprite.png]] | ||
|[[Papahl]] | |[[Papahl]] | ||
|The father of at least five children in Mabe Village, who gets lost in Tal Tal Heights. | |The father of at least five children in Mabe Village, who gets lost in Tal Tal Heights. | ||
|- | |- | ||
|align=center style="background-color: | |align=center style="background-color:lightsteelblue"|[[File:Quadruplet LA sprite.png]] | ||
|[[Quadruplet]]s | |[[Quadruplet]]s | ||
|Four (or five) children who live in Mabe Village and give Link advice they are too young to understand. | |Four (or five) children who live in Mabe Village and give Link advice they are too young to understand. | ||
|- | |- | ||
|align=center style="background-color: | |align=center style="background-color:lightsteelblue"|[[File:Mamasha LA sprite.png]] | ||
|[[Mamasha|Quadruplets' mother]] | |[[Mamasha|Quadruplets' mother]] | ||
|A mother of at least five children in Mabe Village. | |A mother of at least five children in Mabe Village. | ||
|- | |- | ||
|align=center style="background-color: | |align=center style="background-color:lightsteelblue"|[[File:Raccoon LA sprite.png]] | ||
|[[Raccoon]] | |[[Raccoon]] | ||
|A character who causes Link to get lost in the Mysterious Forest. He is later revealed to be Tarin under a spell. | |A character who causes Link to get lost in the Mysterious Forest. He is later revealed to be Tarin under a spell. | ||
|- | |- | ||
|align=center style="background-color: | |align=center style="background-color:lightsteelblue"|[[File:Richard LA sprite.png]] | ||
|[[Richard]] | |[[Richard]] | ||
|The owner of [[Kanalet Castle]] who was evicted by his [[Darknut|servants]]. | |The owner of [[Kanalet Castle]] who was evicted by his [[Darknut|servants]]. | ||
|- | |- | ||
|align=center style="background-color: | |align=center style="background-color:lightsteelblue"|[[File:Sale LA sprite.png]] | ||
|[[Sale]] | |[[Sale]] | ||
|A banana-selling crocodile who loves [[canned food]]. | |A banana-selling crocodile who loves [[canned food]]. | ||
|- | |- | ||
|align=center style="background-color: | |align=center style="background-color:lightsteelblue"|[[File:Schule Donavitch LA sprite.png]] | ||
|[[Schule Donavitch]] | |[[Schule Donavitch]] | ||
|An artist crocodile who made the mermaid statue. | |An artist crocodile who made the mermaid statue. | ||
|- | |- | ||
|align=center style="background-color: | |align=center style="background-color:lightsteelblue"|[[File:Shopkeeper LA sprite.png]] | ||
|[[Shopkeeper (The Legend of Zelda: Link's Awakening)|Shopkeeper]] | |[[Shopkeeper (The Legend of Zelda: Link's Awakening)|Shopkeeper]] | ||
|The owner of the [[Town Tool Shop]], who kills Link with magic if he steals anything and then returns. | |The owner of the [[Town Tool Shop]], who kills Link with magic if he steals anything and then returns. | ||
|- | |- | ||
|align=center style="background-color: | |align=center style="background-color:lightsteelblue"| | ||
|[[Toucan]] | |[[Toucan]] | ||
|One of the animals who listens to Marin singing in Animal Village. | |One of the animals who listens to Marin singing in Animal Village. | ||
|- | |- | ||
|align=center style="background-color: | |align=center style="background-color:lightsteelblue"|[[File:Trendy Gamester LA sprite.png]] | ||
|[[Trendy Gamester]] | |[[Trendy Gamester]] | ||
|The owner of the [[Trendy Game]]. An [[Raft Shop Owner|identical character]] operates [[Rapids Ride]]. | |The owner of the [[Trendy Game]]. An [[Raft Shop Owner|identical character]] operates [[Rapids Ride]]. | ||
|- | |- | ||
|align=center style="background-color: | |align=center style="background-color:lightsteelblue"|[[file:Walrus LA sprite.png]] | ||
|[[Walrus]] | |[[Walrus]] | ||
|A sleepy resident of Animal Village who can block paths with his girth. | |A sleepy resident of Animal Village who can block paths with his girth. | ||
|- | |- | ||
|align=center style="background-color: | |align=center style="background-color:lightsteelblue"|[[File:Witch LA sprite.png]] | ||
|[[Witch]] | |[[Witch]] | ||
|A potion-brewer who can make [[Magic Powder]] from the [[Sleepy Toadstool]]. | |A potion-brewer who can make [[Magic Powder]] from the [[Sleepy Toadstool]]. | ||
| Line 217: | Line 217: | ||
!Sprite | !Sprite | ||
!Name | !Name | ||
!Description | |||
|- | |- | ||
|align=center style="background-color: | |align=center style="background-color:lightsteelblue"| | ||
|[[Bee]] | |[[Bee]] | ||
|Simple insects that stay around their hive in [[Ukuku Prairie]] until [[Tarin]] knocks it down. | |||
|- | |- | ||
|align=center style="background-color: | |align=center style="background-color:lightsteelblue"| | ||
|[[Bird]] | |[[Bird]] | ||
|Carrier pigeon-like birds are found in the houses of [[Mr. Write]] and [[Christine]]. | |||
|- | |- | ||
|align=center style="background-color: | |align=center style="background-color:lightsteelblue"|[[File:Chicken LA sprite.png]] | ||
|[[Cucco|Chicken]] | |[[Cucco|Chicken]] | ||
|Simple fowl that summon an angry swarm of invincible chickens if attacked too much. [[Magic Powder]] and the [[Magic Rod]] can destroy them. | |||
|- | |- | ||
|align=center style="background-color: | |align=center style="background-color:lightsteelblue"|[[File:Fairy LA sprite.png]] | ||
|[[Fairy|Faerie]] | |[[Fairy|Faerie]] | ||
|Small sprites that heal Link if touched. | |||
|- | |- | ||
|align=center style="background-color: | |align=center style="background-color:lightsteelblue"| | ||
|[[Fish]] | |[[Fish]] | ||
|Two sizes of fish, [[runt]]s and [[lunker]]s, appear in the fishing game. Two other fish accompany [[Manbo]]. | |||
|- | |- | ||
|align=center style="background-color: | |align=center style="background-color:lightsteelblue"| | ||
|[[Frog]] | |[[Frog]] | ||
|Hopping amphibians that accompany [[Richard]] and [[Mamu]]. | |||
|- | |- | ||
|align=center style="background-color: | |align=center style="background-color:lightsteelblue"| | ||
|[[ | |[[ChowChow|Mini Bow-Wow]] | ||
|Iron puppies owned by [[Madam MeowMeow]]. | |||
|- | |- | ||
|align=center style="background-color: | |align=center style="background-color:lightsteelblue"| | ||
|[[Monkey]] | |[[Monkey]] | ||
|Primates that build a bridge at [[Kiki the Monkey|Kiki]]'s behest. | |||
|- | |- | ||
|align=center style="background-color: | |align=center style="background-color:lightsteelblue"| | ||
|Mouse | |Mouse | ||
|Small rodents found in unkempt houses. | |||
|- | |- | ||
|align=center style="background-color: | |align=center style="background-color:lightsteelblue"|[[File:Dog LA sprite.png]] | ||
|[[Fox|Mutt]] | |[[Fox|Mutt]] | ||
|Tame foxes that roam [[Mabe Village]]. Attacking them causes them to retaliate, but they are defeated by [[Magic Powder]] or the [[Magic Rod]]. | |||
|- | |- | ||
|align=center style="background-color: | |align=center style="background-color:lightsteelblue"|[[File:Rabbit LA sprite.png]] | ||
|[[Rabbit]] | |[[Rabbit]] | ||
|The main inhabitants of [[Animal Village]]. | |||
|- | |- | ||
|align=center style="background-color: | |align=center style="background-color:lightsteelblue"| | ||
|[[Seagull]] | |[[Seagull]] | ||
|Seabirds that Marin is fascinated with. | |||
|} | |||
==Locations== | |||
All of the locations take place in [[Koholint Island]], which is divided into numerous regions and a few towns: | |||
*[[Animal Village]] | |||
*[[Cemetery|Cemetary]] | |||
*[[East of the Bay]] | |||
*[[Face Shrine]] | |||
*[[Goponga Swamp]] | |||
*[[Koholint Prairie]] | |||
*[[Mabe Village]] | |||
*[[Martha's Bay]] | |||
*[[Mt. Tamaranch]] | |||
*[[Mysterious Forest]] | |||
*[[Pothole Field]] | |||
*[[Rapids Ride]] | |||
*[[Signpost Maze]] | |||
*[[South of the Village]] | |||
*[[Tabahl Wasteland]] | |||
*[[Tal Tal Heights]] | |||
*[[Tal Tal Mountain Range]] | |||
*[[Toronbo Shores]] | |||
*[[Ukuku Prairie]] | |||
*[[Shrine Waterfall|Waterfall at the Shrine]] | |||
*[[Yarna Desert]] | |||
===Minor locations=== | |||
There are minor locations that appear within one of the greater regions or towns. | |||
*[[Crazy Tracy's Health Spa]] | |||
*[[Eastern Tal Tal Mountains]] | |||
*[[Great Fairy Fountain|Faerie Spring]] | |||
*[[Fishing Pond]] | |||
*[[Henhouse|Hen House]] | |||
*[[House by the Bay]] | |||
*[[Madam MeowMeow's House]] | |||
*[[Manbo's Pond]] | |||
*[[Marin and Tarin's House]] | |||
*[[Mermaid Statue]] | |||
*[[Old Man Ulrira's House]] | |||
*[[Quadruplets House|Quadruplet's House]] | |||
*[[Raft Shop]] | |||
*[[Richard's Villa]] | |||
*[[Sale's House o' Bananas|Sale's House O' Bananas]] | |||
*[[Seashell Mansion]] | |||
*[[Telephone Booth]] | |||
*[[Town Tool Shop]] | |||
*[[Trendy Game Shop]] | |||
*[[Under the bridge]] | |||
*[[Village Library]] | |||
*[[Warp point|Warp Hole]] | |||
*[[Weathervane|Weathercock]] | |||
*[[Weird Mr. Write]] | |||
*[[Western Tal Tal Mountains]] | |||
*[[Witch's Hut]] | |||
===Dungeons=== | |||
{|class="wikitable" | |||
!Name | |||
!Description | |||
!Item | |||
!Reward | |||
!Mini-boss | |||
!Boss | |||
|- | |||
| Level 1-- [[Tail Cave]] | |||
| A dungeon located in the hills north of Toronbo Shores. It topographically looks like a Moldorm. The Tail Cave's entrance can be unlocked with the [[Tail Key]]. | |||
| style="text-align:center"| [[File:Roc's Feather LA sprite.png]]<br>[[Roc's Feather]] | |||
| style="text-align:center"| [[File:Full Moon Cello LA sprite.png]]<br>[[Full Moon Cello]] | |||
| style="text-align:center"| [[Spike Roller|Rolling Bones]] | |||
| style="text-align:center"| [[Moldorm (boss)|Moldorm]] | |||
|- | |||
| [[Moblin Cave]] | |||
| A cave found at the foot of [[Mt. Tamaranch]], it is where the [[Moblin]]s take [[Chain Chomp|BowWow]] after kidnapping him. | |||
| style="text-align:center" colspan=2| [[File:BowWow LA sprite.png]]<br>[[Chain Chomp|BowWow]] | |||
| style="text-align:center"| [[Moblin Chief|King Moblin]] | |||
| style="text-align:center"| None | |||
|- | |||
| Level 2-- [[Bottle Grotto]] | |||
| Bottle Grotto is a jar-shaped dungeon located in Goponga Swamp, and is filled with many [[pot]]s. Link can access the dungeon if he has [[Chain Chomp|BowWow]] eat every [[Goponga Flower]] blocking the entrance. | |||
| style="text-align:center"|[[File:Power Bracelet LA sprite.png]]<br>[[Power Bracelet]] | |||
| style="text-align:center"| [[File:Conch Horn LA sprite.png]]<br>[[Conch Horn]] | |||
| style="text-align:center"| [[Hinox]] | |||
| style="text-align:center"| [[Genie]] | |||
|- | |||
| [[Kanalet Castle]] | |||
| The former palace of [[Richard]] north of [[Ukuku Prairie]], he has Link go through it to recover his five [[Golden Leaf|Golden Leave]]s. | |||
| style="text-align:center" colspan=2| [[File:Golden Leaf LA sprite.png]] [[File:Golden Leaf LA sprite.png]] [[File:Golden Leaf LA sprite.png]] [[File:Golden Leaf LA sprite.png]] [[File:Golden Leaf LA sprite.png]]<br>[[Golden Leaf|Golden Leave]]s | |||
| style="text-align:center" colspan=2| None | |||
|- | |||
|Level 3-- [[Key Cavern]] | |||
| A two-floor dungeon found near the Pothole Maze in Ukuku Prairie. Both floors have a layout in the shape of a key, hence its name. Link needs the [[Slime Key]] to enter the Key Cavern. | |||
| style="text-align:center"| [[File:Pegasus Boots LA sprite.png]]<br>[[Pegasus Boots]] | |||
| style="text-align:center"| [[File:Sea Lily's Bell LA sprite.png]]<br>[[Sea Lily's Bell]] | |||
| style="text-align:center"| {{nowrap|[[Dodongo|Dodongo Snake]]s}} | |||
| style="text-align:center"| [[Slime Eye]] | |||
|- | |||
| [[Dream Shrine]] | |||
| A blocked-off room in [[Mabe Village]] that leads into a subspace room. It requires the [[Power Bracelet]] to reach and the [[Pegasus Boots]] to fully navigate. | |||
| style="text-align:center" colspan=2| [[File:Ocarina LA sprite.png]]<br>[[Ocarina]] | |||
| style="text-align:center" colspan=2| None | |||
|- | |||
|style="white-space:nowrap"| Level 4-- [[Angler's Tunnel]] | |||
| A water-filled cave located at the base of Tal Tal Heights. From a bird's-eye view, the outside resembles an anchor or a fishing hook. Link needs the [[Angler Key]] to enter the Key Cavern. | |||
| style="text-align:center"| [[File:Flippers LA sprite.png]]<br>[[Flippers]] | |||
| style="text-align:center"| [[File:Surf Harp LA sprite.png]]<br>[[Surf Harp]] | |||
| style="text-align:center"| [[Cue Ball]] | |||
| style="text-align:center"| [[Angler Fish]] | |||
|- | |||
|Level 5-- [[Catfish's Maw]] | |||
| An underwater-themed dungeon that takes place within a large catfish-like statue in the center of [[Martha's Bay]]. It can be accessed once Link takes the wandering [[ghost (The Legend of Zelda: Link's Awakening)|ghost]] back to its home and then later using his Flippers to take an underwater path to Catfish's Maw. | |||
| style="text-align:center"| [[File:Hookshot LA sprite.png]]<br>[[Hookshot|Hook Shot]] | |||
| style="text-align:center"| [[File:Wind Marimba LA sprite.png]]<br>[[Wind Marimba]] | |||
| style="text-align:center"| [[Master Stalfos]]<br>[[Gohma]]s | |||
| style="text-align:center"|[[Slime Eel]] | |||
|- | |||
| [[Ancient Ruins (The Legend of Zelda: Link's Awakening)|Southern Face Shrine]] | |||
| A shrine found north of Animal Village, where Link must first go to learn about the legend of the Wind Fish. | |||
| style="text-align:center" colspan=2| [[File:Face Key LA sprite.png]]<br>[[Face Key]] | |||
| style="text-align:center"| [[Armos Knight]] | |||
| style="text-align:center"| None | |||
|- | |||
|Level 6-- [[Face Shrine]] | |||
| A ruin further north of the Southern Face Shrine. The Hook Shot and [[Face Key]] are required to enter the Face Shrine. | |||
| style="text-align:center"| [[File:Power Bracelet LA sprite.png]]<br>{{nowrap|[[Powerful Bracelet]]}} | |||
| style="text-align:center"| [[File:Coral Triangle LA sprite.png]]<br>[[Coral Triangle]] | |||
| style="text-align:center"| [[Dodongo|Dodongo Snake]]s<br>[[Rover|Smasher]] | |||
| style="text-align:center"| [[Facade]] | |||
|- | |||
|Level 7-- [[Eagle's Tower]] | |||
| A large, four-story tower nestled within the eastern heights of the Tal Tal Mountain Range. It can be unlocked with the [[Bird Key]]. | |||
| style="text-align:center"| [[File:Shield LA sprite.png]]<br>[[Mirror Shield]] | |||
| style="text-align:center"| [[File:Organ of Evening Calm LA sprite.png]]<br>{{nowrap|[[Organ of Evening Calm]]}} | |||
| style="text-align:center"| [[Hinox]]<br>[[Grim Creeper]] | |||
| style="text-align:center"|[[Evil Eagle]] | |||
|- | |||
|Level 8-- [[Turtle Rock]] | |||
| A lava-filled lair in the cliffside of the western Tal Tal Mountain Range. It is built within the remains of a giant turtle which has become petrified within the rock of the mountainside. To access the dungeon, Link must play the [[Frog's Song of Soul]] to bring the turtle's head to life and then defeat it. | |||
| style="text-align:center"| [[File:Magic Rod LA sprite.png]]<br>[[Magic Rod]] | |||
| style="text-align:center"| [[File:Thunder Drum LA sprite.png]]<br>[[Thunder Drum]] | |||
| style="text-align:center"|[[Hydrosoar|Cue Ball]]<br>[[Spike Roller|Rolling Bones]]<br>[[Dodongo|Dodongo Snake]]s<br>[[Hinox]]<br>[[Rover|Smasher]]<br>[[Blaino]] | |||
| style="text-align:center"|[[Hot Head]] | |||
|- | |||
|[[Wind Fish's Egg]] | |||
| A large egg which is the main landmark of Koholint Island. It is the final area that Link accesses. The Wind Fish's Egg is where the [[Wind Fish]] is sleeping, tormented by the [[Shadow (The Legend of Zelda: Link's Awakening)|Shadow]]s. To crack open an entrance into the Wind Fish's Egg, Link must have all eight [[Instruments of the Sirens]] and play the [[Ballad of the Wind Fish]]. | |||
| style="text-align:center"| None | |||
| style="text-align:center"| Completion | |||
| style="text-align:center"| None | |||
| style="text-align:center"|[[Giant Zol Shadow|Giant Gel]]<br>{{nowrap|[[Agahnim Shadow|Agahnim's Shadow]]}}<br>{{nowrap|[[Moldorm Shadow|Moldorm's Shadow]]}}<br>{{nowrap|[[Ganon Shadow|Shadow of Ganon]]}}<br>[[Lanmola Shadow|Lanmola]]<br>[[Death Shadow|DethI]] | |||
|} | |} | ||
| Line 261: | Line 424: | ||
!Description | !Description | ||
|- | |- | ||
|align=center style="background-color: | |align=center style="background-color:lightsteelblue"|[[File:Angler Fry LA sprite.png]] | ||
|[[Mini Angler|Angler Fry]] | |[[Mini Angler|Angler Fry]] | ||
|Small fish that assist the [[Angler Fish (boss)|Angler Fish]] in battle by swimming at Link. | |Small fish that assist the [[Angler Fish (boss)|Angler Fish]] in battle by swimming at Link. | ||
|- | |- | ||
|align=center style="background-color: | |align=center style="background-color:lightsteelblue"|[[File:Anti-Faery LA sprite.png]] | ||
|[[Bubble|Anti-Faerie]] | |[[Bubble|Anti-Faerie]] | ||
|Spirits that fly around the room diagonally to hit Link. They burn when touched by Magic Powder | |Spirits that fly around the room diagonally to hit Link. They burn when touched by Magic Powder | ||
|- | |- | ||
|align=center style="background-color: | |align=center style="background-color:lightsteelblue"|[[File:Anti-Kirby LA sprite.png]] | ||
|[[Birky|Anti-Kirby]] | |[[Birky|Anti-Kirby]] | ||
|Puffbals that attempt to inhale Link in [[Eagle's Tower]]. | |Puffbals that attempt to inhale Link in [[Eagle's Tower]]. | ||
|- | |- | ||
|align=center style="background-color: | |align=center style="background-color:lightsteelblue"|[[File:Arm-Mimic LA sprite.png]] | ||
|[[Hollow Mimic|Arm-Mimic]] | |[[Hollow Mimic|Arm-Mimic]] | ||
|''{{wp|Haniwa}}'' that copy Link's movements and deal a fairly large amount of damage. | |''{{wp|Haniwa}}'' that copy Link's movements and deal a fairly large amount of damage. | ||
|- | |- | ||
|align=center style="background-color: | |align=center style="background-color:lightsteelblue"|[[File:Armos Statue LA sprite.png]] | ||
|[[Armos|Armos Statue]] | |[[Armos|Armos Statue]] | ||
|Statues that start moving when Link touches them. Found outside the [[Ancient Ruins (The Legend of Zelda: Link's Awakening)|southern Face Shrine]]. | |Statues that start moving when Link touches them. Found outside the [[Ancient Ruins (The Legend of Zelda: Link's Awakening)|southern Face Shrine]]. | ||
|- | |- | ||
|align=center style="background-color: | |align=center style="background-color:lightsteelblue"|[[File:Beetle LA sprite.png]] | ||
|[[Beetle (enemy)|Beetle]] | |[[Beetle (enemy)|Beetle]] | ||
|Small insects that endlessly spawn from a single hole in [[Ukuku Prairie]], after which they simply walk around. | |Small insects that endlessly spawn from a single hole in [[Ukuku Prairie]], after which they simply walk around. | ||
|- | |- | ||
|align=center style="background-color: | |align=center style="background-color:lightsteelblue"|[[File:Bloober LA sprite.png]] | ||
|[[Blooper|Bloober]] | |[[Blooper|Bloober]] | ||
|Squid that swim after Link in side-scrolling areas in a bobbing pattern. | |Squid that swim after Link in side-scrolling areas in a bobbing pattern. | ||
|- | |- | ||
|align=center style="background-color: | |align=center style="background-color:lightsteelblue"|[[File:Bomber LA sprite.png]] | ||
|[[Zirro|Bomber]] | |[[Zirro|Bomber]] | ||
|Winged mushrooms that fly around and drop [[bomb]]s with a large blast radius. | |Winged mushrooms that fly around and drop [[bomb]]s with a large blast radius. | ||
|- | |- | ||
|align=center style="background-color: | |align=center style="background-color:lightsteelblue"|[[File:Bombite LA sprite.png]] | ||
|[[Bombite]] | |[[Bombite]] | ||
|Walking bombs that have two behaviors: after being hit, they will either ricochet around or follow Link, after which they will explode. Found in [[Key Cavern]]. | |Walking bombs that have two behaviors: after being hit, they will either ricochet around or follow Link, after which they will explode. Found in [[Key Cavern]]. | ||
|- | |- | ||
|align=center style="background-color: | |align=center style="background-color:lightsteelblue"|[[File:Boo Buddy LA sprite.png]] | ||
|[[Boo]] | |[[Boo]] | ||
|Ghosts that follow Link invincibly in dark rooms, but will flee vulnerably when the room is brightened. Found in [[Bottle Grotto]]. | |Ghosts that follow Link invincibly in dark rooms, but will flee vulnerably when the room is brightened. Found in [[Bottle Grotto]]. | ||
|- | |- | ||
|align=center style="background-color: | |align=center style="background-color:lightsteelblue"|[[File:Buzz Blob LA sprite.png]] | ||
|[[Buzz Blob]] | |[[Buzz Blob]] | ||
|Bipedal slimes that zap Link if attacked with a sword, unless stunned. Using [[Magic Powder]] on one turns it into a [[cukeman]]. | |Bipedal slimes that zap Link if attacked with a sword, unless stunned. Using [[Magic Powder]] on one turns it into a [[cukeman]]. | ||
|- | |- | ||
|align=center style="background-color: | |align=center style="background-color:lightsteelblue"|[[File:Cheep-Sheep LA sprite.png]] | ||
|[[Cheep Cheep|Cheep-Sheep]] | |[[Cheep Cheep|Cheep-Sheep]] | ||
|Fish that swim back-and-forth or up-and-down in a simple pattern in side-scrolling areas, though some instead jump. | |Fish that swim back-and-forth or up-and-down in a simple pattern in side-scrolling areas, though some instead jump. | ||
|- | |- | ||
|align=center style="background-color: | |align=center style="background-color:lightsteelblue"|[[File:Crow LA sprite.png]] | ||
|[[Crow]] | |[[Crow]] | ||
|Birds that take off and swoop down at Link. One at [[Kanalet Castle]] instead attempts to flee with a [[Golden Leaf]]. | |Birds that take off and swoop down at Link. One at [[Kanalet Castle]] instead attempts to flee with a [[Golden Leaf]]. | ||
|- | |- | ||
|align=center style="background-color: | |align=center style="background-color:lightsteelblue"|[[File:Cukeman LA sprite.png]] | ||
|[[Cukeman]] | |[[Cukeman]] | ||
|Bulgy-eyed slimes that say various non sequiturs to Link if spoken to. They are created by sprinkling Magic Powder on a Buzz Blob, which they otherwise act like. | |Bulgy-eyed slimes that say various non sequiturs to Link if spoken to. They are created by sprinkling Magic Powder on a Buzz Blob, which they otherwise act like. | ||
|- | |- | ||
|align=center style="background-color: | |align=center style="background-color:lightsteelblue"|[[File:Firebat LA sprite.png]] | ||
|[[Firebat]] | |[[Firebat]] | ||
|Evil magic that swoops at Link after being spawned by the [[Ganon Shadow|Shadow of Ganon]]. | |Evil magic that swoops at Link after being spawned by the [[Ganon Shadow|Shadow of Ganon]]. | ||
|- | |- | ||
|align=center style="background-color: | |align=center style="background-color:lightsteelblue"|[[File:Fish LA sprite.png]] | ||
|[[Piranha|Fish]] | |[[Piranha|Fish]] | ||
|Piranhas that swim around [[Goponga Swamp]] with their dorsal fins visible, leaping when Link gets close. | |Piranhas that swim around [[Goponga Swamp]] with their dorsal fins visible, leaping when Link gets close. | ||
|- | |- | ||
|align=center style="background-color: | |align=center style="background-color:lightsteelblue"|[[File:Flying Octorok LA sprite.png]] | ||
|[[Winged Octorok|Flying Octorok]] | |[[Winged Octorok|Flying Octorok]] | ||
|Winged octopodes that acts like normal [[Octorok]]s, but use their wings to avoid his attacks by jumping away. | |Winged octopodes that acts like normal [[Octorok]]s, but use their wings to avoid his attacks by jumping away. | ||
|- | |- | ||
|align=center style="background-color: | |align=center style="background-color:lightsteelblue"|[[File:Zol LA sprite.png]] | ||
|[[Zol|Gel (big)]] | |[[Zol|Gel (big)]] | ||
|Slimes that can appear on the field, in which case a weak attack will split it into two small Gels, or can appear from the ground, falling from the ceiling, or within chests, in which case one hit will immediately defeat them. | |Slimes that can appear on the field, in which case a weak attack will split it into two small Gels, or can appear from the ground, falling from the ceiling, or within chests, in which case one hit will immediately defeat them. | ||
|- | |- | ||
|align=center style="background-color: | |align=center style="background-color:lightsteelblue"|[[File:Gel LA sprite.png]] | ||
|[[Gel|Gel (small)]] | |[[Gel|Gel (small)]] | ||
|Slimes that parasitically attach to Link, slowing him. Can be found simply on the field or by hitting certain large Gels with weak weapons. | |Slimes that parasitically attach to Link, slowing him. Can be found simply on the field or by hitting certain large Gels with weak weapons. | ||
|- | |- | ||
|align=center style="background-color: | |align=center style="background-color:lightsteelblue"|[[File:Ghini LA sprite.png]] | ||
|[[Ghini]] | |[[Ghini]] | ||
|Ghosts that fly around the [[cemetery|cemetary]] erratically after Link. Extra will spawn if he touches the gravestones. | |Ghosts that fly around the [[cemetery|cemetary]] erratically after Link. Extra will spawn if he touches the gravestones. | ||
|- | |- | ||
|align=center style="background-color: | |align=center style="background-color:lightsteelblue"|[[File:Giant Bubble LA sprite.png]] | ||
|[[Giant Bubble]] | |[[Giant Bubble]] | ||
|A huge orb of energy that acts like a normal Anti-Faerie, but appears only in side-scrolling areas, and is much larger. | |A huge orb of energy that acts like a normal Anti-Faerie, but appears only in side-scrolling areas, and is much larger. | ||
|- | |- | ||
|align=center style="background-color: | |align=center style="background-color:lightsteelblue"|[[File:Giant Ghini LA sprite.png]] | ||
|[[Giant Ghini]] | |[[Giant Ghini]] | ||
|A huge ghost that spawns from one of the gravestones in the cemetary, and takes more hits than a normal Ghini, but releases a [[fairy|faerie]] when defeated. | |A huge ghost that spawns from one of the gravestones in the cemetary, and takes more hits than a normal Ghini, but releases a [[fairy|faerie]] when defeated. | ||
|- | |- | ||
|align=center style="background-color: | |align=center style="background-color:lightsteelblue"|[[File:Gibdo LA sprite.png]] | ||
|[[Gibdo]] | |[[Gibdo]] | ||
|Mummies that do not flinch after Link hits them. Burning one reveals a [[Stalfos]]. Found in Eagle's Tower. | |Mummies that do not flinch after Link hits them. Burning one reveals a [[Stalfos]]. Found in Eagle's Tower. | ||
|- | |- | ||
|align=center style="background-color: | |align=center style="background-color:lightsteelblue"|[[File:Giant Goponga Flower LA sprite.png]] | ||
|[[Giant Goponga Flower]] | |[[Giant Goponga Flower]] | ||
|A large, resilient swamp flower that can shoot fireballs. | |A large, resilient swamp flower that can shoot fireballs. | ||
|- | |- | ||
|align=center style="background-color: | |align=center style="background-color:lightsteelblue"|[[File:Goomba LA sprite.png]] | ||
|[[Goomba]] | |[[Goomba]] | ||
|A simple enemy most often found in side-scrolling areas. Squishing it gives Link a [[heart]]. | |A simple enemy most often found in side-scrolling areas. Squishing it gives Link a [[heart]]. | ||
|- | |- | ||
|align=center style="background-color: | |align=center style="background-color:lightsteelblue"|[[File:Goponga Flower LA sprite.png]] | ||
|[[Goponga Flower]] | |[[Goponga Flower]] | ||
|A swamp flower resilient to most attacks. Native to Goponga Swamp. | |A swamp flower resilient to most attacks. Native to Goponga Swamp. | ||
|- | |- | ||
|align=center style="background-color: | |align=center style="background-color:lightsteelblue"|[[File:Hardhat Beetle LA sprite.png]] | ||
|[[Hardhat Beetle]] | |[[Hardhat Beetle]] | ||
|Tough creatures that bump Link around. They cannot be defeated with most weapons unless bumped into a pit. | |Tough creatures that bump Link around. They cannot be defeated with most weapons unless bumped into a pit. | ||
|- | |- | ||
|align=center style="background-color: | |align=center style="background-color:lightsteelblue"|[[File:Iron Mask LA sprite.png]] | ||
|[[Helmasaur|Iron Mask]] | |[[Helmasaur|Iron Mask]] | ||
|Small creatures that wander around with a mask negating damage, though it can be removed with the [[Hookshot|Hook Shot]]. | |Small creatures that wander around with a mask negating damage, though it can be removed with the [[Hookshot|Hook Shot]]. | ||
|- | |- | ||
|align=center style="background-color: | |align=center style="background-color:lightsteelblue"|[[File:Keese LA sprite.png]] | ||
|[[Keese]] | |[[Keese]] | ||
|Bats that fly around erratically, attempting to hit Link. | |Bats that fly around erratically, attempting to hit Link. | ||
|- | |- | ||
|align=center style="background-color: | |align=center style="background-color:lightsteelblue"|[[File:Knight LA sprite.png]] | ||
|[[Ball and Chain Trooper|Knight]] | |[[Ball and Chain Trooper|Knight]] | ||
|The strongest enemy in [[Kanalet Castle]], wielding a flail. | |The strongest enemy in [[Kanalet Castle]], wielding a flail. | ||
|- | |- | ||
|align=center style="background-color: | |align=center style="background-color:lightsteelblue"|[[File:Leever LA sprite.png]] | ||
|[[Leever]] | |[[Leever]] | ||
|Small entities that burrow and spin around in sandy areas after Link. | |Small entities that burrow and spin around in sandy areas after Link. | ||
|- | |- | ||
|align=center style="background-color: | |align=center style="background-color:lightsteelblue"|[[File:Like Like LA sprite.png]] | ||
|[[Like Like]] | |[[Like Like]] | ||
|Large-mouthed creatures that attempt to eat Link's [[shield]], but cannot eat the [[Mirror Shield]]. | |Large-mouthed creatures that attempt to eat Link's [[shield]], but cannot eat the [[Mirror Shield]]. | ||
|- | |- | ||
|align=center style="background-color: | |align=center style="background-color:lightsteelblue"|[[File:Mad Bomber LA sprite.png]] | ||
|[[Bomb Trooper|Mad Bomber]] | |[[Bomb Trooper|Mad Bomber]] | ||
|A specific [[Darknut|Soldier]] that hides in pits and throws bombs at Link, and carries a Golden Leaf. | |A specific [[Darknut|Soldier]] that hides in pits and throws bombs at Link, and carries a Golden Leaf. | ||
|- | |- | ||
|align=center style="background-color: | |align=center style="background-color:lightsteelblue"|[[File:Mask-Mimic LA sprite.png]] | ||
|[[Shy Guy|Mask-Mimic]] | |[[Shy Guy|Mask-Mimic]] | ||
|Masked creatures that mirror Link's movements. Their masks negate damage from the sword. | |Masked creatures that mirror Link's movements. Their masks negate damage from the sword. | ||
|- | |- | ||
|align=center style="background-color: | |align=center style="background-color:lightsteelblue"|[[File:Mini Moldorm LA sprite.png]] | ||
|[[Moldorm (The Legend of Zelda: A Link to the Past)|Mini Moldorm]] | |[[Moldorm (The Legend of Zelda: A Link to the Past)|Mini Moldorm]] | ||
|Caterpillars that crawl around in erratic looping patterns, often bumping into walls. | |Caterpillars that crawl around in erratic looping patterns, often bumping into walls. | ||
|- | |- | ||
|align=center style="background-color: | |align=center style="background-color:lightsteelblue"|[[File:Moblin LA sprite.png]] | ||
|[[Moblin]] | |[[Moblin]] | ||
|Bulldog creatures that wander around slowly and throw spears. Found in the [[Mysterious Forest]] and [[Moblin Cave]]. They also steal [[Chain Chomp|BowWow]] from [[Madam MeowMeow]]. | |Bulldog creatures that wander around slowly and throw spears. Found in the [[Mysterious Forest]] and [[Moblin Cave]]. They also steal [[Chain Chomp|BowWow]] from [[Madam MeowMeow]]. | ||
|- | |- | ||
|align=center style="background-color: | |align=center style="background-color:lightsteelblue"|[[File:Monkey LA sprite.png]] | ||
|[[K.K. Sniper|Monkey]] | |[[K.K. Sniper|Monkey]] | ||
|A monkey that throws coconuts at Link from a tree on [[Toronbo Shores]]. It can be knocked out with the [[Pegasus Boots]]. | |A monkey that throws coconuts at Link from a tree on [[Toronbo Shores]]. It can be knocked out with the [[Pegasus Boots]]. | ||
|- | |- | ||
|align=center style="background-color: | |align=center style="background-color:lightsteelblue"|[[File:Octorok LA sprite.png]] | ||
|[[Octorok]] | |[[Octorok]] | ||
|Octopuses that wander around slowly and spit rocks. | |Octopuses that wander around slowly and spit rocks. | ||
|- | |- | ||
|align=center style="background-color: | |align=center style="background-color:lightsteelblue"|[[File:Pairodd LA sprite.png]] | ||
|[[Pairodd]] | |[[Pairodd]] | ||
|Birdlike creatures that appear in pairs and warp around while shooting projectiles whenever Link approaches. Found in Key Cavern. | |Birdlike creatures that appear in pairs and warp around while shooting projectiles whenever Link approaches. Found in Key Cavern. | ||
|- | |- | ||
|align=center style="background-color: | |align=center style="background-color:lightsteelblue"|[[File:Peahat LA sprite.png]] | ||
|[[Peahat]] | |[[Peahat]] | ||
|Plants that fly around and land with their flower propellers. While airborne, they are invincible. | |Plants that fly around and land with their flower propellers. While airborne, they are invincible. | ||
|- | |- | ||
|align=center style="background-color: | |align=center style="background-color:lightsteelblue"|[[File:Pig Warrior LA sprite.png]] [[File:Pig Warrior armored LA sprite.png]] | ||
|[[Boarblin|Pig Warrior]] | |[[Boarblin|Pig Warrior]] | ||
|Pigs that act exactly like the related Moblins, but appear in mountainous and riverside regions. | |Pigs that act exactly like the related Moblins, but appear in mountainous and riverside regions. | ||
|- | |- | ||
|align=center style="background-color: | |align=center style="background-color:lightsteelblue"|[[File:Pincer LA sprite.png]] | ||
|[[Pincer]] | |[[Pincer]] | ||
|Centipedes that lunge at Link when he approaches their holes. | |Centipedes that lunge at Link when he approaches their holes. | ||
|- | |- | ||
|align=center style="background-color: | |align=center style="background-color:lightsteelblue"|[[File:Piranha Plant LA sprite.png]] | ||
|[[Piranha Plant]] | |[[Piranha Plant]] | ||
|Carnivorous flowers that pop up from columns in side-scrolling areas. | |Carnivorous flowers that pop up from columns in side-scrolling areas. | ||
|- | |- | ||
|align=center style="background-color: | |align=center style="background-color:lightsteelblue"|[[File:Pokey LA sprite.png]] | ||
|[[Pokey]] | |[[Pokey]] | ||
|Cacti that wander around [[Yarna Desert]]. The lower segments must be dealt with first. | |Cacti that wander around [[Yarna Desert]]. The lower segments must be dealt with first. | ||
|- | |- | ||
|align=center style="background-color: | |align=center style="background-color:lightsteelblue"|[[File:Pols Voice LA sprite.png]] | ||
|[[Pols Voice]] | |[[Pols Voice]] | ||
|Rabbits that jump around simply, but can only be defeated with specific things, like thrown [[pot|bottles]]. | |Rabbits that jump around simply, but can only be defeated with specific things, like thrown [[pot|bottles]]. | ||
|- | |- | ||
|align=center style="background-color: | |align=center style="background-color:lightsteelblue"|[[File:Raven LA sprite.png]] | ||
|[[Dacto|Raven]] | |[[Dacto|Raven]] | ||
|Flying creatures that act like crows, but are stronger and tougher. Appear outside of [[Turtle Rock]]. | |Flying creatures that act like crows, but are stronger and tougher. Appear outside of [[Turtle Rock]]. | ||
|- | |- | ||
|align=center style="background-color: | |align=center style="background-color:lightsteelblue"|[[File:Rope enemy LA sprite.png]] | ||
|[[Rope]] | |[[Rope]] | ||
|Snakes that charge at Link while on the same x- or y-coordinate as them. Appear in Turtle Rock. | |Snakes that charge at Link while on the same x- or y-coordinate as them. Appear in Turtle Rock. | ||
|- | |- | ||
|align=center style="background-color: | |align=center style="background-color:lightsteelblue"|[[File:Sand Crab LA sprite.png]] | ||
|[[Sand Crab]] | |[[Sand Crab]] | ||
|Crustaceans that move slowly up or down, but very fast to the side. Appear on Toronbo Shores. | |Crustaceans that move slowly up or down, but very fast to the side. Appear on Toronbo Shores. | ||
|- | |- | ||
|align=center style="background-color: | |align=center style="background-color:lightsteelblue"|[[File:Sea Urchin LA sprite.png]] | ||
|[[Sea Urchin]] | |[[Sea Urchin]] | ||
|Sea creatures that sit in place. They can be pushed with the shield and defeated with most other items. | |Sea creatures that sit in place. They can be pushed with the shield and defeated with most other items. | ||
|- | |- | ||
|align=center style="background-color: | |align=center style="background-color:lightsteelblue"|[[File:Shrouded Stalfos LA sprite.png]] | ||
|[[Shrouded Stalfos]] | |[[Shrouded Stalfos]] | ||
|Skeletons that act exactly like a Moblin, but are found in dungeons and the western mountains. | |Skeletons that act exactly like a Moblin, but are found in dungeons and the western mountains. | ||
|- | |- | ||
|align=center style="background-color: | |align=center style="background-color:lightsteelblue"|[[File:Soldier LA sprite.png]] [[File:Soldier armor LA sprite.png]] | ||
|[[Darknut|Soldier]] | |[[Darknut|Soldier]] | ||
|Warriors that act the same as Moblins, but are found in Kanalet Castle and are much stronger. They were formerly Richard's servants. | |Warriors that act the same as Moblins, but are found in Kanalet Castle and are much stronger. They were formerly Richard's servants. | ||
|- | |- | ||
|align=center style="background-color: | |align=center style="background-color:lightsteelblue"|[[File:Spark LA sprite.png]] | ||
|[[Spark]] | |[[Spark]] | ||
|Electric orbs that travel along the sides of blocks and walls, and are impervious to most weapons. | |Electric orbs that travel along the sides of blocks and walls, and are impervious to most weapons. | ||
|- | |- | ||
|align=center style="background-color: | |align=center style="background-color:lightsteelblue"|[[File:Spiked Beetle LA sprite.png]] | ||
|[[Spiny|Spiked Beetle]] | |[[Spiny|Spiked Beetle]] | ||
|Spiked turtles that charge at Link when they see him, but can be flipped onto their backsides with the shield, leaving them helpless and vulnerable. | |Spiked turtles that charge at Link when they see him, but can be flipped onto their backsides with the shield, leaving them helpless and vulnerable. | ||
|- | |- | ||
|align=center style="background-color: | |align=center style="background-color:lightsteelblue"|[[File:Spiny Beetle LA sprite.png]] | ||
|[[Spiny Beetle]] | |[[Spiny Beetle]] | ||
|Small creatures that hide under grass, rocks, or skulls, and run into Link if he approaches. | |Small creatures that hide under grass, rocks, or skulls, and run into Link if he approaches. | ||
|- | |- | ||
|align=center style="background-color: | |align=center style="background-color:lightsteelblue"|[[File:Stalfos LA sprite.png]] | ||
|[[Stalfos]] | |[[Stalfos]] | ||
|Skeletons that leap away when Link tries to attack with his sword. Additionally, some will attempt to stomp him and some will retaliate with a thrown bone. | |Skeletons that leap away when Link tries to attack with his sword. Additionally, some will attempt to stomp him and some will retaliate with a thrown bone. | ||
|- | |- | ||
|align=center style="background-color: | |align=center style="background-color:lightsteelblue"|[[File:Star LA sprite.png]] | ||
|[[Ballereen|Star]] | |[[Ballereen|Star]] | ||
|Strange creatures that slide diagonally along dungeons floors extremely fast while spinning slowly. | |Strange creatures that slide diagonally along dungeons floors extremely fast while spinning slowly. | ||
|- | |- | ||
|align=center style="background-color: | |align=center style="background-color:lightsteelblue"|[[File:Sword Moblin LA sprite.png]] | ||
|[[Moblin|Sword Moblin]] | |[[Moblin|Sword Moblin]] | ||
|Moblins that charge at Link when he approaches, and can parry his sword blows. Found in the same places as normal Moblins. | |Moblins that charge at Link when he approaches, and can parry his sword blows. Found in the same places as normal Moblins. | ||
|- | |- | ||
|align=center style="background-color: | |align=center style="background-color:lightsteelblue"|[[File:Sword Stalfos LA sprite.png]] | ||
|[[Shrouded Stalfos|Sword Stalfos]] | |[[Shrouded Stalfos|Sword Stalfos]] | ||
|Shrouded Stalfos that act exactly like sword Moblins, but found in dungeons. | |Shrouded Stalfos that act exactly like sword Moblins, but found in dungeons. | ||
|- | |- | ||
|align=center style="background-color: | |align=center style="background-color:lightsteelblue"|[[File:Tektite LA sprite.png]] | ||
|[[Tektite]] | |[[Tektite]] | ||
|Spiders that leap around the screen. Found around the eastern side of [[Tal Tal Heights]]. | |Spiders that leap around the screen. Found around the eastern side of [[Tal Tal Heights]]. | ||
|- | |- | ||
|align=center style="background-color: | |align=center style="background-color:lightsteelblue"|[[File:Three-of-a-Kind LA sprite.png]] | ||
|[[Three-of-a-Kind]] | |[[Three-of-a-Kind]] | ||
|Card suite creatures that can only be defeated when all three are stopped on the same symbol. | |Card suite creatures that can only be defeated when all three are stopped on the same symbol. | ||
|- | |- | ||
|align=center style="background-color: | |align=center style="background-color:lightsteelblue"|[[File:Vacuum Mouth LA sprite.png]] | ||
|[[Voidmaster|Vacuum Mouth]] | |[[Voidmaster|Vacuum Mouth]] | ||
|Void creatures that attempt to suck Link inside of it or blow him away while it flashes. If he is sucked inside, he will be returned to the dungeon entrance. | |Void creatures that attempt to suck Link inside of it or blow him away while it flashes. If he is sucked inside, he will be returned to the dungeon entrance. | ||
|- | |- | ||
|align=center style="background-color: | |align=center style="background-color:lightsteelblue"|[[File:Water Tektite LA sprite.png]] | ||
|[[Water Tektite]] | |[[Water Tektite]] | ||
|Water striders that glide across the surface of the water. | |Water striders that glide across the surface of the water. | ||
|- | |- | ||
|align=center style="background-color: | |align=center style="background-color:lightsteelblue"|[[File:Vire LA sprite.png]] | ||
|[[Vire|Winged Demon]] | |[[Vire|Winged Demon]] | ||
|Bat monsters that swoop down at Link and shoot fireballs. When defeated, they splits into two skull-headed Keese. Appear in Turtle Rock. | |Bat monsters that swoop down at Link and shoot fireballs. When defeated, they splits into two skull-headed Keese. Appear in Turtle Rock. | ||
|- | |- | ||
|align=center style="background-color: | |align=center style="background-color:lightsteelblue"|[[File:Wizzrobe LA sprite.png]] | ||
|[[Wizzrobe]] | |[[Wizzrobe]] | ||
|Magicians that appear and disappear within their hats while shooting magic, and are immune to sword attacks. Appear in Eagle's Tower. | |Magicians that appear and disappear within their hats while shooting magic, and are immune to sword attacks. Appear in Eagle's Tower. | ||
|- | |- | ||
|align=center style="background-color: | |align=center style="background-color:lightsteelblue"|[[File:Zola LA sprite.png]] | ||
|[[Zora|Zola]] | |[[Zora|Zola]] | ||
|Fish creatures that appear from under the water to shoot a fireball at Link. | |Fish creatures that appear from under the water to shoot a fireball at Link. | ||
|- | |- | ||
|align=center style="background-color: | |align=center style="background-color:lightsteelblue"|[[File:Zombie LA sprite.png]] | ||
|[[Zombie]] | |[[Zombie]] | ||
|Undead that dig from under the ground in endless amounts near the graveyard. | |Undead that dig from under the ground in endless amounts near the graveyard. | ||
| Line 532: | Line 695: | ||
!Description | !Description | ||
|- | |- | ||
|align=center style="background-color: | |align=center style="background-color:lightsteelblue"|[[File:Blade Trap LA sprite.png]] | ||
|[[Trap|Blade Trap]] | |[[Trap|Blade Trap]] | ||
|Razored obstacles that charge at Link when he crosses their x- or y-axes. | |Razored obstacles that charge at Link when he crosses their x- or y-axes. | ||
|- | |- | ||
|align=center style="background-color: | |align=center style="background-color:lightsteelblue"|[[File:Boulder LA sprite.png]] | ||
|[[Boulder]] | |[[Boulder]] | ||
|Rolling rocks that fall from above the mountains on the western side of [[Tal Tal Mountain Range]]. | |Rolling rocks that fall from above the mountains on the western side of [[Tal Tal Mountain Range]]. | ||
|- | |- | ||
|align=center style="background-color: | |align=center style="background-color:lightsteelblue"| | ||
|[[Cactus]] | |[[Cactus]] | ||
|Spiky plants found in [[Yarna Desert]]. | |Spiky plants found in [[Yarna Desert]]. | ||
|- | |- | ||
|align=center style="background-color: | |align=center style="background-color:lightsteelblue"|[[File:Eye Guard LA sprite.png]] | ||
|[[Eyegore Statue|Eye Guard]] | |[[Eyegore Statue|Eye Guard]] | ||
|Shoots fireballs at Link from its eye, looking like the various harmless [[Eyegore|Rocklops]] statues. | |Shoots fireballs at Link from its eye, looking like the various harmless [[Eyegore|Rocklops]] statues. | ||
|- | |- | ||
|align=center style="background-color: | |align=center style="background-color:lightsteelblue"|[[File:Face Lamp LA sprite.png]] | ||
|[[Blazing Watch Tower|Face Lamp]] | |[[Blazing Watch Tower|Face Lamp]] | ||
|Shoots fireballs at Link, looking like the various harmless [[torch]]es. | |Shoots fireballs at Link, looking like the various harmless [[torch]]es. | ||
|- | |- | ||
|align=center style="background-color: | |align=center style="background-color:lightsteelblue"|[[File:Flame Fountain LA sprite.png]] | ||
|[[Flame Fountain]] | |[[Flame Fountain]] | ||
|Shoots an endless stream of flames, preventing Link from accessing Turtle Rock without the Mirror Shield. | |Shoots an endless stream of flames, preventing Link from accessing Turtle Rock without the Mirror Shield. | ||
|- | |- | ||
|align=center style="background-color: | |align=center style="background-color:lightsteelblue"| | ||
|[[Flying Pot]] | |||
|[[Pot|Bottle]]s made to fly at Link by [[Facade]]. | |||
|- | |||
|align=center style="background-color:lightsteelblue"|[[File:Flying Tile LA sprite.png]] | |||
|[[Flying Floor|Flying Tile]] | |[[Flying Floor|Flying Tile]] | ||
|Tiles that fly up one-by-one in large groups from the floor before flinging themselves at Link. | |Tiles that fly up one-by-one in large groups from the floor before flinging themselves at Link. | ||
|- | |- | ||
|align=center style="background-color: | |align=center style="background-color:lightsteelblue"|[[File:Laser LA sprite.png]] | ||
|[[Beamos|Laser]] | |[[Beamos|Laser]] | ||
|An obstacle with a slowly-rotating eye. It shoots a beam at Link if it spots him. | |An obstacle with a slowly-rotating eye. It shoots a beam at Link if it spots him. | ||
|- | |- | ||
|align=center style="background-color: | |align=center style="background-color:lightsteelblue"| | ||
|[[Lava]] | |[[Lava]] | ||
|Molten rock that hurts Link if he falls in, and forces him to reset to where he fell in from. Appears in Turtle Rock. | |Molten rock that hurts Link if he falls in, and forces him to reset to where he fell in from. Appears in Turtle Rock. | ||
|- | |- | ||
|align=center style="background-color: | |align=center style="background-color:lightsteelblue"|[[File:Mega Thwomp LA sprite.png]] | ||
|[[Mega Thwomp]] | |[[Mega Thwomp]] | ||
|A rocky block that must be knocked down with the Pegasus Boots by hitting its side, and then can be used as a platform. | |A rocky block that must be knocked down with the Pegasus Boots by hitting its side, and then can be used as a platform. | ||
|- | |- | ||
|align=center style="background-color: | |align=center style="background-color:lightsteelblue"|[[File:Podoboo LA sprite.png]] | ||
|[[Podoboo]] | |[[Podoboo]] | ||
|Fireballs that jump out of lava in side-scrolling areas in Turtle Rock. | |Fireballs that jump out of lava in side-scrolling areas in Turtle Rock. | ||
|- | |- | ||
|align=center style="background-color: | |align=center style="background-color:lightsteelblue"| | ||
|[[Quicksand]] | |[[Quicksand]] | ||
|Appears in Yarna Desert, and pulls Link around, potentially into holes. | |Appears in Yarna Desert, and pulls Link around, potentially into holes. | ||
|- | |- | ||
|align=center style="background-color: | |align=center style="background-color:lightsteelblue"|[[File:Spiked Thwomp LA sprite.png]] | ||
|[[Spiked Thwomp]] | |[[Spiked Thwomp]] | ||
|Floating one-eyed faces that attempt to fall on Link when he approaches, though their spikeless heads can be jumped upon. | |Floating one-eyed faces that attempt to fall on Link when he approaches, though their spikeless heads can be jumped upon. | ||
|- | |- | ||
|align=center style="background-color: | |align=center style="background-color:lightsteelblue"|[[File:Stone Elevator LA sprite.png]] | ||
|[[Stone Elevator]] | |[[Stone Elevator]] | ||
|A lift that does not lower unless the weight put upon them is significantly higher than Link's own, necessitating a held bottle. Appears in Bottle Grotto. | |A lift that does not lower unless the weight put upon them is significantly higher than Link's own, necessitating a held bottle. Appears in Bottle Grotto. | ||
|- | |- | ||
|align=center style="background-color: | |align=center style="background-color:lightsteelblue"|[[File:Thwomp LA sprite.png]] | ||
|[[Thwomp (small)|Thwomp]] | |[[Thwomp (small)|Thwomp]] | ||
|Small floating faces that attempt to fall on Link if he approaches. They are very fast and appear in groups. | |Small floating faces that attempt to fall on Link if he approaches. They are very fast and appear in groups. | ||
| Line 602: | Line 769: | ||
!Locations | !Locations | ||
|- | |- | ||
|align=center style="background-color: | |align=center style="background-color:lightsteelblue"|[[File:Rolling Bones LA sprite.png]] | ||
|[[Spike Roller|Rolling Bones]] | |[[Spike Roller|Rolling Bones]] | ||
|A pudgy creature that pushes a studded [[spiketrap|rolling pin]] across the room, which must be jumped over with [[Roc's Feather]]. | |A pudgy creature that pushes a studded [[spiketrap|rolling pin]] across the room, which must be jumped over with [[Roc's Feather]]. | ||
|[[Tail Cave]]<br>[[Turtle Rock]] | |[[Tail Cave]]<br>[[Turtle Rock]] | ||
|- | |- | ||
|align=center style="background-color: | |align=center style="background-color:lightsteelblue"|[[File:King Moblin LA sprite.png]] | ||
|[[Moblin Chief|King Moblin]] | |[[Moblin Chief|King Moblin]] | ||
|The leader of the [[Moblin]]s that kidnapped [[Chain Chomp|BowWow]], he throws spears at Link before charging at him. He must be tricked into charging into a wall to stun him. | |The leader of the [[Moblin]]s that kidnapped [[Chain Chomp|BowWow]], he throws spears at Link before charging at him. He must be tricked into charging into a wall to stun him. | ||
|[[Moblin's Cave]] | |[[Moblin's Cave]] | ||
|- | |- | ||
|align=center style="background-color: | |align=center style="background-color:lightsteelblue"|[[File:Hinox LA sprite.png]] | ||
|[[Hinox]] | |[[Hinox]] | ||
|Giant one-eyed brutes that charge into Link, grab him to throw him, and throw [[bomb]]s. | |Giant one-eyed brutes that charge into Link, grab him to throw him, and throw [[bomb]]s. | ||
|[[Bottle Grotto]]<br>[[Eagle's Tower]]<br>[[Turtle Rock]] | |[[Bottle Grotto]]<br>[[Eagle's Tower]]<br>[[Turtle Rock]] | ||
|- | |- | ||
|align=center style="background-color: | |align=center style="background-color:lightsteelblue"|[[File:Dodongo Snake LA sprite.png]]<br>[[File:Dodongo Snake LA sprite.png]] | ||
|[[Dodongo|Dodongo Snake]]s | |[[Dodongo|Dodongo Snake]]s | ||
|Thick-skinned eel-like creatures that slide around rooms in pairs, mouths agape. They must be tricked into eating bombs to defeat them. | |Thick-skinned eel-like creatures that slide around rooms in pairs, mouths agape. They must be tricked into eating bombs to defeat them. | ||
|[[Key Cavern]]<br>[[Face Shrine]]<br>[[Turtle Rock]] | |[[Key Cavern]]<br>[[Face Shrine]]<br>[[Turtle Rock]] | ||
|- | |- | ||
|align=center style="background-color: | |align=center style="background-color:lightsteelblue"|[[File:Desert Lanmola LA sprite.png]] | ||
|[[Lanmola|Desert Lanmola]] | |[[Lanmola|Desert Lanmola]] | ||
|A giant centipede that leaps from a quicksand pit to attack. | |A giant centipede that leaps from a quicksand pit to attack. | ||
|[[Yarna Desert]] | |[[Yarna Desert]] | ||
|- | |- | ||
|align=center style="background-color: | |align=center style="background-color:lightsteelblue"|[[File:Cue Ball LA sprite.png]] | ||
|[[Hydrosoar|Cue Ball]] | |[[Hydrosoar|Cue Ball]] | ||
|A water- and lava-skimming creature with an armored face, it must be attacked from the back as it circles the room, occasionally spinning. | |A water- and lava-skimming creature with an armored face, it must be attacked from the back as it circles the room, occasionally spinning. | ||
|[[Angler's Tunnel]]<br>[[Turtle Rock]] | |[[Angler's Tunnel]]<br>[[Turtle Rock]] | ||
|- | |- | ||
|align=center style="background-color: | |align=center style="background-color:lightsteelblue"|[[File:Master Stalfos LA sprite.png]] | ||
|[[Master Stalfos]] | |[[Master Stalfos]] | ||
|A [[Stalfos Knight]] that stole the [[Hookshot|Hook Shot]], but cowardly flees several times throughout the dungeon. He must be knocked down with repeated hits, then hit with bombs while in pieces. | |A [[Stalfos Knight]] that stole the [[Hookshot|Hook Shot]], but cowardly flees several times throughout the dungeon. He must be knocked down with repeated hits, then hit with bombs while in pieces. | ||
|[[Catfish's Maw]] | |[[Catfish's Maw]] | ||
|- | |- | ||
|align=center style="background-color: | |align=center style="background-color:lightsteelblue"|[[File:Gohma LA sprite.png]]<br>[[File:Gohma LA sprite.png]] | ||
|[[Gohma]]s | |[[Gohma]]s | ||
|A pair of large-eyed arthropods that scuttle back-and-forth, occasionally charging forward. They can only be beaten by shooting the eye when it is open. | |A pair of large-eyed arthropods that scuttle back-and-forth, occasionally charging forward. They can only be beaten by shooting the eye when it is open. | ||
|[[Catfish's Maw]] | |[[Catfish's Maw]] | ||
|- | |- | ||
|align=center style="background-color: | |align=center style="background-color:lightsteelblue"|[[File:Armos Knight LA sprite.png]] | ||
|[[Armos Knight]] | |[[Armos Knight]] | ||
|A giant, aggressive statue that attempts to smash Link. | |A giant, aggressive statue that attempts to smash Link. | ||
|[[Ancient Ruins (The Legend of Zelda: Link's Awakening)|Southern Face Shrine]] | |[[Ancient Ruins (The Legend of Zelda: Link's Awakening)|Southern Face Shrine]] | ||
|- | |- | ||
|align=center style="background-color: | |align=center style="background-color:lightsteelblue"|[[File:Smasher LA sprite.png]] | ||
|[[Rover|Smasher]] | |[[Rover|Smasher]] | ||
|An odd ray-like creature that throws an iron ball around, which must be instead thrown at it to damage it. | |An odd ray-like creature that throws an iron ball around, which must be instead thrown at it to damage it. | ||
|[[Face Shrine]]<br>[[Turtle Rock]] | |[[Face Shrine]]<br>[[Turtle Rock]] | ||
|- | |- | ||
|align=center style="background-color: | |align=center style="background-color:lightsteelblue"|[[File:Battle Bat LA sprite.png]] [[File:Battle Bat LA sprite.png]]<br>[[File:Battle Bat LA sprite.png]] [[File:Grim Creeper LA sprite.png]] [[File:Battle Bat LA sprite.png]]<br>[[File:Battle Bat LA sprite.png]] [[File:Battle Bat LA sprite.png]] | ||
|[[Grim Creeper]] and the [[Creep|Big Keese]] | |[[Grim Creeper]] and the [[Creep|Big Keese]] | ||
|A piccolo-playing imp and his fly-like "brothers," which he commands to fly in formation at Link with his instrument. Once all the Big Keese are defeated, the Grim Creeper swears revenge and leaves. | |A piccolo-playing imp and his fly-like "brothers," which he commands to fly in formation at Link with his instrument. Once all the Big Keese are defeated, the Grim Creeper swears revenge and leaves. | ||
|[[Eagle's Tower]] | |[[Eagle's Tower]] | ||
|- | |- | ||
|align=center style="background-color: | |align=center style="background-color:lightsteelblue"|[[File:Turtle Rock mini-boss LA sprite.png]] | ||
|[[Turtle Rock (boss)|Turtle Rock]] | |[[Turtle Rock (boss)|Turtle Rock]] | ||
|The face of [[Turtle Rock]] brought to life with the [[Frog's Song of Soul]]. It darts out at Link to attack. | |The face of [[Turtle Rock]] brought to life with the [[Frog's Song of Soul]]. It darts out at Link to attack. | ||
|[[Tal Tal Mountain Range]] | |[[Tal Tal Mountain Range]] | ||
|- | |- | ||
|align=center style="background-color: | |align=center style="background-color:lightsteelblue"|[[File:Blaino LA sprite.png]] | ||
|[[Blaino]] | |[[Blaino]] | ||
|A mighty punching fighter that knocks Link around and can even send him back to the dungeon entrance. | |A mighty punching fighter that knocks Link around and can even send him back to the dungeon entrance. | ||
| Line 677: | Line 844: | ||
!Location | !Location | ||
|- | |- | ||
|align=center style="background-color: | |align=center style="background-color:lightsteelblue"|[[File:Moldorm LA sprite.png]] | ||
|[[Moldorm (boss)|Moldorm]] | |[[Moldorm (boss)|Moldorm]] | ||
|A giant caterpillar that tries to knock Link into a pit to force the battle to restart. Its tail end is its weak point. | |A giant caterpillar that tries to knock Link into a pit to force the battle to restart. Its tail end is its weak point. | ||
|[[Tail Cave]] | |[[Tail Cave]] | ||
|- | |- | ||
|align=center style="background-color: | |align=center style="background-color:lightsteelblue"|[[File:Genie LA sprite.png]] | ||
|[[Genie]] | |[[Genie]] | ||
|A fire-juggling spirit living in a [[pot|bottle]]. It must be attacked while inside the bottle to stun it, then picked up with the [[Power Bracelet]] and thrown. After enough of this, the bottle is destroyed, and the Genie starts teleporting over Link to attack. However, it can now be attacked directly. | |A fire-juggling spirit living in a [[pot|bottle]]. It must be attacked while inside the bottle to stun it, then picked up with the [[Power Bracelet]] and thrown. After enough of this, the bottle is destroyed, and the Genie starts teleporting over Link to attack. However, it can now be attacked directly. | ||
|[[Bottle Grotto]] | |[[Bottle Grotto]] | ||
|- | |- | ||
|align=center style="background-color: | |align=center style="background-color:lightsteelblue"|[[File:Slime Eye LA sprite.png]] | ||
|[[Slime Eye]] | |[[Slime Eye]] | ||
|A huge eye-like [[Zol|Gel]] that drops several large Gels from the ceiling before falling itself. It must be forcibly split by running it half with the [[Pegasus Boots]], and then the smaller halves must be attacked normally as they bounce around. | |A huge eye-like [[Zol|Gel]] that drops several large Gels from the ceiling before falling itself. It must be forcibly split by running it half with the [[Pegasus Boots]], and then the smaller halves must be attacked normally as they bounce around. | ||
|[[Key Cavern]] | |[[Key Cavern]] | ||
|- | |- | ||
|align=center style="background-color: | |align=center style="background-color:lightsteelblue"|[[File:Angler Fish LA sprite.png]] | ||
|[[Angler Fish (boss)|Angler Fish]] | |[[Angler Fish (boss)|Angler Fish]] | ||
|A huge fish that swims around a small side-scrolling area and attacks directly, as well as with falling rocks and [[Mini Angler|its babies]]. The lure is the weak point. | |A huge fish that swims around a small side-scrolling area and attacks directly, as well as with falling rocks and [[Mini Angler|its babies]]. The lure is the weak point. | ||
|[[Angler's Tunnel]] | |[[Angler's Tunnel]] | ||
|- | |- | ||
|align=center style="background-color: | |align=center style="background-color:lightsteelblue"|[[File:Slime Eel LA sprite.png]] | ||
|[[Slime Eel]] | |[[Slime Eel]] | ||
|A huge serpentine creature that lunges its head from the wall and its studded tail from the floor. Its head must be hooked with the [[Hookshot|Hook Shot]], allowing Link to pull it outward and attack the delicate neck. | |A huge serpentine creature that lunges its head from the wall and its studded tail from the floor. Its head must be hooked with the [[Hookshot|Hook Shot]], allowing Link to pull it outward and attack the delicate neck. | ||
|[[Catfish's Maw]] | |[[Catfish's Maw]] | ||
|- | |- | ||
|align=center style="background-color: | |align=center style="background-color:lightsteelblue"|[[File:Facade LA sprite.png]] | ||
|[[Facade]] | |[[Facade]] | ||
|A giant hollow face in the floor that attacks by manipulating the room. It must be damaged with bombs. | |A giant hollow face in the floor that attacks by manipulating the room. It must be damaged with bombs. | ||
|[[Face Shrine]] | |[[Face Shrine]] | ||
|- | |- | ||
|align=center style="background-color: | |align=center style="background-color:lightsteelblue"|[[File:Evil Eagle LA sprite.png]] | ||
|[[Evil Eagle]] | |[[Evil Eagle]] | ||
|A huge bird summoned at a high-altitude side-scrolling area by the [[Grim Creeper]]. It flies around, pushing Link with wind and feathers, and must be guarded against with the [[Mirror Shield]]. | |A huge bird summoned at a high-altitude side-scrolling area by the [[Grim Creeper]]. It flies around, pushing Link with wind and feathers, and must be guarded against with the [[Mirror Shield]]. | ||
|[[Eagle's Tower]] | |[[Eagle's Tower]] | ||
|- | |- | ||
|align=center style="background-color: | |align=center style="background-color:lightsteelblue"|[[File:Hot Head LA sprite.png]] | ||
|[[Hot Head]] | |[[Hot Head]] | ||
|A huge fiery face that leaps up from lava. It can be attacked with the [[Magic Rod]], causing it to bounce around erratically and eventually lose its flame permanently. | |A huge fiery face that leaps up from lava. It can be attacked with the [[Magic Rod]], causing it to bounce around erratically and eventually lose its flame permanently. | ||
| Line 719: | Line 886: | ||
====Shadows==== | ====Shadows==== | ||
The final Nightmare is a sequential fight against [[Shadow (The Legend of Zelda: Link's Awakening)|Shadow]]s | The final Nightmare, fought in the [[Wind Fish's Egg]], is a sequential fight against [[Shadow (The Legend of Zelda: Link's Awakening)|Shadow]]s. They take a variety of forms, most of them based on foes fought by Link in the game and the previous title, ''A Link to the Past''. | ||
{|class="wikitable" | {|class="wikitable" | ||
| Line 726: | Line 893: | ||
!Description | !Description | ||
|- | |- | ||
|align=center style="background-color: | |align=center style="background-color:lightsteelblue"|[[File:Giant Zol shadow LA sprite.png]] | ||
|[[Giant Zol Shadow|Giant Gel]] | |[[Giant Zol Shadow|Giant Gel]] | ||
|A giant slime that can only be damaged with [[Magic Powder]]. | |A giant slime that can only be damaged with [[Magic Powder]]. | ||
|- | |- | ||
|align=center style="background-color: | |align=center style="background-color:lightsteelblue"|[[File:Agahnim shadow LA sprite.png]] | ||
|[[Agahnim Shadow|Agahnim's Shadow]] | |[[Agahnim Shadow|Agahnim's Shadow]] | ||
|A shadow in the shape of [[Agahnim]] from the previous game. It casts magic at Link, and the round blasts must be deflected back into it with the sword or [[shovel]]. | |A shadow in the shape of [[Agahnim]] from the previous game. It casts magic at Link, and the round blasts must be deflected back into it with the sword or [[shovel]]. | ||
|- | |- | ||
|align=center style="background-color: | |align=center style="background-color:lightsteelblue"|[[File:Moldorm shadow LA sprite.png]] | ||
|[[Moldorm Shadow|Moldorm's Shadow]] | |[[Moldorm Shadow|Moldorm's Shadow]] | ||
|A shadow in the shape of a [[Moldorm (boss)|Moldorm]]. Like normal ones, the tail end is the weak point. | |A shadow in the shape of a [[Moldorm (boss)|Moldorm]]. Like normal ones, the tail end is the weak point. | ||
|- | |- | ||
|align=center style="background-color: | |align=center style="background-color:lightsteelblue"|[[File:Ganon shadow LA sprite.png]] | ||
|[[Ganon Shadow|Shadow of Ganon]] | |[[Ganon Shadow|Shadow of Ganon]] | ||
|A shadow in the shape of [[Ganon]], the final boss of the previous game. It summons [[Firebat]]s to attack and must be damaged with [[Spin Attack]]s. | |A shadow in the shape of [[Ganon]], the final boss of the previous game. It summons [[Firebat]]s to attack and must be damaged with [[Spin Attack]]s. | ||
|- | |- | ||
|align=center style="background-color: | |align=center style="background-color:lightsteelblue"|[[File:Lanmola shadow LA sprite.png]] | ||
|[[Lanmola Shadow|Lanmola]] | |[[Lanmola Shadow|Lanmola]] | ||
|A quick-moving shadow that, while agile, is not especially strong. | |A quick-moving shadow that, while agile, is not especially strong. | ||
|- | |- | ||
|align=center style="background-color: | |align=center style="background-color:lightsteelblue"|[[File:DethI LA sprite.png]] | ||
|[[Death Shadow|DethI]] | |[[Death Shadow|DethI]] | ||
|The final shadow, a giant one-eyed being with a pair of arms that spin in opposite directions. The eye can be attacked only when it is open; while different weapons do different amount of damage, the [[Boomerang]] kills it immediately. | |The final shadow, a giant one-eyed being with a pair of arms that spin in opposite directions. The eye can be attacked only when it is open; while different weapons do different amount of damage, the [[Boomerang]] kills it immediately. | ||
| Line 758: | Line 925: | ||
!Description | !Description | ||
|- | |- | ||
|align=center style="background-color: | |align=center style="background-color:lightsteelblue"|[[File:Fairy LA sprite.png]] | ||
|[[Fairy|Faerie]] | |[[Fairy|Faerie]] | ||
| | |Small sprites that heal Link when touched. They are a rare drop, but always appear from dungeon minibosses and certain other tough enemies. | ||
|- | |- | ||
|align=center style="background-color: | |align=center style="background-color:lightsteelblue"|[[File:Guardian Acorn LA sprite.png]] | ||
|[[Guardian Acorn]] | |[[Guardian Acorn]] | ||
| | |An uncommon drop that boosts Link's defense until the next time he walks through a door. | ||
|- | |- | ||
|align=center style="background-color: | |align=center style="background-color:lightsteelblue"|[[File:Heart LA sprite.png]] | ||
|[[Heart]] | |[[Heart]] | ||
| | |A common drop that restores one heart of Link's life meter. | ||
|- | |- | ||
|align=center style="background-color: | |align=center style="background-color:lightsteelblue"|[[File:Heart Container LA sprite.png]] | ||
|[[Heart Container]] | |[[Heart Container]] | ||
| | |Special items dropped by bosses that permanently boost Link's total health capacity. | ||
|- | |- | ||
|align=center style="background-color: | |align=center style="background-color:lightsteelblue"|[[File:Piece of Heart LA sprite.png]] | ||
|[[Piece of Heart]] | |[[Piece of Heart]] | ||
| | |Heart Container fragments scattered across the island. Collecting four makes a full Heart Container. | ||
|- | |- | ||
|align=center style="background-color: | |align=center style="background-color:lightsteelblue"|[[File:Piece of Power LA sprite.png]] | ||
|[[Piece of Power]] | |[[Piece of Power]] | ||
| | |An uncommon drop that boosts Link's offense until the next time he walks through a door. | ||
|- | |- | ||
|align=center style="background-color: | |align=center style="background-color:lightsteelblue"|[[File:Rupee LA sprite.png]] | ||
|[[Rupee]] | |[[Rupee]] | ||
| | |Small gems that act as money. Ones on the field are all worth one, but ones in chests can be worth more. | ||
|} | |} | ||
===Equipable items=== | ===Equipable items=== | ||
The equipment consists of items that the player can equip to the {{button|GB|A}} or {{button|GB|B}} buttons for Link to use. | The equipment consists of items that the player can equip to the {{button|GB|A}} or {{button|GB|B}} buttons for Link to use. Most are only obtained once. | ||
{|class=wikitable | {|class=wikitable | ||
!Sprite | !Sprite | ||
| Line 794: | Line 961: | ||
!Description | !Description | ||
|- | |- | ||
|align=center style="background-color: | |align=center style="background-color:lightsteelblue"|[[File:Boomerang LA sprite.png]] | ||
|[[Boomerang]] | |[[Boomerang]] | ||
| | |A secret long-range item that deals special effects many enemies and grabs far items. It is a loan from the hidden [[Goriya]] at [[Toronbo Shores]] after getting the [[Magnifying Glass]] and trading another item for it. | ||
|- | |- | ||
|align=center style="background-color: | |align=center style="background-color:lightsteelblue"|[[File:Bow LA sprite.png]] | ||
|[[Bow]] and [[Arrow]]s | |[[Bow]] | ||
|An item buyable from the [[Town Tool Shop]] for a steep price once the [[Shovel]] has been bought. It cannot be used unless Link has [[Arrow]]s. By using it and [[Bomb]]s at the same time, Link can fire [[Bomb Arrow]]s. | |||
|- | |- | ||
|align=center style="background-color: | |align=center style="background-color:lightsteelblue"|[[File:Hookshot LA sprite.png]] | ||
|[[Hookshot|Hook Shot]] | |[[Hookshot|Hook Shot]] | ||
| | |A grappling hook on a retractable chain used for pulling Link towards objects and objects towards him. It is recovered from [[Master Stalfos]] once he is finally destroyed in [[Catfish's Maw]]. | ||
|- | |- | ||
|align=center style="background-color: | |align=center style="background-color:lightsteelblue"|[[File:Magic Rod LA sprite.png]] | ||
|[[Magic Rod]] | |[[Magic Rod]] | ||
| | |A magic wand that casts powerful spells that melt through ice, catch most enemies on fire, and even deal damage to fire enemies. It is found in [[Turtle Rock]]. | ||
|- | |- | ||
|align=center style="background-color: | |align=center style="background-color:lightsteelblue"|[[File:Ocarina LA sprite.png]] | ||
|[[Ocarina]] | |[[Ocarina]] | ||
| | |A wind instrument Link can play magic songs on. It is found in the middle of the [[Dream Shrine]]. | ||
|- | |- | ||
|align=center style="background-color: | |align=center style="background-color:lightsteelblue"|[[File:Pegasus Boots LA sprite.png]] | ||
|[[Pegasus Boots]] | |[[Pegasus Boots]] | ||
| | |Boots that let Link dash forward. They are found in [[Key Cavern]]. | ||
|- | |- | ||
|align=center style="background-color: | |align=center style="background-color:lightsteelblue" rowspan=2|[[File:Power Bracelet LA sprite.png]] | ||
|[[Power Bracelet]] | |[[Power Bracelet]] | ||
| | |A mighty bracelet that lets Link pick up [[rock]]s, [[skull]]s, and [[Pot|bottle]]s. It is found in [[Bottle Grotto]]. | ||
|- | |- | ||
|[[Powerful Bracelet]] | |[[Powerful Bracelet]] | ||
| | |An even stronger bracelet that allows Link to carry pillars and huge iron balls. It is found in the [[Face Shrine]]. | ||
|- | |- | ||
|align=center style="background-color: | |align=center style="background-color:lightsteelblue"|[[File:Roc's Feather LA sprite.png]] | ||
|[[Roc's Feather]] | |[[Roc's Feather]] | ||
| | |A feather that allows Link to jump high over pits and enemies. It is found in the [[Tail Cave]]. | ||
|- | |- | ||
|align=center style="background-color: | |align=center style="background-color:lightsteelblue" rowspan=2|[[File:Shield LA sprite.png]] | ||
|[[Shield]] | |[[Shield]] | ||
| | |Link's shield from a previous adventure, it blocks basic projectiles such as rocks and spears. It is given by [[Tarin]] at the very start of the game. | ||
|- | |- | ||
|[[Mirror Shield]] | |[[Mirror Shield]] | ||
| | |A stronger shield that can repel more projectiles, such as fire and magic. | ||
|- | |- | ||
|align=center style="background-color: | |align=center style="background-color:lightsteelblue"|[[File:Shovel LA sprite.png]] | ||
|[[Shovel]] | |[[Shovel]] | ||
| | |An item that allows Link to dig holes. It is bought at the [[Town Tool Shop]]. | ||
|- | |- | ||
|align=center style="background-color: | |align=center style="background-color:lightsteelblue" rowspan=2|[[File:Sword LA sprite.png]] | ||
|[[Sword]] | |[[Sword]] | ||
| | |Link's sword from a previous adventure, acting as his most basic weapon. It is recovered from [[Toronbo Shores]] at the start of the game. | ||
|- | |- | ||
|[[Koholint Sword|Level 2 Sword]] | |[[Koholint Sword|Level 2 Sword]] | ||
| | |A more powerful sword earned from [[Seashell Mansion]] after bringing in 20 [[Secret Seashell]]s. | ||
|- | |- | ||
|align=center style="background-color: | |align=center style="background-color:lightsteelblue"|[[File:Toadstool LA sprite.png]] | ||
|[[Toadstool]] | |[[Toadstool]] | ||
| | |A magical mushroom that can be plucked from the [[Mysterious Forest]] whenever Link does not have [[Magic Powder]]. By giving it to the [[Witch]], he can get Magic Powder from her. | ||
|} | |||
;Replenishable items | |||
These items can be found multiple times. Each has a limited capacity, each of which can be extended by a "curse" from the [[Li'l Devil|Mad Batter]]. | |||
{|class=wikitable | |||
!Sprite | |||
!Name | |||
!Capacity 1 | |||
!Capacity 2 | |||
!Description | |||
|- | |||
|align=center style="background-color:lightsteelblue"|[[File:Bow LA sprite.png]] | |||
|[[Arrow]] | |||
|20 | |||
|60 | |||
|Ammunition for the [[Bow]]. Arrows can be found as moderately common drop, and deal extra damage against armored enemies. | |||
|- | |||
|align=center style="background-color:lightsteelblue"|[[File:Bomb LA sprite.png]] | |||
|[[Bomb]] | |||
|20 | |||
|60 | |||
|Explosives used to defeat enemies and blow holes in cracked walls. They can be found in a variety of places. | |||
|- | |||
|align=center style="background-color:lightsteelblue"|[[File:Magic Powder LA sprite.png]] | |||
|[[Magic Powder]] | |||
|20 | |||
|40 | |||
|Special dust that can light torches and affect certain enemies. It is gotten from the [[Witch]] after giving her a [[Toadstool]], though it can uncommonly be found elsewhere. | |||
|} | |} | ||
;Songs | ;Songs | ||
Three songs can be learned and played on the [[Ocarina]]. | |||
{|class=wikitable | {|class=wikitable | ||
!Sprite | !Sprite | ||
| Line 866: | Line 1,054: | ||
!Description | !Description | ||
|- | |- | ||
|align=center style="background-color: | |align=center style="background-color:lightsteelblue"| | ||
|1: [[Ballad of the Wind Fish]] | |1: [[Ballad of the Wind Fish]] | ||
| | |A song that, when combined with the [[Instruments of the Sirens]], is said to be able to awaken the [[Wind Fish]]. It is learned from [[Marin]]. | ||
|- | |- | ||
|align=center style="background-color: | |align=center style="background-color:lightsteelblue"| | ||
|2: [[Manbo's Mambo]] | |2: [[Manbo's Mambo]] | ||
| | |A song that warps Link to the entrance of whatever dungeon he is in; on the overworld, it warps him to [[Crazy Tracy's Health Spa]]. It is leaned from [[Manbo]] in [[Tal Tal Heights]]. | ||
|- | |- | ||
|align=center style="background-color: | |align=center style="background-color:lightsteelblue"| | ||
|3: [[Frog's Song of Soul]] | |3: [[Frog's Song of Soul]] | ||
| | |A song that imbues life into certain things. It is learned from [[Mamu]] in the [[Signpost Maze]]. | ||
|} | |} | ||
| Line 885: | Line 1,073: | ||
!Description | !Description | ||
|- | |- | ||
|align=center style="background-color: | |align=center style="background-color:lightsteelblue"|[[File:Flippers LA sprite.png]] | ||
|[[Flippers]] | |[[Flippers]] | ||
| | |An item that allows Link to swim. They are found in [[Angler's Tunnel]]. | ||
|- | |- | ||
|align=center style="background-color: | |align=center style="background-color:lightsteelblue"|[[File:Golden Leaf LA sprite.png]] | ||
|[[Golden Leaf]] | |[[Golden Leaf]] | ||
| | |Five leaves that [[Richard]] requests be recovered from [[Kanalet Castle]]. | ||
|- | |- | ||
|align=center style="background-color: | |align=center style="background-color:lightsteelblue"|[[File:Magnifying Lens LA sprite.png]] | ||
|[[Magnifying Lens]] | |[[Magnifying Lens]] | ||
| | |An item that allows Link to see invisible entities and read "[[Dark Secrets And Mysteries Of Koholint]]" at the [[Library]]. It is gained by completing the trading sequence. | ||
|- | |- | ||
|align=center style="background-color: | |align=center style="background-color:lightsteelblue"|[[File:Secret Medicine LA sprite.png]] | ||
|[[Secret medicine]] | |[[Secret medicine]] | ||
| | |A special medicine that restores Link's life automatically upon losing all health. It is bought from [[Crazy Tracy]], and can rarely be found in chests. | ||
|- | |- | ||
|align=center style="background-color: | |align=center style="background-color:lightsteelblue"|[[File:Secret Seashell LA sprite.png]] | ||
|[[Secret Seashell]] | |[[Secret Seashell]] | ||
| | |Special conch shells that are found hidden throughout the island. They are returned to the [[Seashell Mansion]]. | ||
|} | |} | ||
;Trading sequence | ;Trading sequence | ||
{|class="wikitable | {|class="wikitable" | ||
! | !Sprite | ||
!Name | !Name | ||
! | !Description | ||
|- | |- | ||
|align=center style="background-color: | |align=center style="background-color:lightsteelblue"|[[File:Yoshi doll LA sprite.png]] | ||
|[[Yoshi Doll]] | |[[Yoshi Doll]] | ||
| | |A plush toy of [[Mariowiki:Yoshi|Yoshi]] won from the [[Trendy Game]]. It is given to the [[Mamasha|Quadruplets' mother]] for her baby. | ||
|- | |- | ||
|align=center style="background-color: | |align=center style="background-color:lightsteelblue"|[[File:Ribbon LA sprite.png]] | ||
|[[Ribbon]] | |[[Ribbon]] | ||
| | |An accessory received from the mother. It is given to the [[ChowChow|Mini Bow-Wow]] inside the doghouse adjoining [[Madam MeowMeow]]'s house. | ||
|- | |- | ||
|align=center style="background-color: | |align=center style="background-color:lightsteelblue"|[[File:Canned food LA sprite.png]] | ||
|[[Canned food]] | |[[Canned food]] | ||
| | |Meat in a can received from the Mini Bow-Wow. It is given to [[Sale]] at [[Sale's House O' Bananas]]. | ||
|- | |- | ||
|align=center style="background-color: | |align=center style="background-color:lightsteelblue"|[[File:Bananas LA sprite.png]] | ||
|[[Bananas]] | |[[Bananas]] | ||
| | |Fruit received from Sale. It is given to [[Kiki the Monkey|Kiki]] in exchange for building a bridge to get into [[Kanalet Castle]]. | ||
|- | |- | ||
|align=center style="background-color: | |align=center style="background-color:lightsteelblue"|[[File:Stick LA sprite.png]] | ||
|[[Stick]] | |[[Stick]] | ||
| | |A random stick found on the [[Monkey]]s' bridge. It is given to [[Tarin]] in [[Ukuku Prairie]] so he can knock down a [[beehive]]. | ||
|- | |- | ||
|align=center style="background-color: | |align=center style="background-color:lightsteelblue"|[[File:Honeycomb LA sprite.png]] | ||
|[[Honeycomb]] | |[[Honeycomb]] | ||
| | |Rich honey recovered from the downed beehive. It is given to [[Chef Bear]]. | ||
|- | |- | ||
|align=center style="background-color: | |align=center style="background-color:lightsteelblue"|[[File:Pineapple LA sprite.png]] | ||
|[[Pineapple]] | |[[Pineapple]] | ||
| | |A juicy fruit received from Chef Bear. It is given to [[Papahl]] in [[Tal Tal Mountain Range]]. | ||
|- | |- | ||
|align=center style="background-color: | |align=center style="background-color:lightsteelblue"|[[File:Hibiscus LA sprite.png]] | ||
|[[Hibiscus]] | |[[Hibiscus]] | ||
| | |A flower received from Papahl. It is given to [[Christine]] in [[Animal Village]]. | ||
|- | |- | ||
|align=center style="background-color: | |align=center style="background-color:lightsteelblue"|[[File:Letter LA sprite.png]] | ||
|[[Goat's letter]] | |[[Goat's letter]] | ||
| | |A letter from Christine. It is given to [[Mr. Write]] near [[Goponga Swamp]]. | ||
|- | |- | ||
|align=center style="background-color: | |align=center style="background-color:lightsteelblue"|[[File:Broom LA sprite.png]] | ||
|[[Broom]] | |[[Broom]] | ||
| | |A broom received from Mr. Write. It is given to [[Grandma Yahoo|Grandma Ulrira]] in [[Mabe Village]] to replace her broken one. | ||
|- | |- | ||
|align=center style="background-color: | |align=center style="background-color:lightsteelblue"|[[File:Fishing hook LA sprite.png]] | ||
|[[Fishing hook]] | |[[Fishing hook]] | ||
| | |A fishhook from Grandma Ulrira. It is given to the [[Fisherman]] found under a bridge in [[Martha's Bay]]. | ||
|- | |- | ||
|align=center style="background-color: | |align=center style="background-color:lightsteelblue"|[[File:Bra LA sprite.png]]<br>[[File:Necklace LA sprite.png]] | ||
|[[Necklace]] | |Pink Brassiere<br>[[Necklace]] | ||
|A missing accessory of the [[Mermaid]] pulled up accidentally by the Fisherman. It is returned to the Mermaid in the middle of Martha's Bay. In Japanese, French, and German releases, it is a brassiere, but in English releases, it is censored into a necklace. | |||
|- | |- | ||
|align=center style="background-color: | |align=center style="background-color:lightsteelblue"|[[File:Scale LA sprite.png]] | ||
|[[Mermaid's Scale|Scale]] | |[[Mermaid's Scale|Scale]] | ||
| | |A scale from the Mermaid's tail. It is added to [[Schule Donavitch]]'s mermaid statue overlooking Martha's Bay in order to move it and recover the [[Magnifying Glass]] from the cave underneath. | ||
|} | |} | ||
;Dungeon keys | ;Dungeon keys | ||
{|class="wikitable | In this game, many dungeons require keys to open their entrances. | ||
! | {|class="wikitable" | ||
!Sprite | |||
!Name | !Name | ||
! | !Description | ||
|- | |- | ||
|align=center style="background-color: | |align=center style="background-color:lightsteelblue"|[[File:Tail Key LA sprite.png]] | ||
|[[Tail Key]] | |[[Tail Key]] | ||
| | |The key to the [[Tail Cave]], recovered from the [[Mysterious Forest]]. | ||
|- | |- | ||
|align=center style="background-color: | |align=center style="background-color:lightsteelblue"|[[File:Slime Key LA sprite.png]] | ||
|[[Slime Key]] | |[[Slime Key]] | ||
| | |The key to [[Key Cavern]], found buried in front of an [[Owl Statue]] in [[Pothole Field]]. | ||
|- | |- | ||
|align=center style="background-color: | |align=center style="background-color:lightsteelblue"|[[File:Angler Key LA sprite.png]] | ||
|[[Angler Key]] | |[[Angler Key]] | ||
| | |The key to [[Angler's Tunnel]], found in [[Yarna Desert]]. | ||
|- | |- | ||
|align=center style="background-color: | |align=center style="background-color:lightsteelblue"|[[File:Face Key LA sprite.png]] | ||
|[[Face Key]] | |[[Face Key]] | ||
| | |The key to the [[Face Shrine]], found in the [[Ancient Ruins (The Legend of Zelda: Link's Awakening)|Southern Face Shrine]]. | ||
|- | |- | ||
|align=center style="background-color: | |align=center style="background-color:lightsteelblue"|[[File:Bird Key LA sprite.png]] | ||
|[[Bird Key]] | |[[Bird Key]] | ||
| | |The key to [[Eagle's Tower]], found in a cave in [[Tal Tal Mountain Range]] only navigable with help from the [[Flying Rooster]]. | ||
|} | |} | ||
| Line 998: | Line 1,187: | ||
!Description | !Description | ||
|- | |- | ||
|align=center style="background-color: | |align=center style="background-color:lightsteelblue"|[[File:Compass LA sprite.png]] | ||
|[[Compass]] | |[[Compass]] | ||
| | |An item that shows the position of chests and the boss on the map, and plays a sound when a room with a hidden item is entered. | ||
|- | |- | ||
|align=center style="background-color: | |align=center style="background-color:lightsteelblue"|[[File:Dungeon Map LA sprite.png]] | ||
|[[Dungeon Map]] | |[[Dungeon Map]] | ||
| | |An item that shows the layout of the entire dungeon, including where Link has not yet explored. | ||
|- | |- | ||
|align=center style="background-color: | |align=center style="background-color:lightsteelblue"|[[File:Nightmare Key LA sprite.png]] | ||
|[[Boss Key|Nightmare Key]] | |[[Boss Key|Nightmare Key]] | ||
| | |The key leading to the dungeon's boss. | ||
|- | |- | ||
|align=center style="background-color: | |align=center style="background-color:lightsteelblue"|[[File:Small Key LA sprite.png]] | ||
|[[Small Key]] | |[[Small Key]] | ||
| | |Interchangeable keys that can open a single locked door or block in the dungeon they are found in. | ||
|- | |- | ||
|align=center style="background-color: | |align=center style="background-color:lightsteelblue"|[[File:Stone Slab LA sprite.png]] | ||
|[[Stone slab fragment]] | |[[Stone slab fragment]] | ||
| | |A relief chip that can be put into a [[stone slab]] to get a hint. | ||
|} | |} | ||
| Line 1,022: | Line 1,211: | ||
There are eight [[Instruments of the Sirens]], each one located in a dungeon. Link must obtain all eight in order to awaken the [[Wind Fish]]. | There are eight [[Instruments of the Sirens]], each one located in a dungeon. Link must obtain all eight in order to awaken the [[Wind Fish]]. | ||
{|class="wikitable | {|class="wikitable" | ||
! | !Sprite | ||
!Name | !Name | ||
! | !Description | ||
|- | |- | ||
|align=center style="background-color: | |align=center style="background-color:lightsteelblue"|[[File:Full Moon Cello LA sprite.png]] | ||
|[[Full Moon Cello]] | |[[Full Moon Cello]] | ||
| | |The first instrument, found in the [[Tail Cave]]. | ||
|- | |- | ||
|align=center style="background-color: | |align=center style="background-color:lightsteelblue"|[[File:Conch Horn LA sprite.png]] | ||
|[[Conch Horn]] | |[[Conch Horn]] | ||
| | |The second instrument, found in [[Bottle Grotto]]. | ||
|- | |- | ||
|align=center style="background-color: | |align=center style="background-color:lightsteelblue"|[[File:Sea Lily's Bell LA sprite.png]] | ||
|[[Sea Lily's Bell]] | |[[Sea Lily's Bell]] | ||
| | |The third instrument, found in [[Key Cavern]]. | ||
|- | |- | ||
|align=center style="background-color: | |align=center style="background-color:lightsteelblue"|[[File:Surf Harp LA sprite.png]] | ||
|[[Surf Harp]] | |[[Surf Harp]] | ||
| | |The fourth instrument, found in [[Angler's Tunnel]]. | ||
|- | |- | ||
|align=center style="background-color: | |align=center style="background-color:lightsteelblue"|[[File:Wind Marimba LA sprite.png]] | ||
|[[Wind Marimba]] | |[[Wind Marimba]] | ||
| | |The fifth instrument, found in [[Catfish's Maw]]. | ||
|- | |- | ||
|align=center style="background-color: | |align=center style="background-color:lightsteelblue"|[[File:Coral Triangle LA sprite.png]] | ||
|[[Coral Triangle]] | |[[Coral Triangle]] | ||
| | |The sixth instrument, found in the [[Face Shrine]]. | ||
|- | |- | ||
|align=center style="background-color: | |align=center style="background-color:lightsteelblue"|[[File:Organ of Evening Calm LA sprite.png]] | ||
|[[Organ of Evening Calm]] | |[[Organ of Evening Calm]] | ||
| | |The seventh instrument, found in [[Eagle's Tower]]. | ||
|- | |- | ||
|align=center style="background-color: | |align=center style="background-color:lightsteelblue"|[[File:Thunder Drum LA sprite.png]] | ||
|[[Thunder Drum]] | |[[Thunder Drum]] | ||
| | |The final instrument, found in [[Turtle Rock]]. | ||
|} | |} | ||
| Line 1,082: | Line 1,271: | ||
*[[Torch]] | *[[Torch]] | ||
*[[Treasure Chest]] | *[[Treasure Chest]] | ||
==Cameos== | ==Cameos== | ||
| Line 1,231: | Line 1,297: | ||
|[[mariowiki:Boo|Boo]] (''Super Mario'' series) | |[[mariowiki:Boo|Boo]] (''Super Mario'' series) | ||
|- | |- | ||
|[[Chain Chomp|BowWow]] and [[ | |[[Chain Chomp|BowWow]] and [[ChowChow|Mini Bow-Wow]]s | ||
|[[Madam MeowMeow]]'s BowWow and Mini Bow-Wows ([[ChowChow]] and [[CiaoCiao]]) are the same species as Chain Chomps, who previously appeared as enemies in ''Super Mario Bros. 3'' and ''[[The Legend of Zelda: A Link to the Past]]''. They are friendly pups unlike most other ones, who do not appear as enemies in ''The Legend of Zelda: Link's Awakening''. | |[[Madam MeowMeow]]'s BowWow and Mini Bow-Wows ([[ChowChow]] and [[CiaoCiao]]) are the same species as Chain Chomps, who previously appeared as enemies in ''Super Mario Bros. 3'' and ''[[The Legend of Zelda: A Link to the Past]]''. They are friendly pups unlike most other ones, who do not appear as enemies in ''The Legend of Zelda: Link's Awakening''. | ||
|[[mariowiki:Chain Chomp|Chain Chomp]] (''Super Mario'' series) | |[[mariowiki:Chain Chomp|Chain Chomp]] (''Super Mario'' series) | ||
Revision as of 03:08, April 23, 2023
It has been requested that this article be rewritten and expanded to add reception, item descriptions, and possibly some other missing information.
| The Legend of Zelda: Link's Awakening | |
|---|---|

| |
| Developer(s) | Nintendo EAD |
| Publisher(s) | Nintendo |
| Release date | |
| Genre(s) | Action-adventure |
| Console(s) | Game Boy |
| Mode(s) | Single player |
- This article is about the Game Boy game. For the enhanced Game Boy Color port, see The Legend of Zelda: Link's Awakening DX. For the Nintendo Switch remake, see The Legend of Zelda: Link's Awakening (Nintendo Switch).
The Legend of Zelda: Link's Awakening is the fourth installment of The Legend of Zelda series and the first handheld title in the series. It was released for the Game Boy in 1993. The game was later ported to the Game Boy Color in 1998 with the title The Legend of Zelda: Link's Awakening DX, which was released on a dual-format black cartridge allowing it to also be playable on original Game Boy units like the original version. A two-volume manga based on the game was released in Japan in 1994.
The Legend of Zelda: Link's Awakening is a departure from the main storyline involving Princess Zelda, Ganon, and the Triforce. It takes place after the events of The Legend of Zelda: A Link to the Past. Instead of taking place in Hyrule, the game is set on Koholint Island, where Link is stranded on. To leave the island, Link goes on an adventure to retrieve the Instruments of the Sirens and awaken the Wind Fish.
In February 2019, a Nintendo Direct revealed that a remake of Link's Awakening was under development for the Nintendo Switch. It released worldwide on September 20, 2019.
Plot

After Link's defeat of Ganon in The Legend of Zelda: A Link to the Past, peace was restored in Hyrule, though many were precarious and wondered of potential threats arising from Ganon's ashes. In response, Link left Hyrule and journeyed to foreign lands to strengthen his skills and wits in case a possible threat would occur. After months of training, Link felt ready to return to Hyrule, so he got on a small boat and traveled back.[1][2]
As Link goes seafaring in the Great Hyrulean Sea, he gets caught in a big sea storm. A bolt of lightning strikes the boat, causing it to break and sink underwater. Link unconsciously drifts away at the sea, and washes up onto the shore of Koholint Island along with the ship wreckage. Link is found by a young woman, who struggles to wake him up, so she takes him to her home to recover.

Link wakes up on a bed inside her house, located in Mabe Village. From the young woman's voice, he mistakenly believes her to be Princess Zelda, so the young woman, named Marin, introduces herself and tells Link that he is on Koholint Island. She states that many monsters have appeared on Koholint Island where he was washed ashore. Link goes to talk to her father, Tarin, who gives him back his Shield that he found.
Following Marin's instruction, Link goes to the beach, named Toronbo Shores, and finds his sword stuck in a beach. Just before obtaining his sword, Link is encountered by an owl, who tells him that he cannot leave the island unless he awakens the Wind Fish. The owl mentions that the monsters are more violent for this reason. The owl flies off to the Mysterious Forest and waits there for Link.
Upon entering the Mysterious Forest, Link is greeted again by the owl, who instructs him to retrieve the key to unlock the first dungeon, Tail Cave. Link manages to obtain the key, and he enters the Tail Cave. At the end of the cave, Link gets in a boss fight with Moldorm. After defeating the boss, Link goes into the room above and obtains the Full Moon Cello, the first of the Instrument of the Sirens. The owl appears again and explains to Link that the cello and the seven other Instruments of the Sirens are required to awaken the Wind Fish.
Later, during his search for the sixth instrument, Link enters the Ancient Ruins, which has a mural stating that Koholint Island is a dream world created by the Wind Fish, and that the island would permanently disappear if he woke up. After reading it, Link encounters the owl another time, who tells Link that the mural is only a rumor and that only the Wind Fish knows whether it is true. Throughout Koholint Island, the Nightmares attempt to take control of the Wind Fish's dream world, and try to stop Link from waking up the Wind Fish.

After a long journey, Link obtains the eighth and final instrument, the Thunder Drum, in Turtle Rock. He returns to the Wind Fish's Egg, located in the center of Tal Tal Mountain range, and plays the Ballad of the Wind Fish with his Ocarina and the eight Instruments of the Sirens. By doing so, a hole cracks open in the Wind Fish's Egg, and Link enters inside. After traveling through a maze, Link falls into an enclosed chamber. Here he engages in a final battle against the Shadows and their six forms, most of whom are bosses from earlier The Legend of Zelda titles. Its final form is DethI, a one-eyed, two-tentacled creature.

Link manages to defeat the Shadows, causing a long ladder to appear before him. Link climbs to the top and stands on a platform overseeing a starry, black sky. The owl appears to him one last time, revealing himself as part of the Wind Fish's spirit and the guardian of the dream world. He congratulates Link for defeating the Nightmares and his courage in overcoming them. The owl flies away and the Wind Fish appears to Link, and confirms that they are in a dream world. Link plays the Ballad of the Wind Fish a last time, causing him and the Wind Fish to wake up, and the entire Koholint Island to vanish. The dream ends with Link being taken outside by an upward stream of water.
Link wakes up in the middle of the sea, holding on driftwood from the shipwreck. Link hears the Wind Fish's wail and smiles as he watches the Wind Fish slowly moving overhead in the skies. Link's adventure ends with him sitting on driftwood and gazing at the sky.
The game has a perfect ending if Link does not lose a life. After the end credits, a short scene shows Marin, with new wings, flying around the "The End" text. It is unknown if she managed to escape from the Wind Fish's dream, but the sound of a seagull is heard three times while she is on-screen, suggesting that her wish to become a seagull became true.
Characters
Playable character
| Sprite | Name | Description |
|---|---|---|
| Link | Link is the main protagonist, and he goes on an adventure to awaken the Wind Fish. |
Supporting characters
| Sprite | Name | Description |
|---|---|---|
| BowWow | An iron dog owned by Madam MeowMeow, it is kidnapped by Moblins and accompanies Link after being rescued, eating nearby enemies occasionally. It can bite through Goponga Flowers and sense buried Secret Seashells, but will also fight Kiki. | |
| Flying Rooster | A chicken capable of prolonged flight, brought back from its grave under the weathercock with the Frog's Song of Soul. By picking it up, Link can reach many locations. | |
| Marin | An innocent girl living on the island, she is the one who found Link on the shore and cared for him until he awoke. She enjoys singing and is accompanied in various events throughout the game. | |
| Owl | A wise, mysterious bird who shows up at various intervals throughout the game to deliver lore to Link. | |
| Tarin | Marin's comical, goodhearted father found in various odd circumstances. | |
| Wind Fish | The legendary dreamer held within the egg on Mt. Tamaranch. He is regarded as a deity by the islanders. |
Other characters
| Sprite | Name | Description |
|---|---|---|
| Bear Cub | One of the animals who listens to Marin singing in Animal Village. | |
| Christine | A goat from Animal Village and pen pal of Mr. Write. | |
| Chef Bear | An Animal Village resident and chef, who gives Link a pineapple for a honeycomb. | |
| CiaoCiao | A Mini Bow-Wow with an obsession for jewelry. | |
| Crazy Tracy | A reclusive woman who makes secret medicine. | |
| Faerie Queen | Life-restoring large faeries who live in springs. | |
| Fisherman | Runs a fishing minigame in Mabe Village, and either he or an identical character fishes up the Mermaid's belonging after being given a fishing hook. | |
| Ghost | A spirit who wishes to return to his old house one last time before moving on. | |
| Grandma Ulrira | The sweeping-obsessed wife of old man Ulrira. | |
| Goriya | A reclusive friendly monster who lives on Toronbo Shores and lends Link his Boomerang. | |
| Henhouse Keeper | A man who lives in Tal Tal Heights and wishes to see the Flying Rooster. | |
| Hippo Model | A female hippo of Animal Village who is posing for Schule's painting. | |
| Kiki | A monkey who will help build a bridge for Link if given bananas. It responds aggressively to BowWow. | |
| Madam MeowMeow | A BowWow-owning woman in Mabe Village. | |
| Mamu | The leader of a popular frog band who teach Link the Frog's Song of Soul. | |
| Manbo | A large Sun Fish who teaches Link Manbo's Mambo. | |
| Mermaid | A mermaid who has lost her necklace (or swimsuit top in the Japanese, French and German versions) and gives Link one of her scales if he returns it. | |
| Mr. Write | A letter-writing enthusiast who becomes pen pals with Christine. | |
| Old Man Ulrira | An old man who gives Link hints via telephone. | |
| Papahl | The father of at least five children in Mabe Village, who gets lost in Tal Tal Heights. | |
| Quadruplets | Four (or five) children who live in Mabe Village and give Link advice they are too young to understand. | |
| Quadruplets' mother | A mother of at least five children in Mabe Village. | |
| Raccoon | A character who causes Link to get lost in the Mysterious Forest. He is later revealed to be Tarin under a spell. | |
| Richard | The owner of Kanalet Castle who was evicted by his servants. | |
| Sale | A banana-selling crocodile who loves canned food. | |
| Schule Donavitch | An artist crocodile who made the mermaid statue. | |
| Shopkeeper | The owner of the Town Tool Shop, who kills Link with magic if he steals anything and then returns. | |
| Toucan | One of the animals who listens to Marin singing in Animal Village. | |
| Trendy Gamester | The owner of the Trendy Game. An identical character operates Rapids Ride. | |
| Walrus | A sleepy resident of Animal Village who can block paths with his girth. | |
| Witch | A potion-brewer who can make Magic Powder from the Sleepy Toadstool. |
Species
| Sprite | Name | Description |
|---|---|---|
| Bee | Simple insects that stay around their hive in Ukuku Prairie until Tarin knocks it down. | |
| Bird | Carrier pigeon-like birds are found in the houses of Mr. Write and Christine. | |
| Chicken | Simple fowl that summon an angry swarm of invincible chickens if attacked too much. Magic Powder and the Magic Rod can destroy them. | |
| Faerie | Small sprites that heal Link if touched. | |
| Fish | Two sizes of fish, runts and lunkers, appear in the fishing game. Two other fish accompany Manbo. | |
| Frog | Hopping amphibians that accompany Richard and Mamu. | |
| Mini Bow-Wow | Iron puppies owned by Madam MeowMeow. | |
| Monkey | Primates that build a bridge at Kiki's behest. | |
| Mouse | Small rodents found in unkempt houses. | |
| Mutt | Tame foxes that roam Mabe Village. Attacking them causes them to retaliate, but they are defeated by Magic Powder or the Magic Rod. | |
| Rabbit | The main inhabitants of Animal Village. | |
| Seagull | Seabirds that Marin is fascinated with. |
Locations
All of the locations take place in Koholint Island, which is divided into numerous regions and a few towns:
- Animal Village
- Cemetary
- East of the Bay
- Face Shrine
- Goponga Swamp
- Koholint Prairie
- Mabe Village
- Martha's Bay
- Mt. Tamaranch
- Mysterious Forest
- Pothole Field
- Rapids Ride
- Signpost Maze
- South of the Village
- Tabahl Wasteland
- Tal Tal Heights
- Tal Tal Mountain Range
- Toronbo Shores
- Ukuku Prairie
- Waterfall at the Shrine
- Yarna Desert
Minor locations
There are minor locations that appear within one of the greater regions or towns.
- Crazy Tracy's Health Spa
- Eastern Tal Tal Mountains
- Faerie Spring
- Fishing Pond
- Hen House
- House by the Bay
- Madam MeowMeow's House
- Manbo's Pond
- Marin and Tarin's House
- Mermaid Statue
- Old Man Ulrira's House
- Quadruplet's House
- Raft Shop
- Richard's Villa
- Sale's House O' Bananas
- Seashell Mansion
- Telephone Booth
- Town Tool Shop
- Trendy Game Shop
- Under the bridge
- Village Library
- Warp Hole
- Weathercock
- Weird Mr. Write
- Western Tal Tal Mountains
- Witch's Hut
Dungeons
| Name | Description | Item | Reward | Mini-boss | Boss |
|---|---|---|---|---|---|
| Level 1-- Tail Cave | A dungeon located in the hills north of Toronbo Shores. It topographically looks like a Moldorm. The Tail Cave's entrance can be unlocked with the Tail Key. | Roc's Feather |
Full Moon Cello |
Rolling Bones | Moldorm |
| Moblin Cave | A cave found at the foot of Mt. Tamaranch, it is where the Moblins take BowWow after kidnapping him. | BowWow |
King Moblin | None | |
| Level 2-- Bottle Grotto | Bottle Grotto is a jar-shaped dungeon located in Goponga Swamp, and is filled with many pots. Link can access the dungeon if he has BowWow eat every Goponga Flower blocking the entrance. | Power Bracelet |
Conch Horn |
Hinox | Genie |
| Kanalet Castle | The former palace of Richard north of Ukuku Prairie, he has Link go through it to recover his five Golden Leaves. | Golden Leaves |
None | ||
| Level 3-- Key Cavern | A two-floor dungeon found near the Pothole Maze in Ukuku Prairie. Both floors have a layout in the shape of a key, hence its name. Link needs the Slime Key to enter the Key Cavern. | Pegasus Boots |
Sea Lily's Bell |
Dodongo Snakes | Slime Eye |
| Dream Shrine | A blocked-off room in Mabe Village that leads into a subspace room. It requires the Power Bracelet to reach and the Pegasus Boots to fully navigate. | Ocarina |
None | ||
| Level 4-- Angler's Tunnel | A water-filled cave located at the base of Tal Tal Heights. From a bird's-eye view, the outside resembles an anchor or a fishing hook. Link needs the Angler Key to enter the Key Cavern. | Flippers |
Surf Harp |
Cue Ball | Angler Fish |
| Level 5-- Catfish's Maw | An underwater-themed dungeon that takes place within a large catfish-like statue in the center of Martha's Bay. It can be accessed once Link takes the wandering ghost back to its home and then later using his Flippers to take an underwater path to Catfish's Maw. | Hook Shot |
Wind Marimba |
Master Stalfos Gohmas |
Slime Eel |
| Southern Face Shrine | A shrine found north of Animal Village, where Link must first go to learn about the legend of the Wind Fish. | Face Key |
Armos Knight | None | |
| Level 6-- Face Shrine | A ruin further north of the Southern Face Shrine. The Hook Shot and Face Key are required to enter the Face Shrine. | Powerful Bracelet |
Coral Triangle |
Dodongo Snakes Smasher |
Facade |
| Level 7-- Eagle's Tower | A large, four-story tower nestled within the eastern heights of the Tal Tal Mountain Range. It can be unlocked with the Bird Key. | Mirror Shield |
Organ of Evening Calm |
Hinox Grim Creeper |
Evil Eagle |
| Level 8-- Turtle Rock | A lava-filled lair in the cliffside of the western Tal Tal Mountain Range. It is built within the remains of a giant turtle which has become petrified within the rock of the mountainside. To access the dungeon, Link must play the Frog's Song of Soul to bring the turtle's head to life and then defeat it. | Magic Rod |
Thunder Drum |
Cue Ball Rolling Bones Dodongo Snakes Hinox Smasher Blaino |
Hot Head |
| Wind Fish's Egg | A large egg which is the main landmark of Koholint Island. It is the final area that Link accesses. The Wind Fish's Egg is where the Wind Fish is sleeping, tormented by the Shadows. To crack open an entrance into the Wind Fish's Egg, Link must have all eight Instruments of the Sirens and play the Ballad of the Wind Fish. | None | Completion | None | Giant Gel Agahnim's Shadow Moldorm's Shadow Shadow of Ganon Lanmola DethI |
Enemies
| Sprite | Name | Description |
|---|---|---|
| Angler Fry | Small fish that assist the Angler Fish in battle by swimming at Link. | |
| Anti-Faerie | Spirits that fly around the room diagonally to hit Link. They burn when touched by Magic Powder | |
| Anti-Kirby | Puffbals that attempt to inhale Link in Eagle's Tower. | |
| Arm-Mimic | Haniwa that copy Link's movements and deal a fairly large amount of damage. | |
| Armos Statue | Statues that start moving when Link touches them. Found outside the southern Face Shrine. | |
| Beetle | Small insects that endlessly spawn from a single hole in Ukuku Prairie, after which they simply walk around. | |
| Bloober | Squid that swim after Link in side-scrolling areas in a bobbing pattern. | |
| Bomber | Winged mushrooms that fly around and drop bombs with a large blast radius. | |
| Bombite | Walking bombs that have two behaviors: after being hit, they will either ricochet around or follow Link, after which they will explode. Found in Key Cavern. | |
| Boo | Ghosts that follow Link invincibly in dark rooms, but will flee vulnerably when the room is brightened. Found in Bottle Grotto. | |
| Buzz Blob | Bipedal slimes that zap Link if attacked with a sword, unless stunned. Using Magic Powder on one turns it into a cukeman. | |
| Cheep-Sheep | Fish that swim back-and-forth or up-and-down in a simple pattern in side-scrolling areas, though some instead jump. | |
| Crow | Birds that take off and swoop down at Link. One at Kanalet Castle instead attempts to flee with a Golden Leaf. | |
| Cukeman | Bulgy-eyed slimes that say various non sequiturs to Link if spoken to. They are created by sprinkling Magic Powder on a Buzz Blob, which they otherwise act like. | |
| Firebat | Evil magic that swoops at Link after being spawned by the Shadow of Ganon. | |
| Fish | Piranhas that swim around Goponga Swamp with their dorsal fins visible, leaping when Link gets close. | |
| Flying Octorok | Winged octopodes that acts like normal Octoroks, but use their wings to avoid his attacks by jumping away. | |
| Gel (big) | Slimes that can appear on the field, in which case a weak attack will split it into two small Gels, or can appear from the ground, falling from the ceiling, or within chests, in which case one hit will immediately defeat them. | |
| Gel (small) | Slimes that parasitically attach to Link, slowing him. Can be found simply on the field or by hitting certain large Gels with weak weapons. | |
| Ghini | Ghosts that fly around the cemetary erratically after Link. Extra will spawn if he touches the gravestones. | |
| Giant Bubble | A huge orb of energy that acts like a normal Anti-Faerie, but appears only in side-scrolling areas, and is much larger. | |
| Giant Ghini | A huge ghost that spawns from one of the gravestones in the cemetary, and takes more hits than a normal Ghini, but releases a faerie when defeated. | |
| Gibdo | Mummies that do not flinch after Link hits them. Burning one reveals a Stalfos. Found in Eagle's Tower. | |
| Giant Goponga Flower | A large, resilient swamp flower that can shoot fireballs. | |
| Goomba | A simple enemy most often found in side-scrolling areas. Squishing it gives Link a heart. | |
| Goponga Flower | A swamp flower resilient to most attacks. Native to Goponga Swamp. | |
| Hardhat Beetle | Tough creatures that bump Link around. They cannot be defeated with most weapons unless bumped into a pit. | |
| Iron Mask | Small creatures that wander around with a mask negating damage, though it can be removed with the Hook Shot. | |
| Keese | Bats that fly around erratically, attempting to hit Link. | |
| Knight | The strongest enemy in Kanalet Castle, wielding a flail. | |
| Leever | Small entities that burrow and spin around in sandy areas after Link. | |
| Like Like | Large-mouthed creatures that attempt to eat Link's shield, but cannot eat the Mirror Shield. | |
| Mad Bomber | A specific Soldier that hides in pits and throws bombs at Link, and carries a Golden Leaf. | |
| Mask-Mimic | Masked creatures that mirror Link's movements. Their masks negate damage from the sword. | |
| Mini Moldorm | Caterpillars that crawl around in erratic looping patterns, often bumping into walls. | |
| Moblin | Bulldog creatures that wander around slowly and throw spears. Found in the Mysterious Forest and Moblin Cave. They also steal BowWow from Madam MeowMeow. | |
| Monkey | A monkey that throws coconuts at Link from a tree on Toronbo Shores. It can be knocked out with the Pegasus Boots. | |
| Octorok | Octopuses that wander around slowly and spit rocks. | |
| Pairodd | Birdlike creatures that appear in pairs and warp around while shooting projectiles whenever Link approaches. Found in Key Cavern. | |
| Peahat | Plants that fly around and land with their flower propellers. While airborne, they are invincible. | |
| Pig Warrior | Pigs that act exactly like the related Moblins, but appear in mountainous and riverside regions. | |
| Pincer | Centipedes that lunge at Link when he approaches their holes. | |
| Piranha Plant | Carnivorous flowers that pop up from columns in side-scrolling areas. | |
| Pokey | Cacti that wander around Yarna Desert. The lower segments must be dealt with first. | |
| Pols Voice | Rabbits that jump around simply, but can only be defeated with specific things, like thrown bottles. | |
| Raven | Flying creatures that act like crows, but are stronger and tougher. Appear outside of Turtle Rock. | |
| Rope | Snakes that charge at Link while on the same x- or y-coordinate as them. Appear in Turtle Rock. | |
| Sand Crab | Crustaceans that move slowly up or down, but very fast to the side. Appear on Toronbo Shores. | |
| Sea Urchin | Sea creatures that sit in place. They can be pushed with the shield and defeated with most other items. | |
| Shrouded Stalfos | Skeletons that act exactly like a Moblin, but are found in dungeons and the western mountains. | |
| Soldier | Warriors that act the same as Moblins, but are found in Kanalet Castle and are much stronger. They were formerly Richard's servants. | |
| Spark | Electric orbs that travel along the sides of blocks and walls, and are impervious to most weapons. | |
| Spiked Beetle | Spiked turtles that charge at Link when they see him, but can be flipped onto their backsides with the shield, leaving them helpless and vulnerable. | |
| Spiny Beetle | Small creatures that hide under grass, rocks, or skulls, and run into Link if he approaches. | |
| Stalfos | Skeletons that leap away when Link tries to attack with his sword. Additionally, some will attempt to stomp him and some will retaliate with a thrown bone. | |
| Star | Strange creatures that slide diagonally along dungeons floors extremely fast while spinning slowly. | |
| Sword Moblin | Moblins that charge at Link when he approaches, and can parry his sword blows. Found in the same places as normal Moblins. | |
| Sword Stalfos | Shrouded Stalfos that act exactly like sword Moblins, but found in dungeons. | |
| Tektite | Spiders that leap around the screen. Found around the eastern side of Tal Tal Heights. | |
| Three-of-a-Kind | Card suite creatures that can only be defeated when all three are stopped on the same symbol. | |
| Vacuum Mouth | Void creatures that attempt to suck Link inside of it or blow him away while it flashes. If he is sucked inside, he will be returned to the dungeon entrance. | |
| Water Tektite | Water striders that glide across the surface of the water. | |
| Winged Demon | Bat monsters that swoop down at Link and shoot fireballs. When defeated, they splits into two skull-headed Keese. Appear in Turtle Rock. | |
| Wizzrobe | Magicians that appear and disappear within their hats while shooting magic, and are immune to sword attacks. Appear in Eagle's Tower. | |
| Zola | Fish creatures that appear from under the water to shoot a fireball at Link. | |
| Zombie | Undead that dig from under the ground in endless amounts near the graveyard. |
Traps and obstacles
| Sprite | Name | Description |
|---|---|---|
| Blade Trap | Razored obstacles that charge at Link when he crosses their x- or y-axes. | |
| Boulder | Rolling rocks that fall from above the mountains on the western side of Tal Tal Mountain Range. | |
| Cactus | Spiky plants found in Yarna Desert. | |
| Eye Guard | Shoots fireballs at Link from its eye, looking like the various harmless Rocklops statues. | |
| Face Lamp | Shoots fireballs at Link, looking like the various harmless torches. | |
| Flame Fountain | Shoots an endless stream of flames, preventing Link from accessing Turtle Rock without the Mirror Shield. | |
| Flying Pot | Bottles made to fly at Link by Facade. | |
| Flying Tile | Tiles that fly up one-by-one in large groups from the floor before flinging themselves at Link. | |
| Laser | An obstacle with a slowly-rotating eye. It shoots a beam at Link if it spots him. | |
| Lava | Molten rock that hurts Link if he falls in, and forces him to reset to where he fell in from. Appears in Turtle Rock. | |
| Mega Thwomp | A rocky block that must be knocked down with the Pegasus Boots by hitting its side, and then can be used as a platform. | |
| Podoboo | Fireballs that jump out of lava in side-scrolling areas in Turtle Rock. | |
| Quicksand | Appears in Yarna Desert, and pulls Link around, potentially into holes. | |
| Spiked Thwomp | Floating one-eyed faces that attempt to fall on Link when he approaches, though their spikeless heads can be jumped upon. | |
| Stone Elevator | A lift that does not lower unless the weight put upon them is significantly higher than Link's own, necessitating a held bottle. Appears in Bottle Grotto. | |
| Thwomp | Small floating faces that attempt to fall on Link if he approaches. They are very fast and appear in groups. |
Guardians
The Guardians act as the game's minibosses.
| Sprite | Name | Description | Locations |
|---|---|---|---|
| Rolling Bones | A pudgy creature that pushes a studded rolling pin across the room, which must be jumped over with Roc's Feather. | Tail Cave Turtle Rock | |
| King Moblin | The leader of the Moblins that kidnapped BowWow, he throws spears at Link before charging at him. He must be tricked into charging into a wall to stun him. | Moblin's Cave | |
| Hinox | Giant one-eyed brutes that charge into Link, grab him to throw him, and throw bombs. | Bottle Grotto Eagle's Tower Turtle Rock | |
| Dodongo Snakes | Thick-skinned eel-like creatures that slide around rooms in pairs, mouths agape. They must be tricked into eating bombs to defeat them. | Key Cavern Face Shrine Turtle Rock | |
| Desert Lanmola | A giant centipede that leaps from a quicksand pit to attack. | Yarna Desert | |
| Cue Ball | A water- and lava-skimming creature with an armored face, it must be attacked from the back as it circles the room, occasionally spinning. | Angler's Tunnel Turtle Rock | |
| Master Stalfos | A Stalfos Knight that stole the Hook Shot, but cowardly flees several times throughout the dungeon. He must be knocked down with repeated hits, then hit with bombs while in pieces. | Catfish's Maw | |
| Gohmas | A pair of large-eyed arthropods that scuttle back-and-forth, occasionally charging forward. They can only be beaten by shooting the eye when it is open. | Catfish's Maw | |
| Armos Knight | A giant, aggressive statue that attempts to smash Link. | Southern Face Shrine | |
| Smasher | An odd ray-like creature that throws an iron ball around, which must be instead thrown at it to damage it. | Face Shrine Turtle Rock | |
| Grim Creeper and the Big Keese | A piccolo-playing imp and his fly-like "brothers," which he commands to fly in formation at Link with his instrument. Once all the Big Keese are defeated, the Grim Creeper swears revenge and leaves. | Eagle's Tower | |
| Turtle Rock | The face of Turtle Rock brought to life with the Frog's Song of Soul. It darts out at Link to attack. | Tal Tal Mountain Range | |
| Blaino | A mighty punching fighter that knocks Link around and can even send him back to the dungeon entrance. | Turtle Rock |
Nightmares
Nine Nightmares are the game's main bosses.
| Sprite | Name | Description | Location |
|---|---|---|---|
| Moldorm | A giant caterpillar that tries to knock Link into a pit to force the battle to restart. Its tail end is its weak point. | Tail Cave | |
| Genie | A fire-juggling spirit living in a bottle. It must be attacked while inside the bottle to stun it, then picked up with the Power Bracelet and thrown. After enough of this, the bottle is destroyed, and the Genie starts teleporting over Link to attack. However, it can now be attacked directly. | Bottle Grotto | |
| Slime Eye | A huge eye-like Gel that drops several large Gels from the ceiling before falling itself. It must be forcibly split by running it half with the Pegasus Boots, and then the smaller halves must be attacked normally as they bounce around. | Key Cavern | |
| Angler Fish | A huge fish that swims around a small side-scrolling area and attacks directly, as well as with falling rocks and its babies. The lure is the weak point. | Angler's Tunnel | |
| Slime Eel | A huge serpentine creature that lunges its head from the wall and its studded tail from the floor. Its head must be hooked with the Hook Shot, allowing Link to pull it outward and attack the delicate neck. | Catfish's Maw | |
| Facade | A giant hollow face in the floor that attacks by manipulating the room. It must be damaged with bombs. | Face Shrine | |
| Evil Eagle | A huge bird summoned at a high-altitude side-scrolling area by the Grim Creeper. It flies around, pushing Link with wind and feathers, and must be guarded against with the Mirror Shield. | Eagle's Tower | |
| Hot Head | A huge fiery face that leaps up from lava. It can be attacked with the Magic Rod, causing it to bounce around erratically and eventually lose its flame permanently. | Turtle Rock |
Shadows
The final Nightmare, fought in the Wind Fish's Egg, is a sequential fight against Shadows. They take a variety of forms, most of them based on foes fought by Link in the game and the previous title, A Link to the Past.
| Sprite | Name | Description |
|---|---|---|
| Giant Gel | A giant slime that can only be damaged with Magic Powder. | |
| Agahnim's Shadow | A shadow in the shape of Agahnim from the previous game. It casts magic at Link, and the round blasts must be deflected back into it with the sword or shovel. | |
| Moldorm's Shadow | A shadow in the shape of a Moldorm. Like normal ones, the tail end is the weak point. | |
| Shadow of Ganon | A shadow in the shape of Ganon, the final boss of the previous game. It summons Firebats to attack and must be damaged with Spin Attacks. | |
| Lanmola | A quick-moving shadow that, while agile, is not especially strong. | |
| DethI | The final shadow, a giant one-eyed being with a pair of arms that spin in opposite directions. The eye can be attacked only when it is open; while different weapons do different amount of damage, the Boomerang kills it immediately. |
Items
Pickups
| Sprite | Name | Description |
|---|---|---|
| Faerie | Small sprites that heal Link when touched. They are a rare drop, but always appear from dungeon minibosses and certain other tough enemies. | |
| Guardian Acorn | An uncommon drop that boosts Link's defense until the next time he walks through a door. | |
| Heart | A common drop that restores one heart of Link's life meter. | |
| Heart Container | Special items dropped by bosses that permanently boost Link's total health capacity. | |
| Piece of Heart | Heart Container fragments scattered across the island. Collecting four makes a full Heart Container. | |
| Piece of Power | An uncommon drop that boosts Link's offense until the next time he walks through a door. | |
| Rupee | Small gems that act as money. Ones on the field are all worth one, but ones in chests can be worth more. |
Equipable items
The equipment consists of items that the player can equip to the ![]() or
or ![]() buttons for Link to use. Most are only obtained once.
buttons for Link to use. Most are only obtained once.
| Sprite | Name | Description |
|---|---|---|
| Boomerang | A secret long-range item that deals special effects many enemies and grabs far items. It is a loan from the hidden Goriya at Toronbo Shores after getting the Magnifying Glass and trading another item for it. | |
| Bow | An item buyable from the Town Tool Shop for a steep price once the Shovel has been bought. It cannot be used unless Link has Arrows. By using it and Bombs at the same time, Link can fire Bomb Arrows. | |
| Hook Shot | A grappling hook on a retractable chain used for pulling Link towards objects and objects towards him. It is recovered from Master Stalfos once he is finally destroyed in Catfish's Maw. | |
| Magic Rod | A magic wand that casts powerful spells that melt through ice, catch most enemies on fire, and even deal damage to fire enemies. It is found in Turtle Rock. | |
| Ocarina | A wind instrument Link can play magic songs on. It is found in the middle of the Dream Shrine. | |
| Pegasus Boots | Boots that let Link dash forward. They are found in Key Cavern. | |
| Power Bracelet | A mighty bracelet that lets Link pick up rocks, skulls, and bottles. It is found in Bottle Grotto. | |
| Powerful Bracelet | An even stronger bracelet that allows Link to carry pillars and huge iron balls. It is found in the Face Shrine. | |
| Roc's Feather | A feather that allows Link to jump high over pits and enemies. It is found in the Tail Cave. | |
| Shield | Link's shield from a previous adventure, it blocks basic projectiles such as rocks and spears. It is given by Tarin at the very start of the game. | |
| Mirror Shield | A stronger shield that can repel more projectiles, such as fire and magic. | |
| Shovel | An item that allows Link to dig holes. It is bought at the Town Tool Shop. | |
| Sword | Link's sword from a previous adventure, acting as his most basic weapon. It is recovered from Toronbo Shores at the start of the game. | |
| Level 2 Sword | A more powerful sword earned from Seashell Mansion after bringing in 20 Secret Seashells. | |
| Toadstool | A magical mushroom that can be plucked from the Mysterious Forest whenever Link does not have Magic Powder. By giving it to the Witch, he can get Magic Powder from her. |
- Replenishable items
These items can be found multiple times. Each has a limited capacity, each of which can be extended by a "curse" from the Mad Batter.
| Sprite | Name | Capacity 1 | Capacity 2 | Description |
|---|---|---|---|---|
| Arrow | 20 | 60 | Ammunition for the Bow. Arrows can be found as moderately common drop, and deal extra damage against armored enemies. | |
| Bomb | 20 | 60 | Explosives used to defeat enemies and blow holes in cracked walls. They can be found in a variety of places. | |
| Magic Powder | 20 | 40 | Special dust that can light torches and affect certain enemies. It is gotten from the Witch after giving her a Toadstool, though it can uncommonly be found elsewhere. |
- Songs
Three songs can be learned and played on the Ocarina.
| Sprite | Name | Description |
|---|---|---|
| 1: Ballad of the Wind Fish | A song that, when combined with the Instruments of the Sirens, is said to be able to awaken the Wind Fish. It is learned from Marin. | |
| 2: Manbo's Mambo | A song that warps Link to the entrance of whatever dungeon he is in; on the overworld, it warps him to Crazy Tracy's Health Spa. It is leaned from Manbo in Tal Tal Heights. | |
| 3: Frog's Song of Soul | A song that imbues life into certain things. It is learned from Mamu in the Signpost Maze. |
Collection items
| Sprite | Name | Description |
|---|---|---|
| Flippers | An item that allows Link to swim. They are found in Angler's Tunnel. | |
| Golden Leaf | Five leaves that Richard requests be recovered from Kanalet Castle. | |
| Magnifying Lens | An item that allows Link to see invisible entities and read "Dark Secrets And Mysteries Of Koholint" at the Library. It is gained by completing the trading sequence. | |
| Secret medicine | A special medicine that restores Link's life automatically upon losing all health. It is bought from Crazy Tracy, and can rarely be found in chests. | |
| Secret Seashell | Special conch shells that are found hidden throughout the island. They are returned to the Seashell Mansion. |
- Trading sequence
| Sprite | Name | Description |
|---|---|---|
| Yoshi Doll | A plush toy of Yoshi won from the Trendy Game. It is given to the Quadruplets' mother for her baby. | |
| Ribbon | An accessory received from the mother. It is given to the Mini Bow-Wow inside the doghouse adjoining Madam MeowMeow's house. | |
| Canned food | Meat in a can received from the Mini Bow-Wow. It is given to Sale at Sale's House O' Bananas. | |
| Bananas | Fruit received from Sale. It is given to Kiki in exchange for building a bridge to get into Kanalet Castle. | |
| Stick | A random stick found on the Monkeys' bridge. It is given to Tarin in Ukuku Prairie so he can knock down a beehive. | |
| Honeycomb | Rich honey recovered from the downed beehive. It is given to Chef Bear. | |
| Pineapple | A juicy fruit received from Chef Bear. It is given to Papahl in Tal Tal Mountain Range. | |
| Hibiscus | A flower received from Papahl. It is given to Christine in Animal Village. | |
| Goat's letter | A letter from Christine. It is given to Mr. Write near Goponga Swamp. | |
| Broom | A broom received from Mr. Write. It is given to Grandma Ulrira in Mabe Village to replace her broken one. | |
| Fishing hook | A fishhook from Grandma Ulrira. It is given to the Fisherman found under a bridge in Martha's Bay. | |
| Pink Brassiere Necklace |
A missing accessory of the Mermaid pulled up accidentally by the Fisherman. It is returned to the Mermaid in the middle of Martha's Bay. In Japanese, French, and German releases, it is a brassiere, but in English releases, it is censored into a necklace. | |
| Scale | A scale from the Mermaid's tail. It is added to Schule Donavitch's mermaid statue overlooking Martha's Bay in order to move it and recover the Magnifying Glass from the cave underneath. |
- Dungeon keys
In this game, many dungeons require keys to open their entrances.
| Sprite | Name | Description |
|---|---|---|
| Tail Key | The key to the Tail Cave, recovered from the Mysterious Forest. | |
| Slime Key | The key to Key Cavern, found buried in front of an Owl Statue in Pothole Field. | |
| Angler Key | The key to Angler's Tunnel, found in Yarna Desert. | |
| Face Key | The key to the Face Shrine, found in the Southern Face Shrine. | |
| Bird Key | The key to Eagle's Tower, found in a cave in Tal Tal Mountain Range only navigable with help from the Flying Rooster. |
- Dungeon items
| Sprite | Name | Description |
|---|---|---|
| Compass | An item that shows the position of chests and the boss on the map, and plays a sound when a room with a hidden item is entered. | |
| Dungeon Map | An item that shows the layout of the entire dungeon, including where Link has not yet explored. | |
| Nightmare Key | The key leading to the dungeon's boss. | |
| Small Key | Interchangeable keys that can open a single locked door or block in the dungeon they are found in. | |
| Stone slab fragment | A relief chip that can be put into a stone slab to get a hint. |
- Instruments of the Sirens
There are eight Instruments of the Sirens, each one located in a dungeon. Link must obtain all eight in order to awaken the Wind Fish.
| Sprite | Name | Description |
|---|---|---|
| Full Moon Cello | The first instrument, found in the Tail Cave. | |
| Conch Horn | The second instrument, found in Bottle Grotto. | |
| Sea Lily's Bell | The third instrument, found in Key Cavern. | |
| Surf Harp | The fourth instrument, found in Angler's Tunnel. | |
| Wind Marimba | The fifth instrument, found in Catfish's Maw. | |
| Coral Triangle | The sixth instrument, found in the Face Shrine. | |
| Organ of Evening Calm | The seventh instrument, found in Eagle's Tower. | |
| Thunder Drum | The final instrument, found in Turtle Rock. |
Objects
- Block
- Bush
- Crystal Block
- Crystal Switch
- Flashing Tile
- Grass
- Ice Block
- Moving Tile
- Orb
- Owl statue
- Pillar
- Pot
- Revolving Door
- Rock
- Sign
- Skull
- Stone slab
- Switch Block
- Switch
- Torch
- Treasure Chest
Cameos

The Legend of Zelda: Link's Awakening is notable for featuring many cameos of characters from other Nintendo games, most of which are from the Mario franchise. Several enemies reappear from the Super Mario series, most of whom previously appeared in Super Mario Bros. 3.
| Character | Description | Origin |
|---|---|---|
| Anti-Kirby | Although an enemy, Anti-Kirby is directly based on Kirby, the main protagonist of Kirby's Dream Land. Since the release of The Legend of Zelda: Link's Awakening, Kirby has starred in many more games released in the Kirby series. | Kirby (Kirby franchise) |
| Bloober | Bloobers are an enemy from the Super Mario series. They previously appeared in Super Mario Bros. and Super Mario Bros. 3. | Blooper (Super Mario series) |
| Bombite | Bombites are based on Bob-ombs, enemies who previously appeared in three Super Mario games: Super Mario Bros. 2 (previously released as a non-Mario game in Yume Kōjō: Doki Doki Panic in Japan), Super Mario Bros. 3, and Super Mario World. | Bob-omb (Super Mario series) |
| Boo | Boos are an enemy from the Super Mario series. They previously appeared in Super Mario Bros. 3, Super Mario World, and Super Mario Land 2: 6 Golden Coins. | Boo (Super Mario series) |
| BowWow and Mini Bow-Wows | Madam MeowMeow's BowWow and Mini Bow-Wows (ChowChow and CiaoCiao) are the same species as Chain Chomps, who previously appeared as enemies in Super Mario Bros. 3 and The Legend of Zelda: A Link to the Past. They are friendly pups unlike most other ones, who do not appear as enemies in The Legend of Zelda: Link's Awakening. | Chain Chomp (Super Mario series) |
| Cheep-Sheep | Cheep-Sheep are the same enemy as Cheep Cheeps from the Super Mario series. They previously appeared in Super Mario Bros., Super Mario Bros. 3, and Super Mario World. Cheep-Sheep are called Cheep Cheeps in the Nintendo Switch remake. | Cheep Cheep (Super Mario series) |
| Christine | Although Christine is a goat, she sends a photograph of Princess Toadstool to her pen pal, Mr. Write, who believes it is her actual appearance. | Princess Toadstool (Mario franchise) |
| Goomba | Goombas are an enemy from the Super Mario series. They previously appeared in Super Mario Bros., Super Mario Bros. 3, and Super Mario Bros. 2: 6 Golden Coins. | Goomba (Super Mario series) |
| Henhouse Keeper | The Henhouse Keeper resembles Luigi, the brother of Mario. | Luigi (Mario franchise) |
| Mamu | Mamu previously appeared as the final boss and main antagonist of Yume Kōjō: Doki Doki Panic, later converted into the second overseas Super Mario installment, Super Mario Bros. 2. Known as Wart in other countries, Mamu keeps his Japanese name in The Legend of Zelda: Link's Awakening. | Wart (Yume Kōjō: Doki Doki Panic / Super Mario Bros. 2) |
| Mask-Mimic | Mask-Mimics are the same enemy as Shy Guys from the Super Mario series. They previously appeared in Yume Kōjō: Doki Doki Panic / Super Mario Bros. 2. Mask-Mimics are called Shy Guys in the Nintendo Switch remake. | Shy Guy (Yume Kōjō: Doki Doki Panic / Super Mario Bros. 2) |
| Mega Thwomp and Spiked Thwomp | Mega Thwomp and Spiked Thwomps are based on Thwomps from the Super Mario series, enemies who previously appeared in two games: Super Mario Bros. 3 and Super Mario World. | Thwomp (Super Mario series) |
| Mr. Write | His appearance and name is based on Dr. Wright, the personal adviser of the player in the Super Nintendo release of SimCity. | Dr. Wright (SimCity SNES) |
| Piranha Plant | Piranha Plants are an enemy from the Super Mario series. They previously appeared in Super Mario Bros., Super Mario Bros. 3, and Super Mario World. | Piranha Plant (Super Mario series) |
| Podoboo | Podoboos are an obstacle from the Super Mario series. They previously appeared in Super Mario Bros., Super Mario Bros. 3, and Super Mario World. | Podoboo (Super Mario series) |
| Pokey | Pokeys are an enemy from the Super Mario series. They previously appeared in Super Mario Bros. 2 and Super Mario World. | Pokey (Super Mario series) |
| Richard | Richard originally appeared in Kaeru no Tame ni Kane wa Naru, where he is the rival and childhood friend of the Prince of Sablé. | Richard (Kaeru no Tame ni Kane wa Naru) |
| Sea Urchin | Sea Urchins directly resemble Gordo, a spiked enemy in Kirby's Dream Land, as well as the original in-game appearance of Unibō, a similar enemy from Super Mario Land 2: 6 Golden Coins. | Gordo (Kirby's Dream Land) Unibō (Super Mario series) |
| Spiked Beetle | Spiked Beetles are the same enemy as Spinies from the Super Mario series. They previously appeared in Super Mario Bros., Super Mario Bros. 3, and Super Mario World. Spiked Beetles are called Spinies in the Nintendo Switch remake. | Spiny (Super Mario series) |
| Tarin | Tarin has a distinct resemblance to Mario, the titular character of the Mario franchise. Early in his adventure, Link encounters a raccoon, who is later revealed to be Tarin; the cause of his transformation is suggested to be from a toadstool that he ate. The raccoon form likely references the Tanooki Suit power-up from Super Mario Bros. 3. | Mario (Mario franchise) |
| Thwomp | Thwomps are technically the same enemy as Thwimps from the Super Mario series, having specifically appeared in Super Mario World. | Thwimp (Super Mario series) |
| Yoshi Doll | As its name directly states, the Yoshi Doll is of Yoshi, who first appeared in Super Mario World as Mario and Luigi's dinosaur sidekick. | Yoshi (Mario franchise) |
Glitches
- Main article: List of The Legend of Zelda: Link's Awakening glitches
Gallery
- Main article: Gallery:The Legend of Zelda: Link's Awakening
North American box art
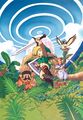
Main artwork used for Japanese cover


Names in other languages
| Language | Name | Meaning |
|---|---|---|
| Japanese | ゼルダの伝説 夢をみる島 Zeruda no Densetsu Yume o Miru Shima |
The Legend of Zelda: The Dreaming Island |
References
External links
- Official Japanese web page
- The Legend of Zelda: Link's Awakening Strategy on Nintendo.com (Wayback Machine)