| Don't like the ads? Then create an account! Users with accounts have more options than anonymous users. |
The Legend of Zelda: Majora's Mask
This article is under construction. Therefore, please excuse its informal appearance while it's being worked on. We hope to have it completed as soon as possible.
| The Legend of Zelda: Majora's Mask | |||
|---|---|---|---|

| |||
| Developer(s) | Nintendo EAD | ||
| Publisher(s) | Nintendo | ||
| Release date | Nintendo 64: | ||
| Genre(s) | Action-adventure | ||
| Rating(s) |
| ||
| Console(s) | Nintendo 64, Virtual Console (Wii, Wii U) | ||
| Mode(s) | Single player | ||
The Legend of Zelda: Majora's Mask is the sixth installment of The Legend of Zelda series and was released for the Nintendo 64 in 2000, as a direct follow-up to The Legend of Zelda: Ocarina of Time. This game has a very strong emphasis on sidequests not seen to the same extent in the series again until The Legend of Zelda: Breath of the Wild, to the point of only having four major dungeons. The game has a markedly darker and more cynical tone than its predecessor.
The Legend of Zelda: Majora's Mask is one of three games that requires the use of the Expansion Pak, with the other two being Donkey Kong 64 and Perfect Dark. Of the three, The Legend of Zelda: Majora's Mask is the only one to be directly developed by Nintendo, as the other two were developed by Rare. In 2015, the game received a remake for the Nintendo 3DS, titled The Legend of Zelda: Majora's Mask 3D.
Story


The game starts with young Link atop Epona deep in the Lost Woods, as he searches for "a dear friend." Suddenly, two fairies named Tatl and Tael ambush him, causing him to be knocked off Epona and fall unconscious. Skull Kid then appears, wearing a sinister-looking mask, and finds the Ocarina of Time, which he plays with until Link wakes up, leading to a chase where Skull Kid poorly attempts to ride Epona and Link holds on to one of her legs, but eventually ends up kicked off near a large stump. Following further on foot, Link falls deep underground after going inside a large tree, before landing on a large flower. Skull Kid taunts him and tells him he got rid of Epona, but then his tone turns more sinister and he curses Link, turning him into a Deku Scrub (called "Deku Link"). He then laughs and leaves him like this, but accidentally leaves Tatl behind, forcing Link and Tatl into an uneasy alliance. After travelling underground and passing a withered tree closely resembling Deku Link, the two travel through a winding, warping tunnel and end up inside the bottom of a Clock Tower. As they leave the Clock Tower, they are met by the eccentric Happy Mask Salesman, who tells them that "a very important mask" was taken from him by the same imp that stole "a very important item" from Link, and that if Link recovers his "very important item," he will tell him how to restore his body, but he will be leaving town in three days.
Once they leave the Clock Tower, Link finds himself in a town called Clock Town in the land of Termina, where many of the inhabitants bear an uncanny resemblance to people he had met previously in Hyrule. Tatl suggests finding the nearby Great Fairy, but when they go to her, they find she has been split into Stray Fairies by Skull Kid. They also find that Skull Kid has caused trouble for many other people recently, compounded by the impending threat of an eerie-faced moon that seems to be growing closer each passing day. However, the things Link is able to do while as a Deku Scrub are highly limited, as many of the adults treat him as a small child, not even letting him leave town. After meeting a few people, such as the Bombers, Professor Shikashi, and a Business Scrub, Link is able to make it to the top of the Clock Tower where Skull Kid is, but only on midnight of the third day, when the Moon is dangerously close. Once he gets up to it, Skull Kid taunts them, while Tael tells them to find "the four" who are at the "swamp, mountain, ocean, canyon," for which Skull Kid insults and slaps him, to Tatl's shock. Skull Kid then screams, bringing the Moon down faster. Deku Link hits him with a bubble, causing him to drop the ocarina, and once Link picks it up, he remembers the Song of Time. While playing it as Deku Link, the ocarina changes into Deku Pipes, with the song itself reversing time for three days back to when they emerged from the Clock Tower, with only Link and Tatl remembering any of it. Realizing that the ocarina was the item the Mask Salesman spoke of, they return to him, and he teaches them the Song of Healing, turning the Deku curse into a removable mask, and thus restoring Link. However, once he realizes Link has not recovered the mask, he abruptly turns angry and frantic, telling them that the mask is of an evil power and will cause terrible things to happen, with an unwitting Skull Kid having stolen it while he was asleep.
Now restored, Link is able to leave town, and the game becomes vastly more open-ended regarding sidequest availability. He can find many masks by speaking to people around Termina, as it is an important tradition for their yearly carnival. Tatl urges him to go down to the Southern Swamp, like Tael said. Along the way, they find a drawing on a tree that Skull Kid, Tatl, and Tael made the day the two fairies met him, where he was crying over losing his best friends. Heading further south, they find the swamp's waters poisoned and filled with hostile Big Octos. Several monkeys direct Link to help an old hag, Koume, who takes Link via boat to the Deku Palace, where he learns the Deku King is holding a monkey prisoner on the false charge of killing his daughter, with only the Deku Butler believing him. In reality, the monkey was helping her to try and find the source of the poison. Link sneaks through the Palace Gardens and gets into the monkey's cage, where after realizing Link wants to help, he teaches him the Sonata of Awakening used to open Woodfall Temple. The Deku King overhears and is further enraged, as the song is only known to members of the royal family, and decides to start the monkey's punishment via repeatedly dipping him in a huge pot of boiling water. Link travels to Woodfall, first meeting a more cynical version of the owl Kaepora Gaebora, who teaches him the Song of Soaring to warp around. After getting to Woodfall Temple and playing the Sonata, Link travels through the dark temple full of poison and dangerous creatures, eventually finding the Fairy Bow and fighting the masked jungle warrior Odolwa. After defeating Odolwa and taking his mask, Link and Tatl are taken to a strange ethereal world where a large, mostly hidden being teaches them the Oath to Order song before transporting them back. In a nearby room, they find the Deku Princess, who they take back to the palace. Seeing what her father is doing, she angrily tackles him and demands the guards free the monkey, after which everything calms down and all is forgiven.
Link's next destination is the mountains of Snowhead, where the Goron tribe lives. When they get there, Link and Tatl discover it is in the midst of a lengthy winter, with many of the Gorons freezing due to the chilly air coming out of Snowhead Temple. Kaepora meets Link again and has him follow him across an abyss full of invisible platforms, with shed feathers acting as a guide. At a cave on the other side, Link discovers the Lens of Truth, allowing him to see both the platforms on the way back and the ghost of the Goron champion, Darmani III, who was blown off the mountain while trying to investigate the temple. He leads Link to his grave to be absolutely sure he can see him, and asks him to bring him back to life with his magic, and if that is too much to instead heal his sorrow. After using the Song of Healing, Darmani becomes the Goron Mask, which allows Link to take his form as Goron Link. When speaking with other Gorons, they will assume he is Darmani. After finding the Goron Elder and unfreezing him with Hot Springwater, he reveals he too is trying to go to the temple despite his feeble condition, but upon learning his son is crying because he misses him, he teaches him part of the Goron Lullaby to calm him down. When Goron Link plays it, the young Goron teaches him the rest, while every Goron in the room other than Link falls asleep. Making his way up to the temple and using the Lens of Truth, it is revealed that the wind is actually an apparently possessed Biggoron violently exhaling repeatedly. After playing the Goron's Lullaby, Biggoron falls asleep and falls off the mountain, allowing Link to access the temple, where he finds several ice and speed-related puzzles, the Fire Arrows, and a giant mechanical beast called Goht. After defeating Goht, Link is transported to another ethereal world and meets another Giant, who tells them they are "guardians," which Tatl interprets as meaning they are protective gods. Before they can get any further information, they are transported outside, where spring has returned. Before moving on to the next area, Link must first gain access to the Powder Keg item from Medigoron.
On another first day, Link must buy a Powder Keg and use it on the boulder blocking Milk Road, allowing access to Romani Ranch, where they find Epona under the care of Romani, who teaches them how to shoot arrows from horseback, re-teaches Link Epona's Song, and asks them to help deal with strange aliens that always show up before the carnival to steal their cows. Now having Epona, Link can travel to Great Bay, where the Zora tribe lives. Noticing a strange form in the water surrounded by seagulls, Link finds the wounded musician Mikau, lead guitarist of the popular Zora band, The Indigo-gos. He tells them through song that a Zora girl laid some eggs, which were then stolen by pirates, causing her to lose her voice, and he was wounded trying to get them back. He then asks someone to "heal his soul," prompting Link to play the Song of Healing and turn him into the Zora Mask. When he travels to Zora Hall, he sees that the Zora girl in the song referred to the lead singer of the band, Lulu, and that the water has recently fogged up from a storm at the Great Bay Temple, making it hard for the Zoras to navigate. Link must then go to the Pirate's Fortress and recover some of the eggs (as well as the Hookshot item), though he learns there are some more in Pinnacle Rock. After rescuing a seahorse from a fisherman, he is led to Pinnacle Rock where he can find the rest of the eggs being guarded by giant sea snakes. Taking all the eggs to the Lakeside Laboratory, where they hatch and form a musical staff, teaching him the New Wave Bossa Nova. Once he plays this to Lulu, her voice returns, and a nearby island is revealed to be a giant, ancient turtle. The turtle takes Link to the temple, where he must navigate many water-powered mechanisms and find the Ice Arrows, eventually leading him to fight a giant fish called Gyorg. Once it is beaten, Link is again trasported to another Giant's realm. The Giant urges them to "Help our friend," which Tatl takes to mean the remaining Giant.
The final region is the Ikana Canyon. Before they can reach the top, a hooded man tells them they cannot pass without a specific mask from two evil-hearted men near Milk Road, referring to the Gorman Brothers. After bating them in a horse race, they give him the Garo Mask. Once he obtains that, the man lets him pass, and warns him of the evil spirits lingering ahead. When he reaches the top of the canyon, he discovers many types of wandering spirits, and must deal with them in a variety of ways. Eventually, after collecting the Captain's Hat, re-learning the Song of Storms, collecting the Gibdo Mask, making it through the maze beneath the Well, and collecting the Mirror Shield, he makes it to the heart of Ikana Castle, where he does battle with the king, Igos du Ikana. After defeating him, Ikana realizes that fighting petty battles is what destroyed their civilization in the first place, and urges Link to travel to the top of Stone Tower Temple to stem the evil within. To assist him, he teaches Link the Elegy of Emptiness, which creates a statue of Link's current form in his place. Once he gets through the Stone Tower Temple, he is accosted by the Garo Master, and after defeating him, gains the Light Arrow. Link must them travel outside the temple and use the new arrow on a large red jewel, flipping the temple upside-down. Link must then navigate the flipped version of the temple, creating a vastly different experience, and eventually make it to the same room he obtained the arrows in, leading to a portal that leads to a fight against the gargantuan Twinmold, a task made easier if he obtained the Giant's Mask prior. Once that is done, they are taken to the final Giant, who tells them to call the Giants when they need them, and then sadly tells them to forgive their friend, confusing Tatl. Once that is done, a portal appears over Ikana Canyon and seemingly takes away the evil spirits, allowing them to rest peacefully.
Making their way to the top of the Clock Tower on the third night again, Link uses the Oath to Order to call the giants, and they successfully stop the Moon from falling while Skull Kid faints. Tatl scolds Skull Kid for everything he had done, but Tael tells her it was the mask's doing, to which another voice agrees, calling Skull Kid weak. The two realize now that the mask itself is speaking, as it drops Skull Kid and says he is no longer useful, before going into the Moon to possess it instead. The Moon starts being brought down even harder, straining the Giants, while Link resolves to go into the Moon himself to destroy the mask. When he gets there, he discovers a large clearing with a single tree. Around the tree are four children wearing the bosses' masks playing, while another, wearing Majora's Mask, sits lonely under the tree. If Link has collected every mask he can, he can trade them to the playing children and play a game of hide-and-seek with each, taking him to a challenge themed after one of the dungeons. Once all except the main three transformation masks are traded away, Link can obtain the Fierce Deity Mask. Regardless, talking with the child under the tree leads to a fight against Majora's Mask, who throughout the battle transforms into Majora's Incarnation and then Majora's Wrath. Once Majora's Wrath is destroyed, the Moon vanishes in a beam of rainbow light, while Link, Epona, Tatl, Tael, Skull Kid, and the four Giants appear in Termina Field. It is shown that the friends Skull Kid thought had abandoned him were the Giants, and they tell him they still always thought of him as a friend in spite of all he had done before walking off again while Skull Kid cries in shame. Skull Kid then asks Link if he wants to be his friend and indirectly reveals he is the same one who Link played Saria's Song to in the previous game. The Happy Mask Salesman then appears with Majora's Mask and reveals that the evil has now left it, before disappearing. Skull Kid and his friends travel to the carnival as the credits roll, and everyone who Link helped in his adventure is shown celebrating. At the end of it, it is shown that the gnarled, Deku-like tree from the opening is actually the Deku Butler's missing son, and Link is shown traveling further in his search for Navi, with the stump now having a drawing of Link, Skull Kid, Tatl, Tael, and the Giants on it.
Gameplay
 This section is a stub. You can help Triforce Wiki by expanding it.
The Legend of Zelda: Majora's Mask reuses many of the gameplay mechanics from The Legend of Zelda: Ocarina of Time, while introducing two major mechanics: masks and the three-day cycle. Masks allow Link to access different areas and quests, and some masks transform Link, allowing him to perform unique actions. The transformation masks include the Deku Mask, Goron Mask, Zora Mask, and Fierce Deity's Mask.
The Legend of Zelda: Majora's Mask operates on a three-day cycle, where Link has 72 in-game hours before the moon crashes into Termina, requiring him to play the Song of Time to reset the cycle. Several quests are time-sensitive, taking place at specific times on specific days. Each time the cycle is reset, Link loses all disposable items, such as Rupees and arrows, as well as any quest progress, as everyone except Link, Tatl, and the Happy Mask Salesman are reset to how they were at the beginning of the cycle, with no knowledge of anything Link did previously. Additionally, progress in dungeons is reset alongside the cycle.
Characters
- This section is a stub. You can help Triforce Wiki by expanding it.
Heroes


Supporting characters
The following characters directly assist Link during his adventure.
Enemies
- Armos
- Bad Bat
- Beamos
- Big Octo
- Big Poe
- Bio Deku Baba
- Boe (black and white)
- Bubble (blue and red)
- Chuchu (red, green, yellow, and blue)
- Death Armos
- Deep Python
- Deku Baba (normal and withered)
- Deku Scrub (guard)
- Desbreko
- Dexihand
- Dinofols
- Dodongo (small and large)
- Dragonfly
- Eeno
- Eyegore
- Fire Keese
- Floormaster
- Freezard
- Garo Robe
- Gerudo guard
- Ghost
- Giant Bee
- Gibdo
- Goht's Remains
- Guay
- Gyorg's Remains
- Hiploop (maskless and masked)
- Ice Keese
- Keese
- Leever
- Like Like
- Mad Scrub
- Mini Baba
- Moth
- Nejiron
- Octorok
- Odolwa's Remains
- Peahat
- Peahat Larva
- Poe
- Real Bombchu
- ReDead
- Shell Blade
- Snapper
- Skullfish
- Skulltula
- Skullwalltula
- Stalchild
- Takkuri
- Tektite (blue)
- Twinmold's Remains
- Wallmaster
- Wizrobe (fire)
- Wolfos (normal and white)
Obstacles
Minibosses
- Skull Kid (Clock Tower)
- Dinofols (Woodfall Temple, Secret Shrine, Moon)
- Gekko and Snapper (Woodfall Temple)
- Wizrobe (ice and fire) (Snowhead Temple, Ancient Castle of Ikana, Secret Shrine)
- Pirate (Pirates' Fortress)
- Wart (Great Bay Temple, Secret Shrine)
- Gekko and Mad Jelly (Great Bay Temple)
- Captain Keeta (Ikana Graveyard)
- Iron Knuckle (Beneath the Graveyard, Moon)
- Big Poe (Beneath the Graveyard)
- Poe Sisters (Amy, Jo, Beth, and Meg) (Ikana Village)
- Sharp (Spring Water Cave)
- Pamela's father (Music Box House)
- Igos du Ikana's lackeys (Ancient Castle of Ikana)
- Igos du Ikana (Ancient Castle of Ikana)
- Garo Master (Stone Tower Temple, Secret Shrine, Moon)
- Gomess (Stone Tower Temple)
Bosses
In fitting with the game's theme, each of the temple bosses wears a mask, which the player obtains upon defeating them.
| Image | Name | Dungeon |
|---|---|---|
| File:MM Odolwa artwork.png | Masked Jungle Warrior: Odolwa | Woodfall Temple |
| File:MM Goht artwork.png | Masked Mechanical Monster: Goht | Snowhead Temple |

|
Gargantuan Masked Fish: Gyorg | Great Bay Temple |
| Giant Masked Insect: Twinmold | Stone Tower Temple | |
| Majora's Mask | Moon | |
| Majora's Incarnation | Moon | |
| Majora's Wrath | Moon |
Locations
Main locations
Dungeons
Each dungeon in The Legend of Zelda: Majora's Mask effects its surrounding area when completed, opening up optional sidequests. Progress in dungeons and the changes to its surrounding area when completed are lost when resetting the three-day cycle. Once a dungeon's boss is defeated, a platform lights up in the dungeon's entrance that allows Link to quickly return to the boss room.
| Name | Description |
|---|---|
| Woodfall Temple | Located in the Woodfall area of the Southern Swamp, this dungeon requires the use of Deku Link. Once the boss, Odolwa, is defeated, the poison clears from the swamp, and, the first time the temple is cleared, Link meets and rescues the Deku Princess. |
| Snowhead Temple | Located in Snowhead, this dungeon requires the use of Goron Link. The dungeon consists of a tall main room that must be scaled by using smaller, side rooms. Once the boss, Goht, is defeated, spring comes to Mountain Village. |
| Great Bay Temple | Located in Great Bay, this dungeon requires the use of Zora Link. The dungeon consists of room of flowing water, and the direction of the water flow must be changed to access certain rooms. Once the boss, Gyorg, is defeated, the murky water in Great Bay clears up. |
| Stone Tower Temple | Located at the top of the Stone Tower in Ikana Canyon, this dungeon requires the use of all of Link's transformations as well as the Elegy of Emptiness. Additionally, the dungeon can be inverted, making what was previously the ceiling of a room the floor. Once the boss, Twinmold, is defeated, the curse over Ikana Canyon is lifted. |
Items
Many of the items from The Legend of Zelda: Ocarina of Time return in The Legend of Zelda: Majora's Mask, while some new ones, such as the Powder Keg and Pictograph Box. Additionally, masks appear as major items that allow certain quests to be completed and certain areas to be reached. The player can assign items to either ![]() ,
, ![]() , and
, and ![]() from the Select Item or Masks Subscreen. Quest items and disposable items are lost when the three-day cycle is reset.
from the Select Item or Masks Subscreen. Quest items and disposable items are lost when the three-day cycle is reset.
There are some items that Link can only obtain once.
| Icon | Name | Description |
|---|---|---|
| Bombers' Notebook | ||
| Goht's Remains | ||
| Gyorg's Remains | ||
| Land Title Deed | ||
| Letter to Kafei | ||
| Moon's Tear | ||
| Mountain Title Deed | ||
| Ocarina of Time | A gift that Link received from Princess Zelda during the events of The Legend of Zelda: Ocarina of Time. During his adventure in The Legend of Zelda: Majora's Mask, Link must use the Ocarina of Time to manipulate time, travel across Termina, and uncover the four dungeons. | |
| Ocean Title Deed | ||
| Odolwa's Remains | ||
| Pendant of Memories | ||
| Pictograph Box | Link can use this to take pictures of scenery and people, although the Pictograph Box can only hold one photo at a time. Koume gives this as a present to Link for rescuing her. | |
| Room Key | ||
| Special Delivery to Mama | ||
| Swamp Title Deed | ||
| Twinmold's Remains |
There are some items that Link obtains more than once during his adventure, many of which reappear from previous The Legend of Zelda installments.
| Icon | Name | Description |
|---|---|---|
| Empty Bottle | These are used to contain certain items, such as potions. There are six Empty Bottles for Link to collect. Resetting the three-day cycle allows Link to keep his Empty Bottles, including if any were stolen, but he does not retain their contents. | |
| Gold Skulltula Token | Link receives one of these after defeating a Gold Skulltula. There are 30 of them in the Swamp Spider House and the Great Bay Spider House each. Completing the former earns Link the Mask of Truth as a reward, but completing the latter earns him a Giant Wallet if it is completed on Day 1 - 50 rupees if completed on Day 2 or 3. | |
| Heart Container | Link finds one at the end of each dungeon as a reward for defeating the boss. Collecting a Heart Container adds another heart to Link's health. There are only four in the game | |
| Magic Bean | These can be purchased from the Magic Bean Seller in the Deku Palace for 10 Rupees. In his normal form, Link can plant Magic Beans in plots of soft soil. He can then pour water into the soil, causing the Magic Bean to grow rapidly. Link can then use the plant that formed to ride around the area he is in for a short time. | |
| Magic Jar | Collecting these adds to Link's Magic Meter gauge, therefore allowing him to use the Fire, Ice, and Light Arrows, although with a limited supply of magic. | |
| Piece of Heart | These are found all around Termina, and there are 52 Pieces of Hearts in total. If Link collects four Pieces of Hearts, another Heart Container is added to his health gauge. Whenever Link collects a Piece of Heart, his health is refilled. | |
| Rupee | The type of currency used in nearly every The Legend of Zelda game. They can be found through various means, such as cutting grass. Rupees come in different colors, each having a different value. |
There are a few items that reappear only in dungeons. Any Dungeon Maps or Compasses collected by Link remains with him, even if he repeats the three-day cycle.
| Icon | Name | Description |
|---|---|---|
| Boss Key | These are one-time use items that unlock the boss room of a dungeon. Link can always obtain a Boss Key by defeating the second mini-boss of a dungeon. | |
| Compass | These allow Link to see where treasure chests are located in a dungeon. They also show the direction Link is facing and where he entered the room. | |
| Dungeon Map | These show which rooms Link has visited and which room he is currently in. When paired with a Compass, a Dungeon Map shows which rooms have treasure chests, which rooms have not yet been visited, and the dungeon boss's room. | |
| Small Key | One-time use items that unlock certain regular doors within dungeons. They are usually found within treasure chests. |
There are some items that Link cannot obtain unless he has a bottle to store it in. Every bottled item is usable in both timelines.
| Icon | Name | Description |
|---|---|---|
| Blue Fire | ||
| Blue Potion | ||
| Bug | ||
| Chateau Romani | ||
| Fairy | ||
| Deku Princess | ||
| Fish | ||
| Gold Dust | ||
| Green Potion | ||
| Hot Spring Water | ||
| Magic Mushroom | ||
| Milk | ||
| Poe Soul / Big Poe Soul | ||
| Red Potion | ||
| Seahorse | ||
| Spring Water | ||
| Zora Egg |
Weapons
There are a couple of weapons that Link only obtains once.
| Icon | Name | Description |
|---|---|---|
| Gilded Sword | A permanent upgrade to the Kokiri Sword with three times the strength. To acquire it, Link must go to the Mountain Village with the Gold Dust and give it to the Mountain Smithy, who then mends the Kokiri Sword into the Gilded Sword. | |
| Great Fairy's Sword | This sword is the game's analogue to Biggoron's Sword from The Legend of Zelda: Ocarina of Time. The Great Fairy's Sword is a large, purple sword with black roses etched in its blade. Because of how large the Great Fairy's Sword is, Link has to use both hands to carry it, therefore preventing him from simultaneously equipping a shield. Unlike the Kokiri Sword and its variants, the Great Fairy's Sword is a C-button item. The sword is obtained by rescuing the fifteen Stray Fairies in the Stone Tower Temple and reuniting them with the Great Fairy in Ikana Canyon. | |
| Hero's Bow | A bow that Link can shoot arrows from to hit enemies or switches at a distance. It is the main treasure of the Woodfall Temple, and is the game's counterpart to the Fairy Bow of The Legend of Zelda: Ocarina of Time, which can only be used by adult Link. | |
| Hero's Shield | A metal shield that Link starts his journey with. It resembles the Hylian Shield from The Legend of Zelda: Ocarina of Time. Unlike the Hylian Shield, the Hero's Shield is small enough for Link to hold it with one hand, instead of crouch. | |
| Hookshot | A set of spring-loaded, trigger-pulled hooks attached to lengthy chains. The Hookshot is found in the Gerudo's Fortress. It can attack enemies from a distance as well as latch onto certain surfaces (like wood) to pull Link across large distances. The Hookshot has a different design than in The Legend of Zelda: Ocarina of Time, and it has a longer chain, about the length of the Longshot from said game. | |
| Kokiri Sword | The Kokiri Sword is the most basic sword, and it returns from The Legend of Zelda: Ocarina of Time, albeit redesigned. During his journey, Link can upgrade it to a more powerful weapon. | |
| Lens of Truth | A special eyepiece found in Goron Village. Whenever the item is active, Link can see other ghosts, hidden walls and fake walls. The Lens of Truth is required to see Darmani's Ghost to obtain the Goron Mask. | |
| Mirror Shield | A shield made of highly polished metal inscribed with the symbol of a screaming face. It is an upgrade of the Hero's Shield, and its reflective plate allows Link to reflect light onto light-sensitive switches, enemies, and blocks. It is the main treasure found in the Beneath the Well sub-dungeon. | |
| Razor Sword | This sword is a temporary form of the Kokiri Sword that inflicts twice as much damage. After defeating Goht or melting the ice on the forge at the Mountain Smithy, Link can obtain it for 100 rupees at the Mountain Smithy in the Mountain Village. It loses its edge after 100 hits or when a three-day cycle is restarted, returning to the shape of the Kokiri Sword. |
There are some weapons that Link can obtain more than once. Whenever Link restarts the three-day cycle, he loses all of these items.
| Icon | Name | Description |
|---|---|---|
| Bomb | These are explosive items that are used to blow up fake walls, but they can also take out enemies, dealing two units of damage per hit to them. Link can only use them while he is in his normal form. Bombs can be obtained by defeating enemies, chopping bushes, smashing rocks and vases, or buying them from certain shops. | |
| Bombchu | A Bombchu is a bomb in the shape of a chu (mouse). When Link uses one, the fuse is lit, then when he releases the Bombchu, it travels for a while before exploding. If Link does not quickly release it, the Bombchu explodes and damages him. Bombchus travel on any surface and may travel up the ceiling or wall, depending on how far away they were released. Bombchus do not have much of a unique purpose, although there are sub-games involving Bombchu in which the objective is to hit small wall-based targets within a time limit. Bombchus have an enemy equivalent named Real Bombchu, a mouse with a fizzing bomb on the end of its tail. | |
| Deku Nut | Deku Nuts are natural stun grenades, and Link can use them in his regular form. Deku Nuts can be obtained by killing enemies, chopping bushes, smashing rocks and vases, or buying them from certain shops. As Deku Link, he can shoot Deku Nuts in midair after launching out of a Deku Flower. | |
| Deku Stick | These are long wooden branches that Link can swing by pressing the designated C button. Deku Sticks inflict twice as much damage as the Kokiri Sword, and twice moreover when aflame. They can mainly be acquired by destroying Deku Babas while they are in an upright position. Link can also use them as a torch to carry fire to objects that require kindling. The disadvantage of using a Deku Stick is that they break on impact. | |
| Fire Arrow | These are flaming arrows that Link can shoot from the Hero's Bow, although at the cost of magic power. When launched at a target, a Fire Arrow bursts into flames, burning any enemies who come in contact. Fire Arrows can also be used to light torches and melt ice. Fire Arrows are the main treasure in Snowhead Temple. | |
| Ice Arrow | These are icy arrows that Link can shoot from the Hero's Bow, although at the cost of magic power. Ice Arrows are used to freeze enemies into ice blocks or freeze water. They play a larger role than in The Legend of Zelda: Ocarina of Time, and are the main dungeon item of the Great Bay Temple. | |
| Light Arrow | These are arrows with the power of light that Link can shoot from the Hero's Bow, although at the cost of magic power (more than what the Fire and Ice Arrows require). Light Arrows are the main item in the Stone Tower Temple. Their main use is to turn the temple upside down, but are also used to defeat the mini-boss Gomess. | |
| Powder Keg | A powerful bomb that can only be used by Goron Link and purchased at West Clock Town. Because of their size, Goron Link can only carry one at a time. Powder Kegs are used to blow up very large rocks, such as the one blocking the entrance to Romani's Ranch. |
Upgradables
There is some equipment that Link can upgrade later on in his adventure. Each type is displayed from the leftmost side of the Inventory.
| Icon | Name | Description |
|---|---|---|
| Quivers | ||
| Quiver | This item comes with the Hero's Bow and is where Link keeps the arrows that he collects. It can carry up to 30 arrows. | |
| Big Quiver | The first upgrade is obtained in the Clock Town Shooting Gallery if Link can score 40 or more points. It can carry up to 40 arrows. | |
| Biggest Quiver | The second upgrade is also obtained by clearing another Shooting Gallery challenge, the Swamp Shooting Gallery, if Link gains at least 2,120 points. The Biggest Quiver can hold up to 50 arrows. | |
| Bomb Bags | ||
| Bomb Bag | This is where Link keeps his bombs. The Bomb Bag carry up to 20 bombs. Link can buy it from the Bomb Shop in West Clock Town for 50 Rupees. | |
| Big Bomb Bag | The first upgrade carries up to 30 Bombs. It becomes available for purchase if Link recovers the Old Lady's sack of Bomb Bags from Sakon on the night of the First Day. If Link does not do this, he can instead purchase the Big Bomb Bag from the Curiosity Shop for 100 Rupees on the Final Day. | |
| Biggest Bomb Bag | The second upgrade carries up to 40 Bombs. Link can acquire it from the Business Scrub near Goron Village if he trades the Big Bomb Bag and 200 Rupees. | |
Link starts out with a Wallet that holds up to 99 Rupees. During his adventure, he can purchase two Wallet upgrades, which increase the maximum number of rupees he can carry.
| Icon | Name | Description |
|---|---|---|
| Adult's Wallet | The first upgrade to the Wallet, the Adult's Wallet, is given to Link if he deposits a collective total of 200 rupees in the Clock Town Bank. The same number applies to the Adult Wallet's capacity. | |
| Giant's Wallet | The second upgrade to the Wallet, the Giant's Wallet, is offered to Link after he acquires the 30 Gold Skulltula Spirits in the Oceanside Spider House on the First Day. The Giant's Wallet can hold up to 500 Rupees. |
Masks
There are a total of 24 masks in The Legend of Zelda: Majora's Mask. The total number of masks Link has collected is shown on the File Select screen. Masks range from being used in a single optional sidequest to being required to complete the game.
Gallery
- For this game's image gallery, see Gallery:The Legend of Zelda: Majora's Mask.
English logo
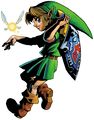
Link with Tatl


Names in other languages
| Language | Name | Meaning |
|---|---|---|
| Japanese | ゼルダの伝説 ムジュラの仮面 Zeruda no Densetsu: Mujura no Kamen |
The Legend of Zelda: Mujura's Mask |
External links
- Official website (Wayback Machine)
- Official Japanese website
References
- ^ https://www.nintendo.co.jp/n01/n64/software/nus_p_nzsj/normal/index.html
- ^ Zelda - A History of Success - www.zelda.de (Wayback Machine)
- ^ Nintendo: Nintendo 64 Game List - nintendo.com (Wayback Machine)
- This article is a stub. You can help Triforce Wiki by expanding it.
It has been requested that one or more images be uploaded and added to this article. Remove this template once the image(s) has/have been uploaded and applied.