| Don't like the ads? Then create an account! Users with accounts have more options than anonymous users. |
The Legend of Zelda: Twilight Princess
| The Legend of Zelda: Twilight Princess | |||||||
|---|---|---|---|---|---|---|---|

| |||||||
| Developer(s) | Nintendo EAD | ||||||
| Publisher(s) | Nintendo | ||||||
| Release date | Wii: Nintendo GameCube: | ||||||
| Genre(s) | Action-adventure | ||||||
| Rating(s) |
| ||||||
| Console(s) | Wii, Nintendo GameCube | ||||||
| Mode(s) | Single player | ||||||
The Legend of Zelda: Twilight Princess is the 13th installment of the main The Legend of Zelda series. It was released for the Wii and Nintendo GameCube in late 2006. It is the first game of the series to feature realistic HD graphics, as opposed to the cel-shaded style of The Legend of Zelda: The Wind Waker. The Wii version was the first time that a The Legend of Zelda game was released as a launch title.
The story focuses on Link, who goes on an adventure to save Hyrule from being engulfed by a corrupted parallel dimension known as the Twilight Realm. In order to do so, he takes the form of both a Hylian and a wolf, and he is assisted in this task by a mysterious character named Midna. The game takes place hundreds of years after The Legend of Zelda: Ocarina of Time and The Legend of Zelda: Majora's Mask.
Twilight Princess was critically acclaimed upon release, being praised for its world design, art direction and change in tone from other games in the franchise. However, the Wii version received criticism for its motion controls, with many calling them "forced" and "tacked-on". By 2015, it had sold 8.85 million copies worldwide, and was the best-selling Zelda game until being overtaken by The Legend of Zelda: Breath of the Wild in April of 2018. In 2011, the Wii version was re-released under the Nintendo Selects label. A high-definition remaster for the Wii U, The Legend of Zelda: Twilight Princess HD, was released in March of 2016. On December 5, 2017, the game was re-released for the Nvidia Shield in China.
The Legend of Zelda: Twilight Princess was first revealed in the form of a trailer at E3 2004. Playable demos were featured at E3 2005 and E3 2006, the former of which had a The Legend of Zelda: Twilight Princess Preview Trailer, which participants could watch on their Nintendo DS from either a cartridge or via DS Download Play.
Plot
The game starts with Link, who lives in Ordon Village and works as a ranch hand. He is asked by Rusl, the village's blacksmith and swordsman, to deliver the Ordon Sword and Ordon Shield to the Royal Family of Hyrule. Before Link could start his journey, Ilia and Colin were kidnapped by a group of King Bulblins. Link goes on a journey to rescue them, although he gets knocked unconscious along the way.
When Link woke up, he continued pursuing the monsters, only to be sucked into the Twilight Realm, where he is transformed into a wolf and imprisoned in a dungeon of Hyrule Castle. There, link meets Midna, the princess of the Twili race. They join forces and work their way out of the Underground Waterway. They ascend up the castle's towers and meet Princess Zelda. She explains that Zant, a member of the Twili race, is trying to merge the Twilight Realm and Hyrule into a single land of darkness for him to rule over.
Midna is searching for a sacred weapon called the Fused Shadows, which she wants to use to defeat Zant and save the Twilight Realm. Midna is uninterested in the fate of Hyrule. During Link and Midna's quest for the Fused Shadows, it is discovered that the Twili's ancestors, the interlopers, tried to conquer the Sacred Realm, causing a war to break out in Hyrule. After they became too powerful, the goddesses sent three Spirits of Light to seal the interlopers away into the Twilight Realm.
Link and Midna eventually reassemble the Fused Shadow. Zant then appears curses Link, trapping him in his wolf form. Midna is exposed to Lanayru's light and is mortally wounded. Zant leaves, and Link hurries Midna back to Hyrule Castle to seek aid from Princess Zelda.
At Hyrule Castle, Princess Zelda, reveals that Link can only return to normal if he has the Master Sword. As Midna's life fades away, Zelda sacrifices herself to save Midna. Link and Midna travel far into the Sacred Grove and obtain the Master Sword. Midna kept the Shadow Crystal that transformed Link into a wolf, so with both the Master Sword and Power Crystal, Link is able to change his form willingly.
Midna tells Link that they must search for the Mirror of Twilight and use it to confront Zant with the Master Sword. When they reach the mirror, they discover that Zant had already broken it into four fragments. Only one fragment of the Mirror of Twilight is present. The sages, who are the mirror's guardians, appear and reveal that Ganondorf has the Triforce of Power, which prevents him from being killed. At one point they impaled Ganondorf, and the sages thought he was executed, but he instantly rose, killed the Sage of Water and was sealed into the Twilight Realm. The sages reveal that only the Twili ruler could destroy the Mirror of Twilight, which means that Zant was only powerful enough to break it in four.
After finding the four fragments, Link and Midna reconstruct the Mirror of Twilight and use it to enter the Twilight Realm. There, Link and Midna confront Zant and learn that he was passed over in the choice of being a ruler. Zant went into a crazed rage and was approached by the spirit of Ganondorf, who selected him to be a servant that would help him rise to power. Midna is revealed to be the Twilight Princess and that she overthrown by Zant and turned into an imp using Ganondorf's power. Sfter a long battle, Link manages to defeat Zant. He reveals to Link and Midna that he can be resurrected with Ganondorf's power. Midna then uses the Fused Shadows to kill Zant.
Link and Midna go to Hyrule Castle and enter the throne room on the highest floor. There, they find Ganondorf sitting on a throne and Zelda's lifeless body suspended above him. Ganondorf possesses Zelda's body, turning her into Puppet Zelda, and fights Link, who manages to win the battle. Midna uses the Fused Shadow to purge Zelda of Ganondorf, who then transforms into a beast, Ganon, and attacks Link manages to slay Ganon during battle, and Midna unwittingly returns Zelda's soul to her body. Before they can assume victory, Ganondorf's soul appears. Midna warps Link and Zelda to safety in Hyrule Field and then tries to destroy Ganon using the Fused Shadow. Link and Zelda turn to Hyrule Castle and see a giant explosion emanating from it. They then see Ganondorf on horseback, holding Midna's helmet, indicating that he defeated her. He crushes it and charges with his phantom riders.
Ganondorf is about to slay Link, and Zelda when the Princess uses her divine power to summon the Spirits of Light. They bestow the Light Arrows to Zelda. The next part of the battle involves Link and Zelda riding Epona and battling Ganondorf as he rides his horse. After this, Ganondorf challenges Link to a sword duel. The battle ends with Link performing an Ending Blow with his Master Sword, impaling Ganondorf and defeating him entirely.
With Ganondorf defeated, Zant's curse on Midna is lifted, and Midna regains her true form. They travel back to the Mirror of Twilight, and Midna returns home. With her tear, she permanently destroys the Mirror of Twilight, thus permanently closing the Twilight Realm's portal.
Gameplay
Link is controlled similarly as in previous 3D The Legend of Zelda installments. A key difference with The Legend of Zelda: Twilight Princess's gameplay is that Link can alternate between his human and wolf form. As a human, Link can use his sword, shield, and various other equipment that he cannot use as a wolf. He acquires some armory along the way, such as the Zora Armor, which allows him to breathe underwater.
Whenever Link is in the Twilight Realm, he transforms into a wolf. In this form, Link can use his senses to detect ghosts, people from the Light World that are stuck in the twilight, and digging patches with hidden items. When Midna is Wolf Link's back, he can use dark energy that forms a large circle and defeats any enemies that get caught within. There are some areas where Wolf Link can perform long distance jumps with the help of Midna. Wolf Link learns certain howls along the way, which are akin to the songs played on the Ocarina of Time and the Wind Waker from their respective games.
The Wii version takes advantage of the Wii Remote's motion controls. Link's movement is controlled from using the Nunchuk's control stick, while the Wii Remote is used to swing the sword. Combining button and motion techniques performs special attacks. To aim while using certain items, point using the Wii remote, and attack by pressing the B button. When Link is not using any items, the player can use a fairy as a cursor while pointing the Wii Remote to the screen.
The Nintendo GameCube version has similar controls to The Legend of Zelda: The Wind Waker. It has free camera movement, unlike the Wii version, and it is controlled using the C-stick. In the GameCube version, Link holds the sword in his left hand, and in the Wii version, he holds the sword in his right hand (as most players are right-handed). Furthermore, the maps in the Wii version are mirrored from those in the GameCube version.
Characters
Main
Supporting
- Agitha
- Barnes
- Colin
- Coro
- Darbus
- Doctor Borville
- Fyer
- Gor Amoto
- Gor Coron
- Gor Ebizo
- Gor Liggs
- Impaz
- Jovani
- Malo
- Mayor Bo
- Ooccoo
- Ooccoo Jr.
- Postman
- Prince Rhalis
- The Resistance
- Renado
- Rutella
- Spirits of Light
- Talo
- Yeta
- Yeto
Species
Races
Other
Locations
- Lantern Caverns and Dig Caverns
- Ordona Province
- Hyrule Kingdom
- Hyrule Castle
- Hyrule Field
- Faron Province
- Faron Woods
- Sacred Grove (includes usual Lost Woods)
- Eldin Province
- Lanayru Province
- Great Bridge of Hylia
- Hyrule Castle Town
- Castle Town Central Square
- Castle Town Sewers
- Castle Town East Road (switched with west in Wii version)
- Castle Town South Road
- Castle Town West Road (switched with east in Wii version)
- Lake Hylia
- Upper Zora's River
- Zora's Domain
- Zora's River
- Desert Province
- Peak Province
- Twilight Realm
Dungeons
Major dungeons are in bold. Minor dungeons are in italics.
| Name | Description | Item | Reward | Mini-boss | Boss |
|---|---|---|---|---|---|
| Hyrule Castle (1) | Hyrule Castle is the home of the Royal Family of Hyrule. Link first travels through it as a wolf while it is engulfed in twilight, meeting Midna in the dungeon and going through the Castle Sewers and Castle Rooftops, eventually meeting Princess Zelda. | None | |||
| Forest Temple | A forest-themed dungeon where Link must rescue several monkeys who help him progress. | Gale Boomerang |
Fused Shadow | Ook | Diababa |
| Goron Mines | A subterranean, fiery dungeon belonging the Gorons where their patriarch Darbus was locked away after being cursed. | Hero's Bow |
Fused Shadow | Dangoro | Fyrus |
| Lakebed Temple | A water-themed temple that requires Link to constantly alter the water flow and rotate staircases to progress. | Clawshot |
Fused Shadow | Deku Toad | Morpheel |
| Hyrule Castle (2) | Hyrule Castle is visited a second time after Link is cursed by the Shadow Crystal and Midna is wounded by Zant. This time, he must go through the Castle Underground Waterway to reach the end of the Castle Sewers, making his way across the Castle Rooftops to again meet Zelda, who heals Midna. | None | |||
| Cave of Ordeals | This optional dungeon is 50 floors of battles with the Great Fairy appearing on every 10th floor. It cannot be fully completed until the dungeon items from the next four main dungeons are collected. | Great Fairy's Tears |
None | ||
| Arbiter's Grounds | An infamous prison located in the Gerudo Desert and the location of the Mirror of Twilight. There is a lot of sand in the dungeon, and in later parts, Link can progress by using the Spinner. | Spinner |
Mirror Shard | Death Sword | Stallord |
| Snowpeak Ruins | The dungeon is located in the snow mountains and takes place in a mansion where a yeti couple live. | Ball and Chain |
Mirror Shard | Darkhammer | Blizzeta |
| Temple of Time | A hollow temple that is filled with various statues. Several traps and metal-armored enemies are encountered here. | Dominion Rod |
Mirror Shard | Darknut | Armogohma |
| City in the Sky | A mythical city located in the clouds and the home of the Oocca. Link must save the city from a dragon named Argorok. | Double Clawshots |
Mirror Shard | Aeralfos | Argorok |
| Palace of Twilight | A dark castle in the Twilight Realm that was taken over by Zant. This is where Link fights Zant. | Master Sword (2) |
Fused Shadows | Phantom Zant | Zant |
| Hyrule Castle (3) | Hyrule Castle is visited one last time as the final dungeon, where Link now must travel through the courtyards, the main corridors, and the central tower. Ganondorf has taken over the castle, and he be encountered at the very top of the tower. | None | Completion | King Bulblin Darknut |
Zelda Ganon |
Enemies
| Name | Description | Locations |
|---|---|---|
| Aeralfos | Flying lizard warriors that are elite enemies. They must be pulled down by grabbing their shields with a Clawshot. | Cave of Ordeals City in the Sky Hyrule Castle |
| Armos | Hopping statues wielding blunt axes. Attacking the jewel in back defeats them, but causes them to go berserk before exploding. | Cave of Ordeals Temple of Time |
| Baba Serpent | Deku Baba variants that slither after Link after their stems are cut to continue to bite at him. | Cave of Ordeals City in the Sky Dig Cavern Forest Temple Hyrule Field |
| Baby Gohma | Tiny spider enemies that are very skittish and appear in huge swarms. | Temple of Time |
| Bari | Slow-moving freshwater jellyfish that let out electricity every few seconds. They can be defeated by pulling out the nucleus with the Clawshot. | Lakebed Temple |
| Beamos (1) | Large, brown plinths that spin and shoot lasers on sight. When defeated with an arrow to the eye, some can be pushed. | Cave of Ordeals Dig Cavern Goron Mines Lantern Cavern |
| Beamos (2) | Large, white columns that spin and shoot lasers. They can be defeated with an arrow to the eye or with a hammer statue, but cannot be pushed. | Temple of Time |
| Big Baba | Huge symbiotic Deku Babas with Deku Likes, the Baba head must be attacked until it is defeated, then the Like must have an explosive thrown inside. | City in the Sky Forest Temple |
| Blue Chu | Moderately rare slimes that release Blue Chu Jelly upon defeat. | Cave of Ordeals Dig Cavern Great Bridge of Hylia Hyrule Field Lakebed Temple |
| Bokoblin (1) | Weak purple goblins that attack Link with wooden bats. They run at Link with no strategy whatsoever. | Cave of Ordeals Faron Woods Forest Temple Hyrule Field |
| Bokoblin (2) | Strong pink goblins that attack Link with machetes. They run at Link aggressively. | Cave of Ordeals Hyrule Castle Hyrule Field |
| Bombfish | Explosive fish that can be knocked around to make explode or caught to add to Link's Water Bomb total. | Dig Cavern Lakebed Temple |
| Bombling | Large explosive insects that crawl out of holes and lunge into Link if he approaches. They can be picked up and used as bombs. | Forest Temple |
| Bomskit | Strange bipedal creatures that run around, dropping explosive balls if pursued. They leave behind a worm when defeated. | Hyrule Field |
| Bubble | Winged skull spirits that often hide among normal skulls. They are more durable that most enemies their size. | Arbiter's Grounds Cave of Ordeals Dig Cavern |
| Bulblin (1) | Nomadic goblins that attack Link with wooden clubs. When not attacking, they try to keep their distance. | Castle Rooftops Castle Sewers Castle Underground Channel Cave of Ordeals Gerudo Desert Goron Mines Hidden Village Hyrule Field Ordon Village Ordon Woods |
| Bulblin (2) | Goblins that attack with burning or explosive arrows. They often appear situated in high areas as guards. | Bridge of Eldin Castle Rooftops Castle Sewers Cave of Ordeals Gerudo Desert Goron Mines Great Bridge of Hylia Hidden Village Hyrule Castle Hyrule Field |
| Bulblin (3) | Goblins that handle Bullbo mounts. If knocked off, they attack with clubs. | Gerudo Desert Hyrule Field |
| Bullbo | Giant boars ridden by Bulblins. Link can ride them, too, to break through certain structures. | Gerudo Desert Hyrule Castle Hyrule Field |
| Chilfos | Tall, icy warriors that attack with unlimited spears. | Cave of Ordeals Dig Cavern Snowpeak Ruins |
| Chu Worm | Large insects that hide inside a giant ball of mucus and can be removed with the Clawshot. | Cave of Ordeals Lakebed Temple |
| Darknut | Powerful knights that attack with broadswords or maces. They block most of Link's attacks until their outer armor is chipped away, after which they switch to a lighter sword and move faster. They appear with much color variation, which makes no functional difference. | Cave of Ordeals Hyrule Castle |
| Deku Baba | Carnivorous plants that try to grab Link in their mouths to chew on him, and can appear on the floor or ceiling. Cutting their stems defeats them and hardens their heads into a Deku Nut. | Cave of Ordeals City in the Sky Dig Cavern Faron Woods Forest Temple Hyrule Field Lantern Cavern |
| Deku Like | Carnivorous plants that eat whatever moves over them. They can swallow Link whole, but are defeated if fed a bomb. | Forest Temple |
| Dodongo | Fire-breathing reptilian enemies that can walk on floors or walls. They can be defeated by repeatedly attacking their fleshy tails, or by feeding them an arrow or bomb when they inhale. | Cave of Ordeals Dig Cavern Goron Mines Lantern Cavern |
| Dynalfos | Giant lizard warriors that block most of Link's attacks and get up immediately upon being knocked down. | Cave of Ordeals City in the Sky Hyrule Castle Temple of Time |
| Fire Bubble | Burning skull spirits that try to catch Link on fire. | Arbiter's Grounds Cave of Ordeals Dig Cavern |
| Fire Keese | Burning bats that cause fire damage and destroy Wooden Shields like the Ordon Shield. | Cave of Ordeals Goron Mines |
| Freezard | Giant icy monsters that breath freezing mist, either directly at Link when he approaches or back-and-forth infinitely. | Cave of Ordeals Dig Cavern Snowpeak Ruins |
| Ghoul Rat | Paranormal rats that hop onto Link to slow him down, and can only be seen and defeated with Wolf Link's senses. | Arbiter's Grounds Cave of Ordeals Hyrule Castle |
| Goron | While normally a friendly race, Gorons in this game at first attack Link when he attempts to climb the mountain by rolling at him. He must anchor himself with the Iron Boots and then grab them when they approach. Some will walk after him and try to hit him, and must be attacked until they roll up, allowing Link to climb on and use them to reach higher ledges. | Death Mountain |
| Green Chu | An extremely rare Chu that only appears in early revisions of the Wii release when a Yellow and Blue Chu mix. This can only occur in the Cave of Ordeals and Hyrule Field. | None |
| Guay | Sharp-beaked crows that slowly fly in large flocks. Defeating all in a flock causes Rupees to drop from the sky. | Graveyard Great Bridge of Hylia Hyrule Field Kakariko Village Lake Hylia |
| Hawk | While normally a friendly character, the hawk is used by Hanch to attack Wolf Link when he first returns to Ordon Village. It swoops in whenever he approaches, and so Link must perform a sneak attack to get Hanch to flee. | Ordon Village |
| Helmasaur | Small dinosaurs that wear metallic helmets that cover all but their backsides. The helmets can be removed with a Clawshot. | Cave of Ordeals City in the Sky Hyrule Field Lakebed Temple |
| Helmasaurus | Large dinosaurs that have irremovable biological armor on their fronts. Attacking the backside is the only way to defeat them. | City in the Sky |
| Ice Bubble | Icy skull spirits that try to freeze Link. | Cave of Ordeals Dig Cavern Snowpeak Ruins |
| Ice Keese | Bats that cause icy damage to Link on contact. | Cave of Ordeals Dig Cavern Snowpeak Snowpeak Ruins |
| Imp Poe | 56 scythe-wielding ghosts that appear throughout Hyrule, only marked by the lanterns they carry. To see and battle them, Wolf Link must use his senses. Each carries a Poe Soul that is needed to break the curse on Jovani. | Various |
| Kargarok | Huge cockatrices that fly around open areas and swoop down to attack Link. | Castle Rooftops City in the Sky Hyrule Castle Hyrule Field |
| Keese | Small, weak, and common bats that are a recurring minor nuisance throughout the game. | Cave of Ordeals Castle Sewers Castle Underground Channel City in the Sky Dig Cavern Faron Woods Forest Temple Hyrule Castle Lakebed Temple Lantern Cavern Temple of Time |
| Leever | Top-like plants that dig out from the ground in rings around Link before spiraling around towards him. | Cave of Ordeals Gerudo Desert Hyrule Field |
| Lizalfos (1) | Mildly strong lizard warriors that attack with swords and the axe blades on their tails. Arrows stick to their hides. | Cave of Ordeals Hyrule Castle Hyrule Field Lakebed Temple Temple of Time |
| Lizalfos (2) | Lizard warriors that use antelope skulls as helmets for added protection. | Cave of Ordeals Hyrule Castle Lakebed Temple |
| Mini Freezard | Tiny ice creatures that move slowly and freeze Link on contact. Attacking them causes them to ricochet wildly. | Cave of Ordeals Dig Cavern Snowpeak Ruins |
| Moldorm (1) | Small, burrowing worms that pursue Link from under the sand in large numbers and leap when he is close. | Gerudo Desert |
| Moldorm (2) | Large, burrowing worms that attack more solitarily than their smaller counterparts. | Arbiter's Grounds |
| Ordon bee | Simple bees that swarm anything that attacks their hive, no matter how far away it is. | Dig Cavern Graveyard Ordon Village Sacred Grove |
| Ordon Goat | Normally docile livestock that sometimes charges out of the ranch. They attack if they are flipped over unprovoked or if Wolf Link approaches. | Ordon Goat Ordon Village |
| Phantom Ganon | Ghosts made to look like Ganondorf, he summons them to knock Link off Epona during their horseback battle. | Hyrule Field |
| Poe | Four large ghosts that steal the fires from torches controlling a door, then lead him around the dungeon to retrieve them. Each also holds a Poe Soul. | Arbiter's Grounds |
| Poison Mite | Swarms of tiny insects that slow Link down by crawling on him, but can be removed by rolling or spinning. | Arbiter's Grounds |
| Puppet | Hostile marionettes that attack with their long arms. | Faron Woods Sacred Grove |
| Purple Chu | Common slimes that appear by default or when other colors merge. They give Purple Chu Jelly upon defeat. | Cave of Ordeals Dig Cavern Great Bridge of Hylia Hyrule Field Lakebed Temple Snowpeak Ruins |
| Rare Chu | Extremely uncommon Chus that have the best type of jelly, the Rare Chu Jelly. | Cave of Ordeals Death Mountain Dig Cavern Great Bridge of Hylia |
| Rat | Large-but-weak rodents that pursue Link in dark places, sometimes in swarms. | Arbiter's Grounds Castle Sewers Castle Underground Channel Cave of Ordeals Dig Cavern Lantern Cavern |
| Red Chu | Slimes that release Red Chu Jelly upon defeat. | Cave of Ordeals Dig Cavern Great Bridge of Hylia Hyrule Field Lakebed Temple |
| Redead Knight | Mummified ghouls that paralyze Link with a shriek before attacking with a broadsword. | Arbiter's Grounds Cave of Ordeals |
| Rusl | Link's mentor, who attacks Wolf Link while the village is on high alert. Due to an injury, he has a limp, and will only attack if Link comes close to him or Uli. | Ordon Village |
| Shell Blade | Giant bivalves that attempt to lunge and bite at Link. When the valves are open, the internal muscle can be attacked. | Dig Cavern Lakebed Temple |
| Skullfish | Tiny skeletal fish that try to swarm Link. They can be caught for a heart. | Dig Cavern Lakebed Temple |
| Skulltula (1) | Giant skull-backed spiders that can only be damaged on the soft undersides or by slitting the neck with the Ending Blow. They crawl along the ground, making it harder to hit the weak spot. | Castle Underground Channel Cave of Ordeals Dig Cavern Forest Temple Lantern Cavern |
| Skulltula (2) | A smaller Skulltula with much softer armor. | Forest Temple |
| Stalfos | Skeleton warriors that can be knocked down, but must have the resulting bone pile destroyed to truly defeat them. They appear with metal or wooden shields, though there is no functional difference. | Arbiter's Grounds Cave of Ordeals Dig Cavern Hyrule Castle |
| Stalhound | Slow, skeletal dogs that attack in pairs or full packs by burrowing up from the ground. | Cave of Ordeals Hyrule Field |
| Stalkin | Small skeletons that burrow from the ground in swarms and slowly pursue with spears. | Arbiter's Grounds Cave of Ordeals Hyrule Castle |
| Staltroop | Skeleton soldiers that block Link during the first part of Stallord's battle. | Arbiter's Grounds |
| Tektite | Hopping four-legged spiders that can stand on the surface of water. They appear in red or blue, although there is no functional difference. | Cave of Ordeals Dig Cavern Goron Mines Hyrule Field Lakebed Temple Lantern Cavern |
| Tile Worm | Giant millipedes that hide under floor tiles, launching Link up if he stands on one. The Gale Boomerang can temporarily remove them and leave them vulnerable. | City in the Sky Forest Temple |
| Toado | Tiny tadpoles that assist Deku Toad in battle by charging through the shallow water at Link. | Lakebed Temple |
| Toadpoli (1) | Fiery frogs that shoot burning projectiles at Link from the lava. | Goron Mines |
| Toadpoli (2) | Large frogs that spit up at Link from the water. | Dig Cavern Goron Mines |
| Torch Slug | Burning mollusks that create plums of fire around them and sometimes fall from the ceiling, but are very weak. | Cave of Ordeals Dig Cavern Goron Mines Lantern Cavern |
| Twilit Baba (1) | Deku Babas affected by twilight. They do not become Deku Nuts when defeated. | Faron Woods Hyrule Field Lantern Cavern Palace of Twilight |
| Twilit Baba (2) | Baba Serpents affected by twilight. They act the same as their normal counterparts. | Palace of Twilight |
| Twilit Bulblin (1) | Hammer-wielding corrupted goblins. | Hyrule Field Kakariko Village Lake Hylia |
| Twilit Bulblin (2) | Corrupted goblins that attack with fiery or explosive arrows. | Great Bridge of Hylia Hyrule Field Zora's River |
| Twilit Kargarok (1) | Twilight-affected Kargaroks that attack like their normal counterparts. | Castle Rooftops Hyrule Field Kakariko Village Palace of Twilight |
| Twilit Kargarok (2) | A giant Twilit Kargarok called by a Twilit Bulblin to act as a mount. When both are defeated, the bird is tamed by Midna. | Lake Hylia |
| Twilit Keese | Twilight-corrupted Keese that fly around in more open areas as well as the usual caves due to the extended reach of darkness. | Castle Sewers Death Mountain Faron Woods Graveyard Kakariko Village Hyrule Field Lantern Cavern Palace of Twilight Zora's Domain |
| Twilit Messenger | Zant's primary minions, these creatures usually appear in groups, where there must not be only one left standing or the others will revive. Defeating all in a group creates a portal. | Various |
| Twilit Parasite | Dark insects that consumed a Tear of Light each, and can only be seen with Wolf Link's senses. They can crawl on the ground or on walls, fly, or burrow. Their only attack is to approach Link while sparking. | Various |
| Twilit Vermin | Tentacled blobs that act similar to Rats, but able to run across water. | Castle Sewers Death Mountain Faron Woods Lantern Cavern Palace of Twilight |
| Walltula | Small spiders that cling to climbable walls and charge at Link on sight. | City in the Sky Forest Temple Ordon Village |
| White Wolfos | Quick, acrobatic wolves that attack Link in packs or pairs. Attacking a jumping one defeats it immediately. | Snowpeak Snowpeak Ruins |
| Yellow Chu | Extremely common slimes that give Yellow Chu Jelly upon defeat. | Cave of Ordeals Dig Cavern Hyrule Castle Hyrule Field Lakebed Temple Lantern Cavern Snowpeak Ruins |
| Young Gohma | Large spider larvae that pounce at Link. | Temple of Time |
| Zant Mask | Huge copies of Zant's helmet that teleport around and fire energy blasts. | Palace of Twilight |
| Zant's Hand | Giant hands that guard the two sols and pursue them once they are taken. | Palace of Twilight |
Obstacles
Minibosses
Bosses
| Twilit Parasite | Twilit Igniter | Twilit Aquatic | |||||||||

|

|

| |||||||||
| Diababa | Fyrus | Morpheel | |||||||||
| Forest Temple | Goron Mines | Lakebed Temple | |||||||||
| Twilit Fossil | Twilit Ice Mass | Twilit Arachnid | Twilit Dragon | ||||||||

|

|

|

| ||||||||
| Stallord | Blizzeta | Armogohma | Argorok | ||||||||
| Arbiter's Grounds | Snowpeak Ruins | Temple of Time | City in the Sky | ||||||||
| Usurper King | Ganon's Puppet | Dark Beast | Dark Lord | ||||||||

|

|

|

| ||||||||
| Zant | Zelda | Ganon | Ganondorf | ||||||||
| Palace of Twilight | Hyrule Castle | Hyrule Field | |||||||||
Items
Pick-ups
There are a few items that are found around the overworld or within dungeons. They appear in almost every The Legend of Zelda game:
| Name | Description |
|---|---|
| Heart | |
| Rupee | |
| Tear of Light |
Set item
Unique items
| Sprite | Name | Description |
|---|---|---|
| Ball and Chain | Link can swing around the chain and throw the large ball at tough ice barriers and certain boulders to break them. It can also be used as a weapon against enemies. The Ball and Chain is the main dungeon item for Snowpeak Ruins. | |
| Clawshot | An extendable claw that can latch on to walls, ceilings, and grids, allowing Link to quickly reach higher areas. The Clawshot can be used to stun enemies. The Clawshot is found in Lakebed Temple. | |
| Dominion Rod | Found in the Temple of Time, the Dominion Rod allows Link to control certain statues to replicate his movements. This is necessary in order to progress in the temple and later parts of the game. | |
| Double Clawshots | A second Clawshot can be obtained at the City in the Sky. The pair are collectively known as the Double Clawshots, which Link can use to cling from one area to the next. | |
| Fishing Rod | This allows Link to go fishing at various bodies of water around Hyrule. He can catch fish and record them in his journal. Link receives it as a gift from Uli if he returns the cradle to her. | |
| Gale Boomerang | A boomerang that has the power of wind. Link obtains the Gale Boomerang in the Forest Temple, and he target up to five things with it at once. The Gale Boomerang can stun faraway enemies, collect faraway items, and stir up leaves scattered on the ground. | |
| Hawkeye | An optional item, the Hawkeye is a mask that functions like binoculars, as it allows Link to see things at a faraway distance. It can be bought at Malo Mart. | |
| Hero's Bow | Found in Goron Mines, the Hero's Bow allows Link to shoot arrows at targets and enemies. It is obtained with a quiver, which is where the arrows are stored. | |
| Horse Call | A charm that Link can use anywhere on the overworld to summon Epona. | |
| Iron Boots | These boots weigh down on Link, allowing him to walk on magnetic walls and ceilings, and even force him onto the underwater floor. Link receives the Iron Boots from Mayor Bo after winning a sumo match against him. | |
| Lantern | Fueled by Lantern Oil, the Lantern works as a light source for Link in dark areas, especially caves, and allows him to view his surroundings. If the Lantern runs out of oil, it becomes useless. Link receives the Lantern in Faron Woods, as a gift from Coro. | |
| Ooccoo | ||
| Ooccoo Jr. | ||
| Slingshot | Link can use the Slingshot to fire seed projectiles at enemies. He can buy the Slingshot at Sera's Sundries early in his adventure. | |
| Spinner | A large spinning top that can cling onto railings within walls and rapidly travel across them. Sometimes Link must jump with his Spinner between two railings to dodge obstacles. The Spinner is the main item of Arbiter's Grounds. |
Replenishable weapons
| Sprite | Name | Description |
|---|---|---|
| Arrow | ||
| Bomb | Round, explosive weapons that Link can use to destroy obstructions in his path, including boulders, walls, and floor sections. They can be combined with an arrow to create Bomb Arrows, which can blast distant targets. Bombs are stored in a Bomb Bag, which Link can buy from Barnes Bomb Shop in Kakariko Village. | |
| Bombling | These are insect-shaped bombs that can move slightly before detonating. They can be bought at Barnes Bomb Shop. | |
| Seed | ||
| Water Bomb | These are bombs that are specifically intended for underwater use. Link must wear Iron Boots in order to use Water Bombs. Like other bombs, they can be bought at Barnes Bomb Shop. |
Bomb bags
| Sprite | Name | Description |
|---|---|---|
| Bomb Bag | ||
| Bomb Bag | ||
| Bomb Bag | ||
| Giant Bomb Bag |
Bottles
Bottles are used to store various items, such as Lantern Oil, soups, potions, Chu Jelly, and fairies. Link can obtain up to four bottles in his adventure.
| Sprite | Name | Description |
|---|---|---|
| Empty Bottle | ||
| Empty Bottle | ||
| Empty Bottle | ||
| Empty Bottle |
Bottleable items
Quest items
| Sprite | Name | Description |
|---|---|---|
| Ancient Sky Book | ||
| Ashei's Sketch | A sketch of Yeto and a Reekfish given to Link. He can show it to Prince Ralis to receive the Coral Earring. | |
| Auru's Memo | A memo where Auru gives instruction for Link to access the Gerudo Desert. | |
| Coral Earring | A type of fishing hook that allows Link to capture the Reekfish in Zora's Domain. Link can obtain it from Prince Ralis in Kakariko Village. | |
| Filled Sky Book | ||
| Ilia's Charm | ||
| Invoice | Telma gives this to Link to convince Borville to tell reveal the location of the Wooden Statue, which helps in restoring Ilia's memory. | |
| Renado's Letter | A letter that Renado gives for Link to deliver to Telma, starting the quest of restoring Ilia's memory. In return, Telma gives the Doctor's Invoice to Link. | |
| Wooden Statue | A figure that was stolen from Borville by Stalhounds, who are located south of Castle Town. Link must defeat them to recover the Wooden Statue and then show it to Ilia to recover part of her memory. |
Map
| Sprite | Name | Description | ||
|---|---|---|---|---|
| Standard items | ||||
| Big Key | ||||
| Compass | ||||
| Dungeon Map | ||||
| Small Key | ||||
| One-time items | ||||
| Bedroom Key | ||||
| Key Shards | ||||
| Ordon Goat Cheese | A block of cheese which is an ingredient for Yeto's soup in Snowpeak Ruins. | |||
| Ordon Pumpkin | Another ingredient which is added into Yeto's soup. | |||
Collection
| Sprite | Name | Description |
|---|---|---|
| Fishing Journal | ||
| Golden Bugs | ||
| Heart Container | ||
| Letters | ||
| Piece of Heart | ||
| Poe Souls | ||
| Vessel of Light |
Equipment
Equipment consists of clothing, weapons, and other essential that Link can directly equip during his adventure.
| Sprite | Name | Description | ||
|---|---|---|---|---|
| Swords | ||||
| Wooden Sword | This is the sword that Link starts off with. Rusl dropped it off at Link's house. | |||
| Ordon Sword | The second sword obtained by Link. He obtains it inside of Rusl's house while in his wolf form. | |||
| Master Sword (1) | Also known as the Blade of Evil's Bane, the Master Sword is a powerful sword that rests in the Sacred Grove. It removes Zant's curse that traps Link in his wolf form. | |||
| Master Sword (2) | This is an upgrade of the Master Sword when it is imbued with the power of the Sols in the Palace of Twilight. | |||
| Shields | ||||
| Ordon Shield | Link can obtain the Ordon Shield from Jaggle's house during his first visit to Ordon Village as a wolf. | |||
| Wooden Shield | Flammable shields that are similar to the Ordon Shield. Link can buy a Wooden Shield from either the Malo Mart in Kakariko Village or the Hot Spring Shop in Death Mountain. | |||
| Hylian Shield | Often paired with the Master Sword, the Hylian Shield is a metallic shield that is resistant to fire and can deflect projectiles more effectively than the Wooden Shield. | |||
| Armor | ||||
| Hero's Clothes | The standard green clothing worn by Link. He obtains it after collecting the first set of Tears of Light. | |||
| Zora Armor | An armor that allows Link to breathe underwater. Queen Rutela gives it to Link after he safely guides the carriages from Castle Town to Kakariko Village. | |||
| Magic Armor | An expensive suit of armor that grants Link temporary invincibility, although at the cost of losing two Rupees every second. | |||
There are a few equipment that Link can upgrade during a later part of his adventure.
| Sprite | Name | Description | ||
|---|---|---|---|---|
| Wallets | ||||
| Wallet | It can hold up to 300 Rupees. | |||
| Big Wallet | The first wallet upgrade, capable of holding up to 600 Rupees. Link can obtain it from Agitha after he gives her a Golden Bug | |||
| Giant Wallet | The second wallet upgrade, capable of holding up to 1,000 Rupees. Link can obtain it from Agitha once he gives all 24 golden bugs to her. | |||
| Quivers | ||||
| Quiver | Can store up to 30 arrows. It is obtained with the Hero Bow. | |||
| Big Quiver | Can store up to 60 arrows. Link can obtain it by completing the STAR Game the first time. | |||
| Giant Quiver | Can store up to 100 arrows. Link can obtain it by completing the STAR Game a second time. | |||
Fish
| Sprite | Name | Description |
|---|---|---|
| Greengill | ||
| Hylian Loach | ||
| Hylian Pike | ||
| Hyrule Bass | ||
| Ordon Catfish | ||
| Reekfish | A unique fish that is native to a certain area of Zora's Domain. Once obtained, Link (as a wolf) can learn the Reekfish scent and follow Yeto's trail in Peak Province. |
Hidden Skills
| Sprite | Name | Description |
|---|---|---|
| Ending Blow | ||
| Shield Attack | ||
| Back Slice | ||
| Helm Splitter | ||
| Mortal Draw | ||
| Jump Strike | ||
| Great spin |
Lures
| Name | Description | ||
|---|---|---|---|
| Default | |||
| Popper Lure | |||
| Spinner Lure | |||
| Swimmer Lure | |||
| Unlockable | |||
| Frog Lure | |||
| Sinking Lure | |||
Scents
| Sprite | Name | Description |
|---|---|---|
| Youths' Scent | ||
| Scent of Ilia | ||
| Poe Scent | ||
| Reekfish Scent | ||
| Medicine Scent |
Miscellaneous
| Name | Description |
|---|---|
| Ranch Clothes | |
| Shadow Crystal | A dark, cursed object that Zant implanted into Link, forcing him to stay in his wolf form. Once Link obtains the Master Sword, he turns back to a human, and Midna holds on to the Shadow Crystal for whenever he wants to transform back into a wolf. |
| Surf Leaf |
Gallery
- For this subject's image gallery, see Gallery:The Legend of Zelda: Twilight Princess.

Logo
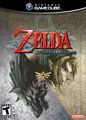
Nintendo GameCube cover
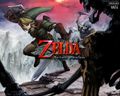
Wallpaper


Trivia
- The Legend of Zelda: Twilight Princess is the only The Legend of Zelda main series title that was given a T rating from the ESRB.
External links
- North American website (Wayback Machine)
- Japanese website
- Wii.com web page (Wayback Machine)
 This article is a stub. You can help Triforce Wiki by expanding it.